In Google Docs you can use the built-in table feature, to insert and customize a table to form a grid that consists of intersecting rows and columns.
To begin, simply click on the “insert” option in the menu bar, then hover your mouse pointer over the “table” option. This will open up a menu where you can specify the desired number of rows and columns for your table. Once you’ve determined the dimensions, you can easily adjust the size of each row and column to create evenly spaced square cells forming a grid.

In this article, we will dive into the details of how to create a grid in Google Docs using the table feature.
Step 1 – Create a New Document
1 – Open Google Docs and sign in if you haven’t already.
2 – Look for the “Blank” option and click on it to create a new document.

Step 2 – Insert a Table
1 – Position your cursor at the desired location where you want the grid to appear.

2 – Navigate to the top menu and click on the “Insert” button.

3 – Locate the table option in the drop-down menu and hover your mouse pointer over it.

4 – Within the slide-out menu, select the number of rows and columns for your grid. To do this, simply drag your cursor over the grid of squares and choose the desired amount of rows and columns.
Keep in mind that the maximum size for a table in Google Docs is 20 rows by 20 columns.

5 – Once you have made your selection, click once to insert the table.

Step 3 – Customize the Table to Form a Grid
1 – Begin by clicking and holding on the first cell of the table.
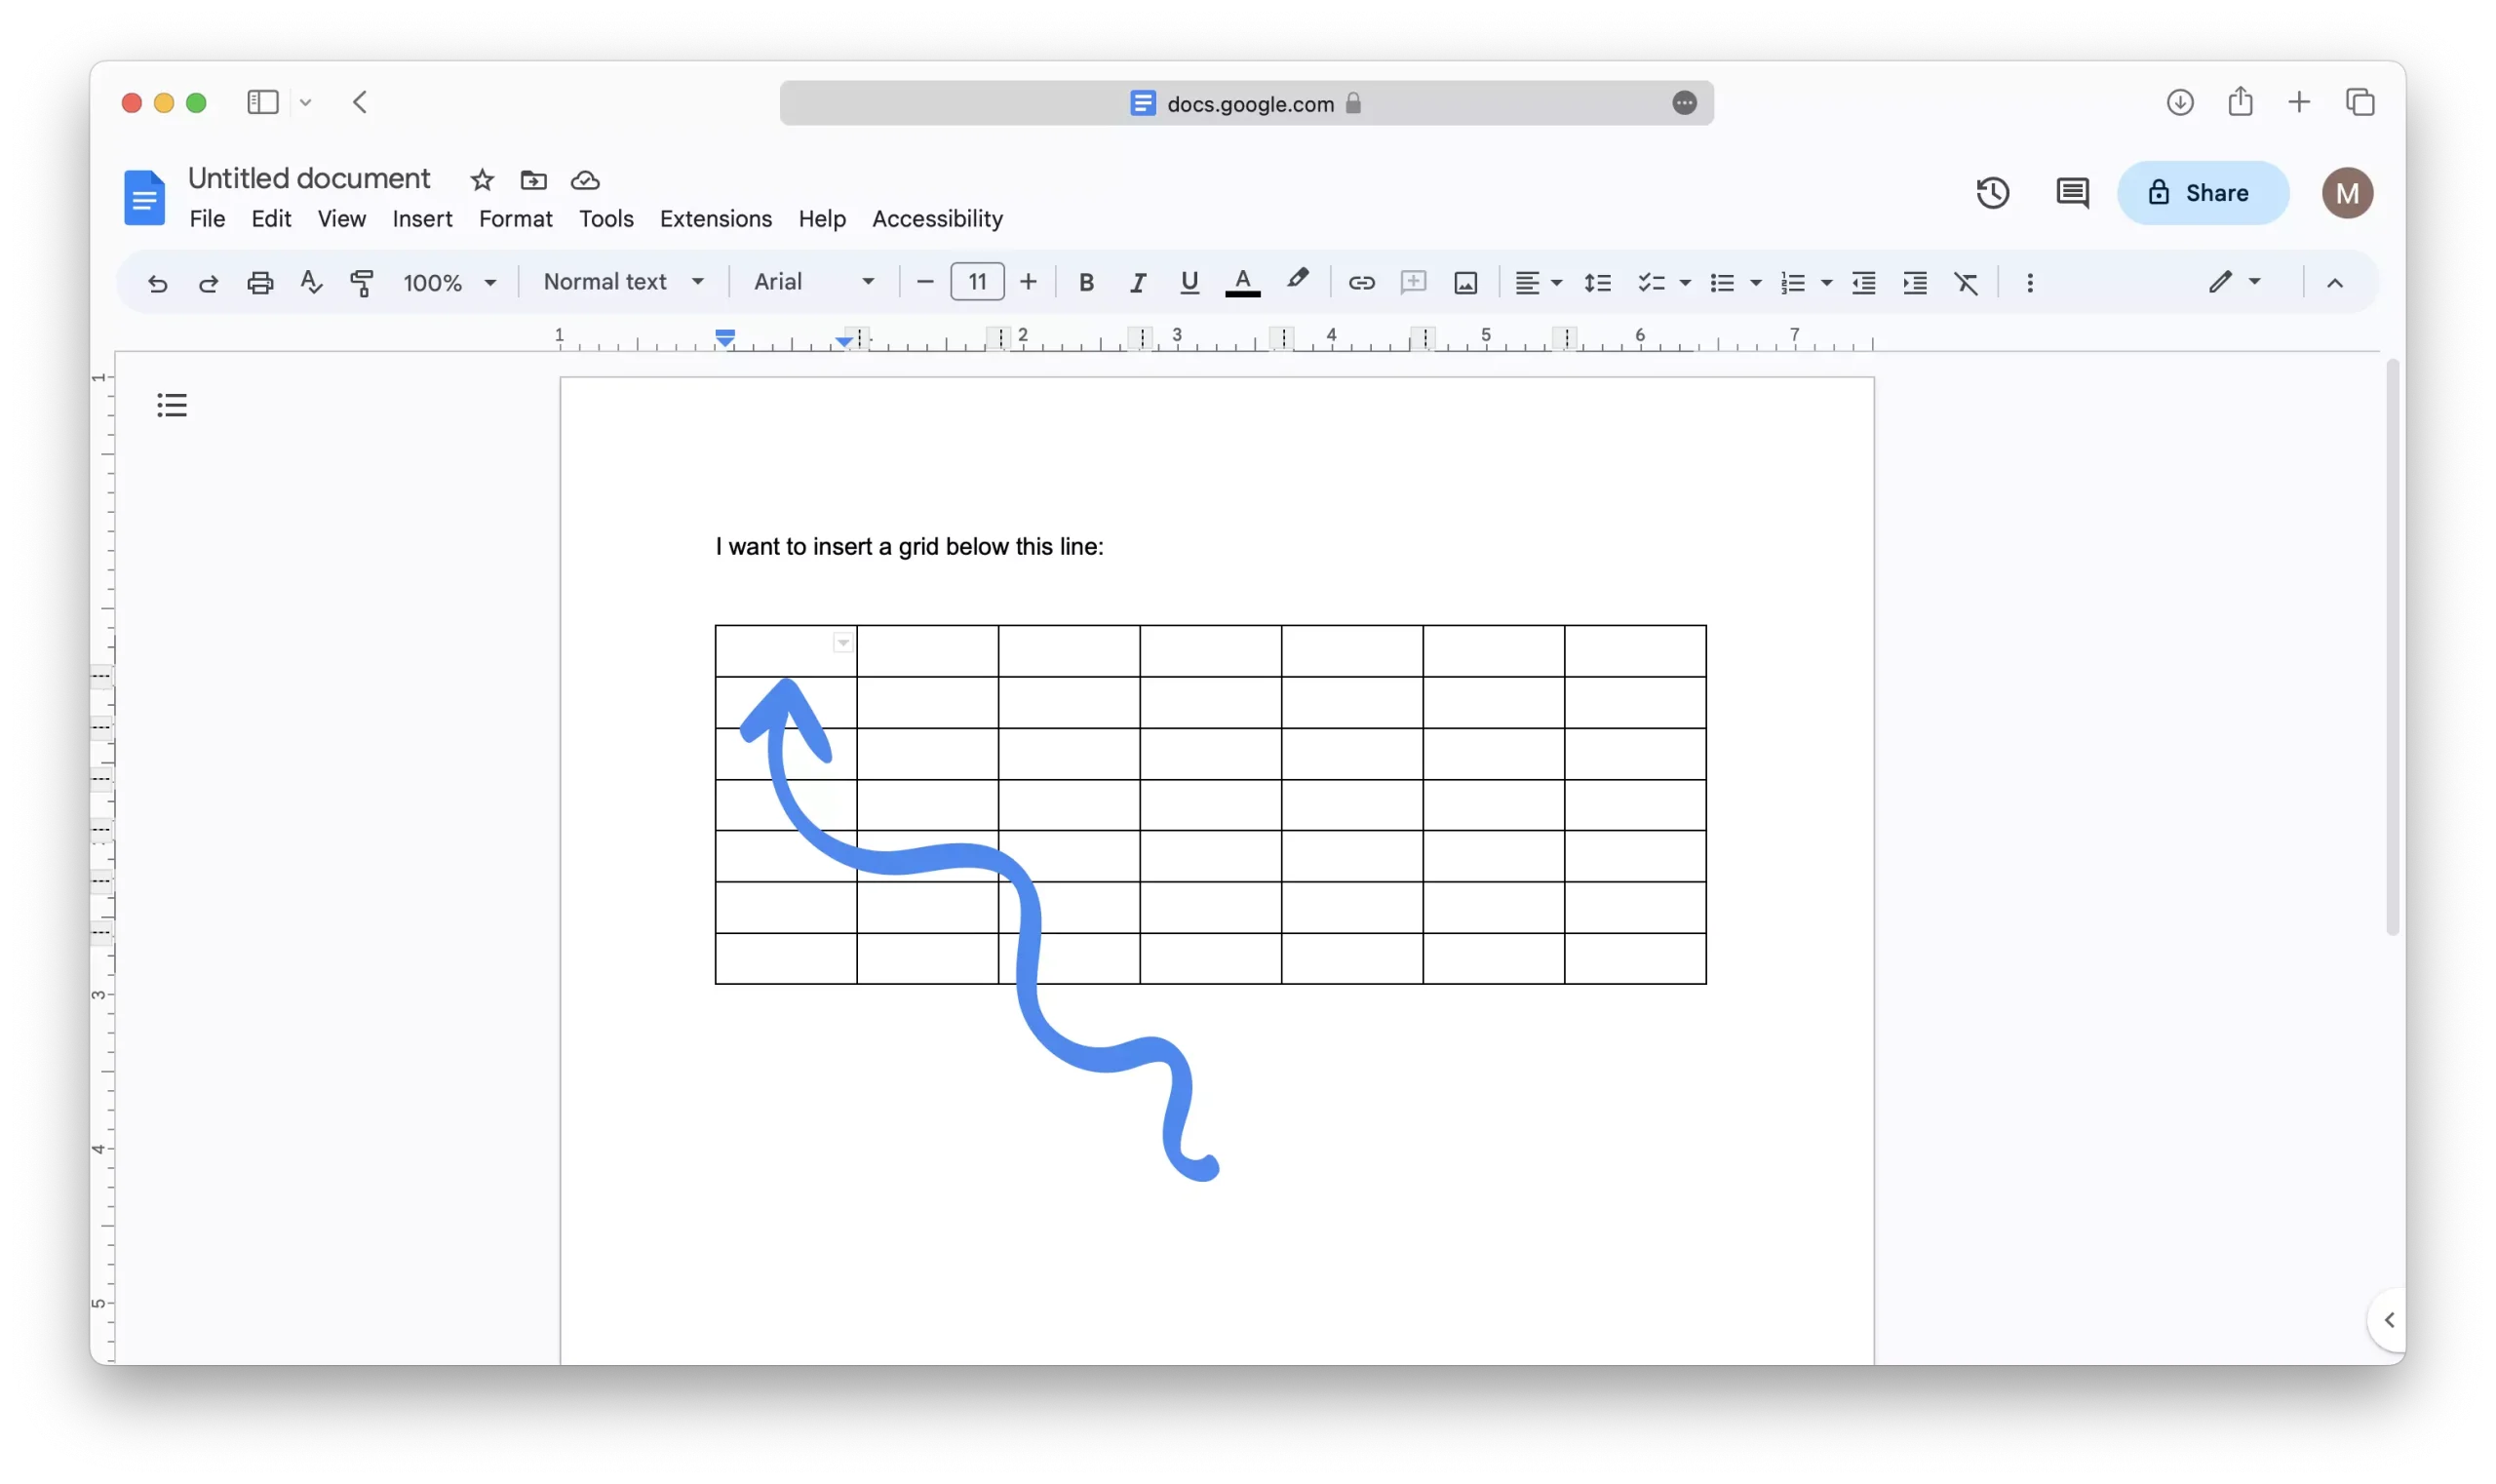
2 – While continuing to hold the initial click, drag your mouse pointer to select all the cells in the table.

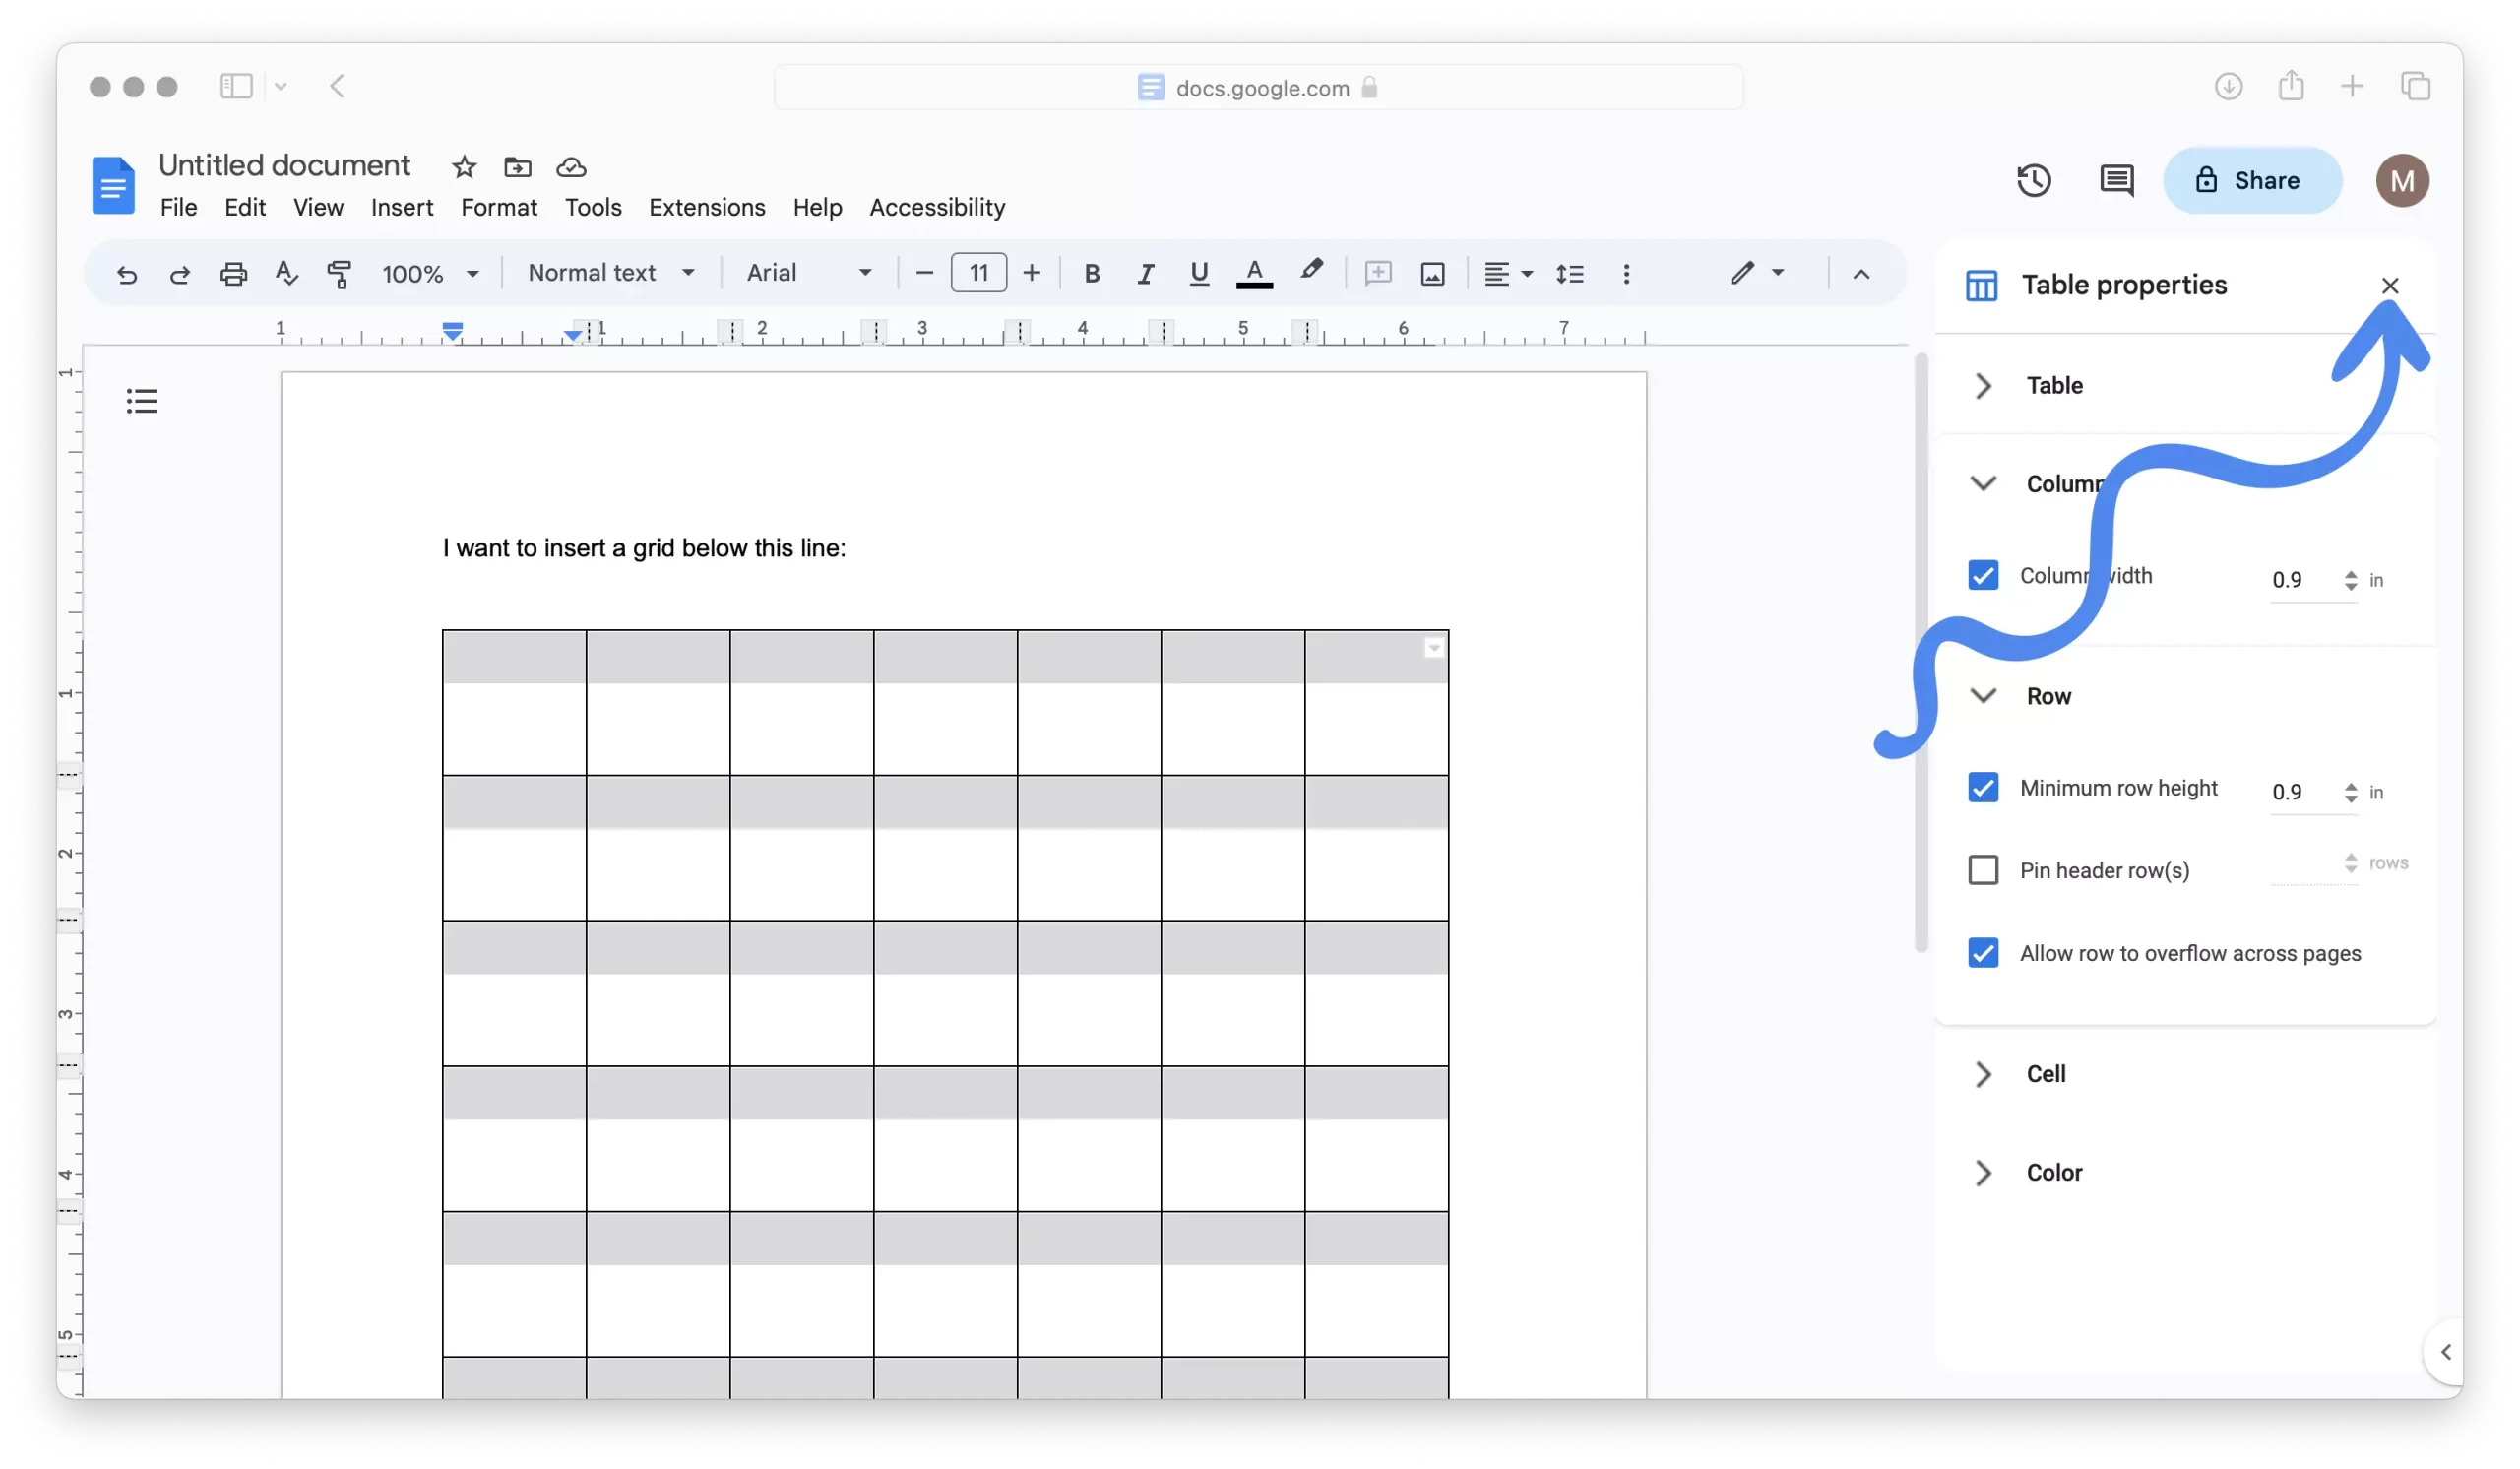
3 – Once all the cells are selected, right-click on the table and choose “Table Properties” from the contextual menu.

4 – In the table properties menu, click on the “Column” heading.

5 – Place a check in the column width box and adjust the column width to a fixed number that suits your table size. For example, in a 7 by 7 table, a column width of 0.9 works well.

6 – Next, click on the “Row” tab in the table properties menu.

7 – Select the “Minimum row height” option by clicking on the empty checkbox next to the label.

8 – Set the minimum row height to match the column width you just set. In our example of a 7 by 7 table, a row height of 0.9 is suitable.

9 – Close the “table properties” settings.
By ensuring that the column width and row height are the same, your table will transform into evenly spaced squares, forming a grid-like pattern.
Note: Remember that if you change the width and height of rows and columns without selecting all the cells, the changes will only apply to the cell where your cursor is active.
Step 4 – Remove Outer Grid Border (optional)
If you want to achieve a specific grid layout, such as a 2-by-2 grid to divide the page into four sections, you can remove the outer border of your grid. Here’s how:
1 – Begin by selecting all the cells in the grid. Click and hold on to the first cell, then drag your mouse pointer to the last cell.

2 – Once all the cells are selected, locate the downward-facing arrow in the top right cell and click on it.

3 – In the contextual menu that appears, click on the outer border icon to select the outer border of the grid.

4 – In the toolbar, look for the “border width” icon and click on it.

5 – In the dropdown menu that appears, select “0pt” to remove the border completely.


To Wrap Things Up
The steps outlined in this guide demonstrate the ease with which you can insert a table and transform it into a grid-like structure within your documents.
By perfecting this method, you can take your documents to the next level by creating grids to organize your information and enhance the visual appeal of your documents in Google Docs
Frequently Asked Questions
- Insert a 2 by 2 table into your document.
- Click inside the first cell and drag your mouse pointer to the last cell to select all cells in the table.
- Right-click on the table and choose “Table Properties” from the contextual menu.
- In the table properties menu, set the column width to 3.2 and the minimum row height to 3.2.