So you’ve purchased a WordPress theme from the Envato marketplace or ThemeForest and now you have no idea how to install and use it.
No problem we’ve all been here before as beginners. See WordPress makes it so easy to install and activate a free theme from its built-in theme directory. However, WordPress doesn’t really tell you how to install themes that you may have gotten from a third-party provider.
Well, you can stop worrying now because today I’m going to guide you through two other ways in which you can install a theme on WordPress.
By the end of this article, you will know how to install a WordPress theme from Envato or any other third party theme provider. You’ll also realize how simple it is to do. So if you’re ready let’s get started.
Where To Buy Premium WordPress Themes
Step 1: First, let’s start by heading over to the Envato Marketplace and finding a theme that we like.
In this tutorial, I will be using BeTheme which is actually one of my favorite premium WordPress themes at the moment.
Step 2: When you’ve found and purchased the theme that you like, head on over to your downloads section.

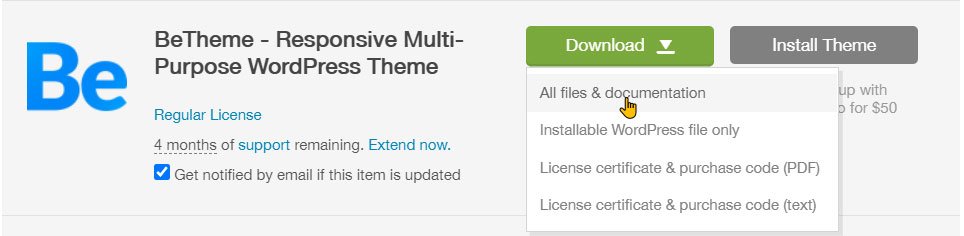
Step 3: On the next page find the theme you just purchased, click on download to open a drop-down menu, and within this menu click on “all files and documentation”.
This will download a compressed zip file to your computer. Normally Google Chrome will save this file in your “downloads folder”.
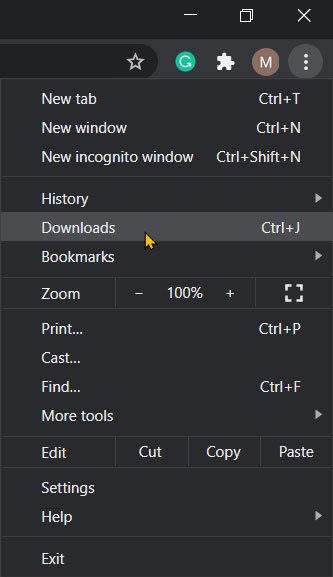
Step 4: A quick way to find where the file has been stored is to click on the ellipsis (the three vertical dots) at the top right of your browser and click on downloads. You can also use the keyboard shortcut CTRL + J.
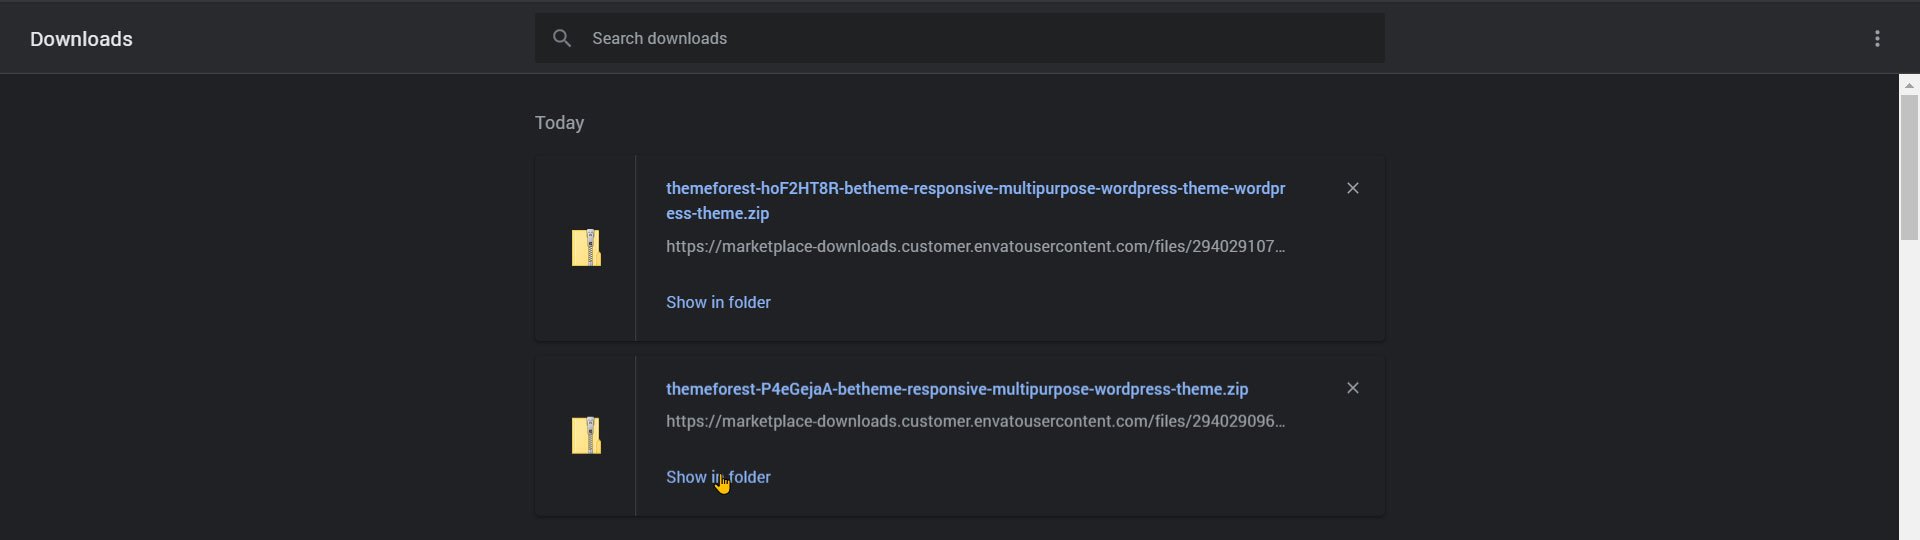
Step 5: In your browser’s download page locate the file and click on show in folder.
How To Install WordPress Theme From Zip
When you locate the zip file you will need to extract its content. If this is your first time working with “.zip” files you’ll need to download 7-zip or WinRAR. I personally use 7-zip but you can use any application that can create or extract compressed files.
How to extract a WordPress theme
Step 1: After 7-zip is installed right-click on the ThemeForest .zip file and move your pointer over 7-zip then click on extract to “the folder name”.
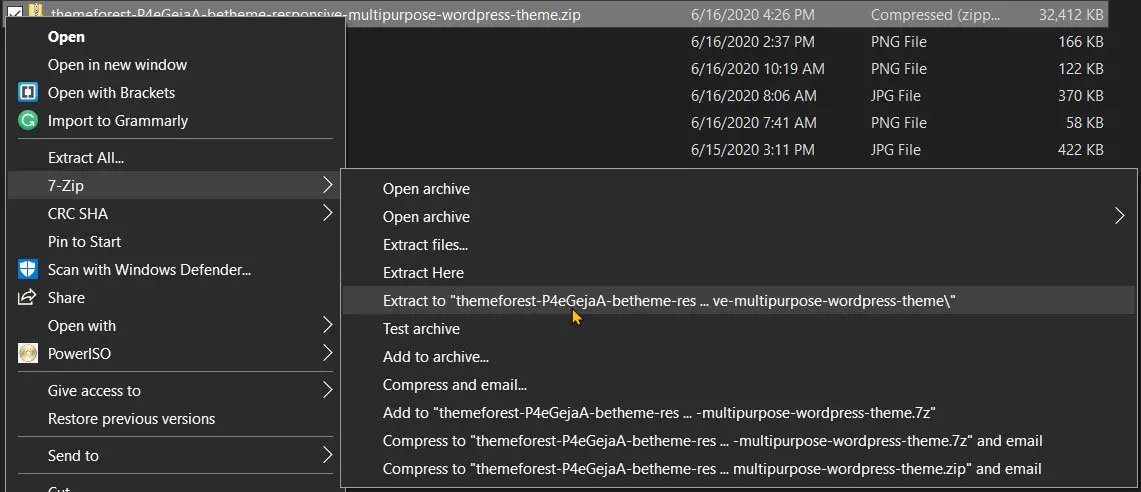
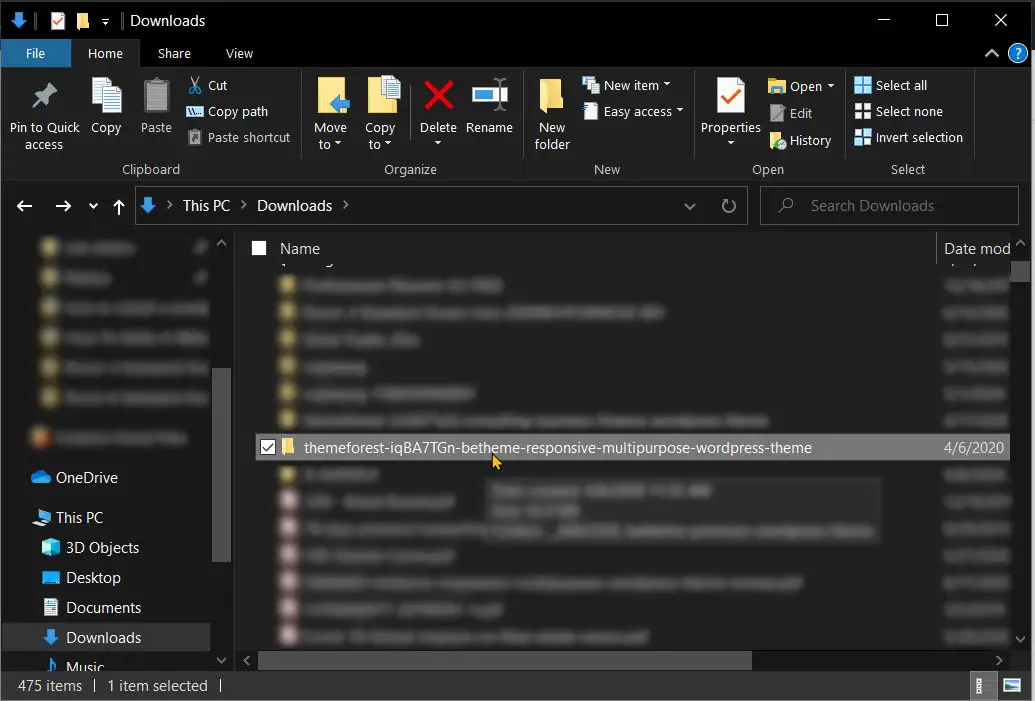
This will create a normal folder with the same name as the zip file. Within this folder, you will find the theme files that we would be using to install your new theme.
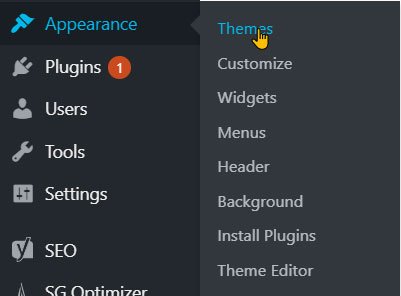
Step 2: Now we’ll head over to your WordPress dashboard. Hover your pointer over appearance and click on themes.
Step 3: Next at the top of the page, you’ll see a button that says “add new” click it.

Step 4: On the add themes page click on upload theme and then on choose file.

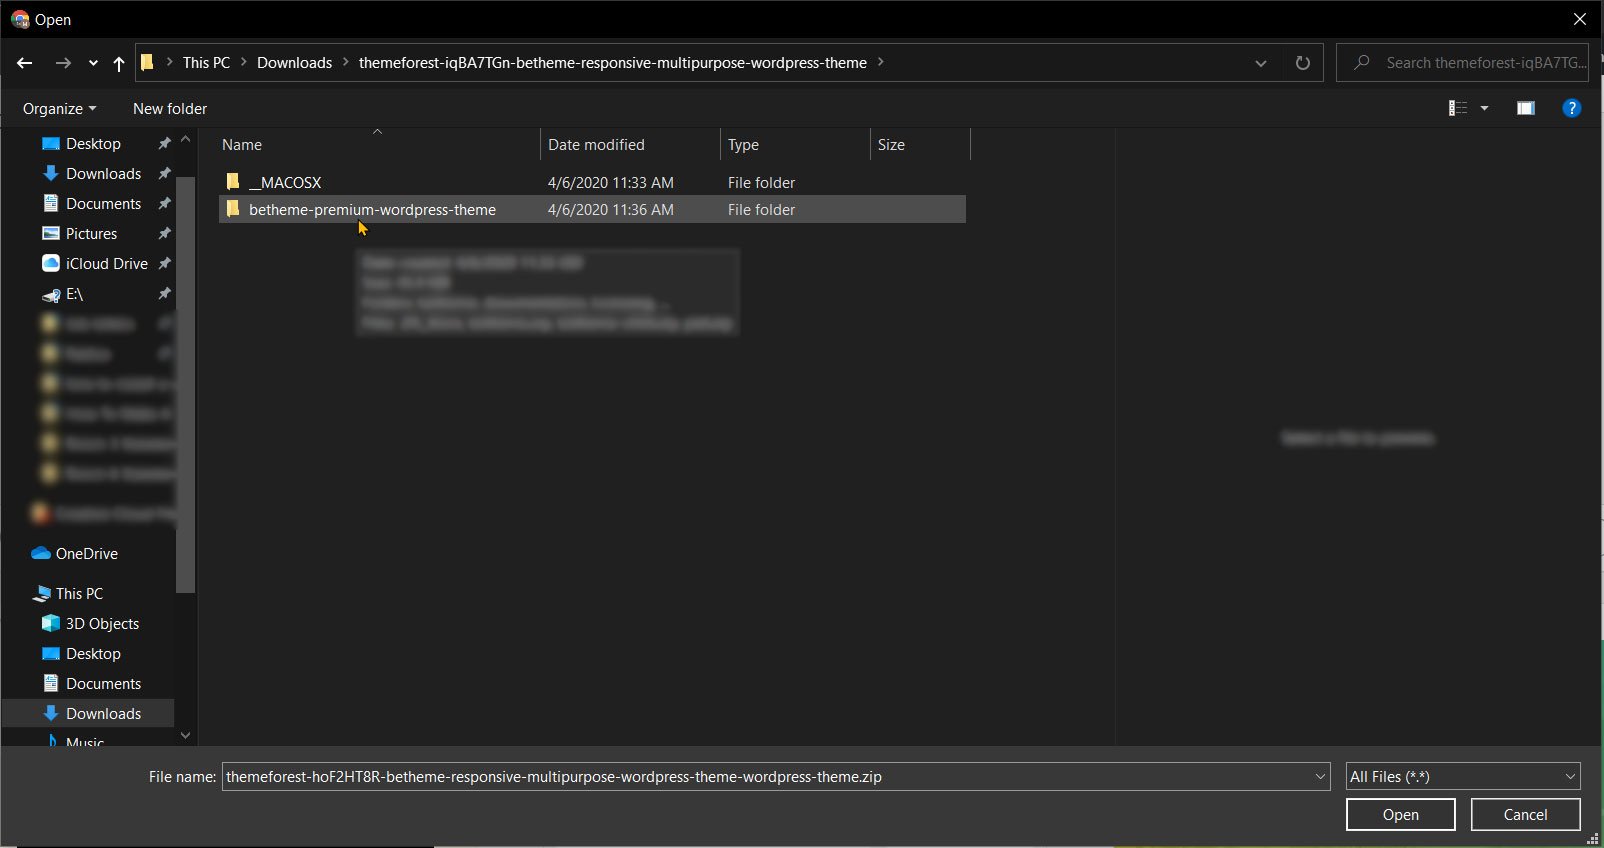
Step 5: Then navigate to the folder where you extracted your theme.
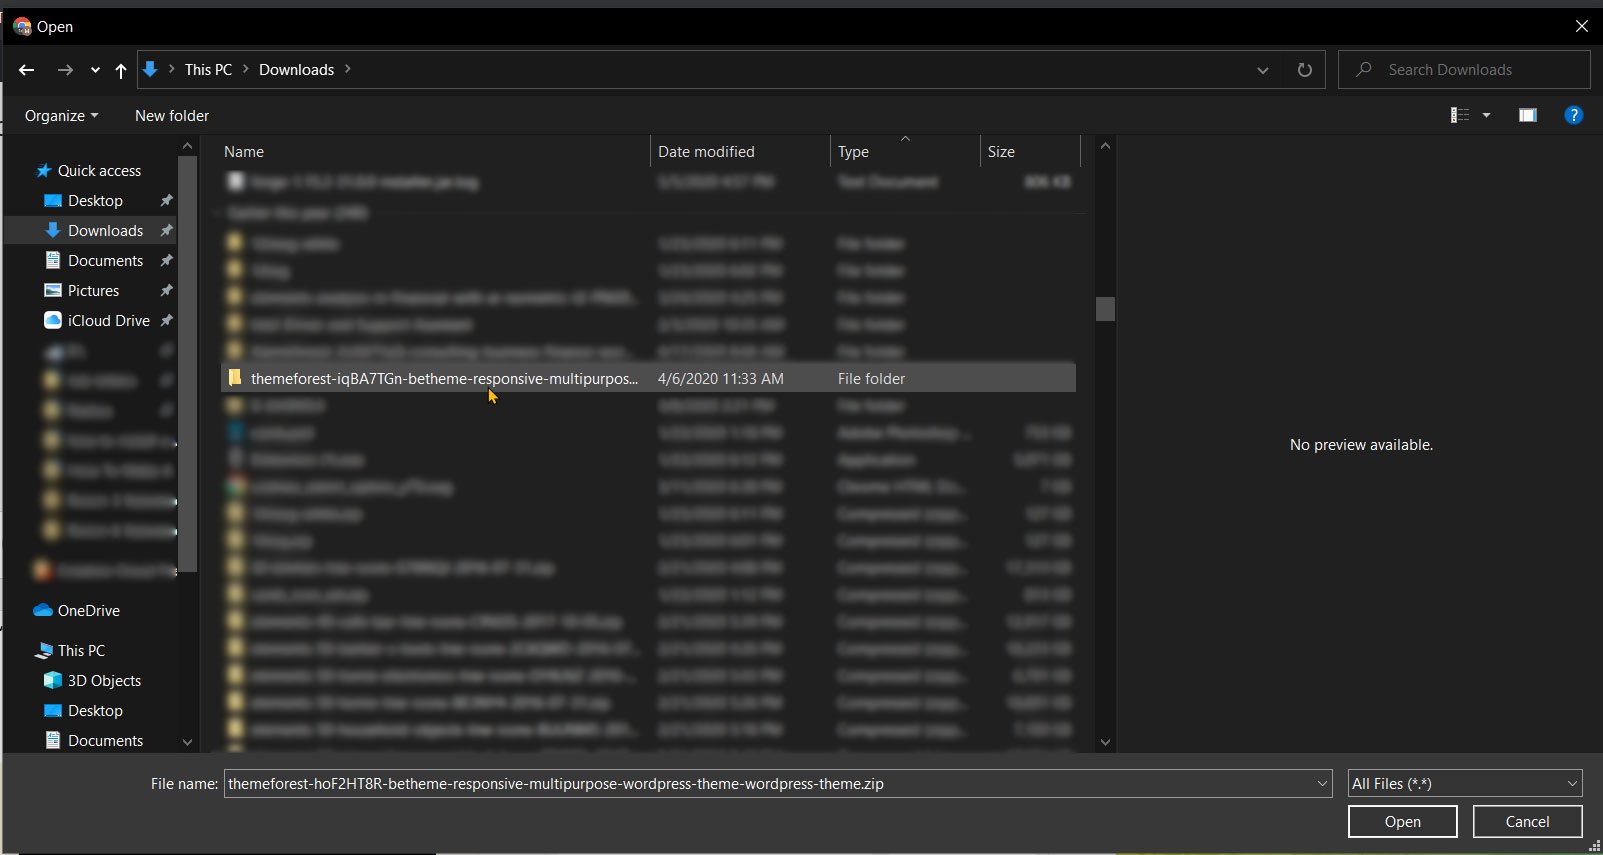
Step 6: Navigate through the folders until you find the themename.zip file. When you’ve found the file select it and click on open.

Step 7: When the theme is done uploading you’ll see it in your theme library. Locate it and, click on activate.
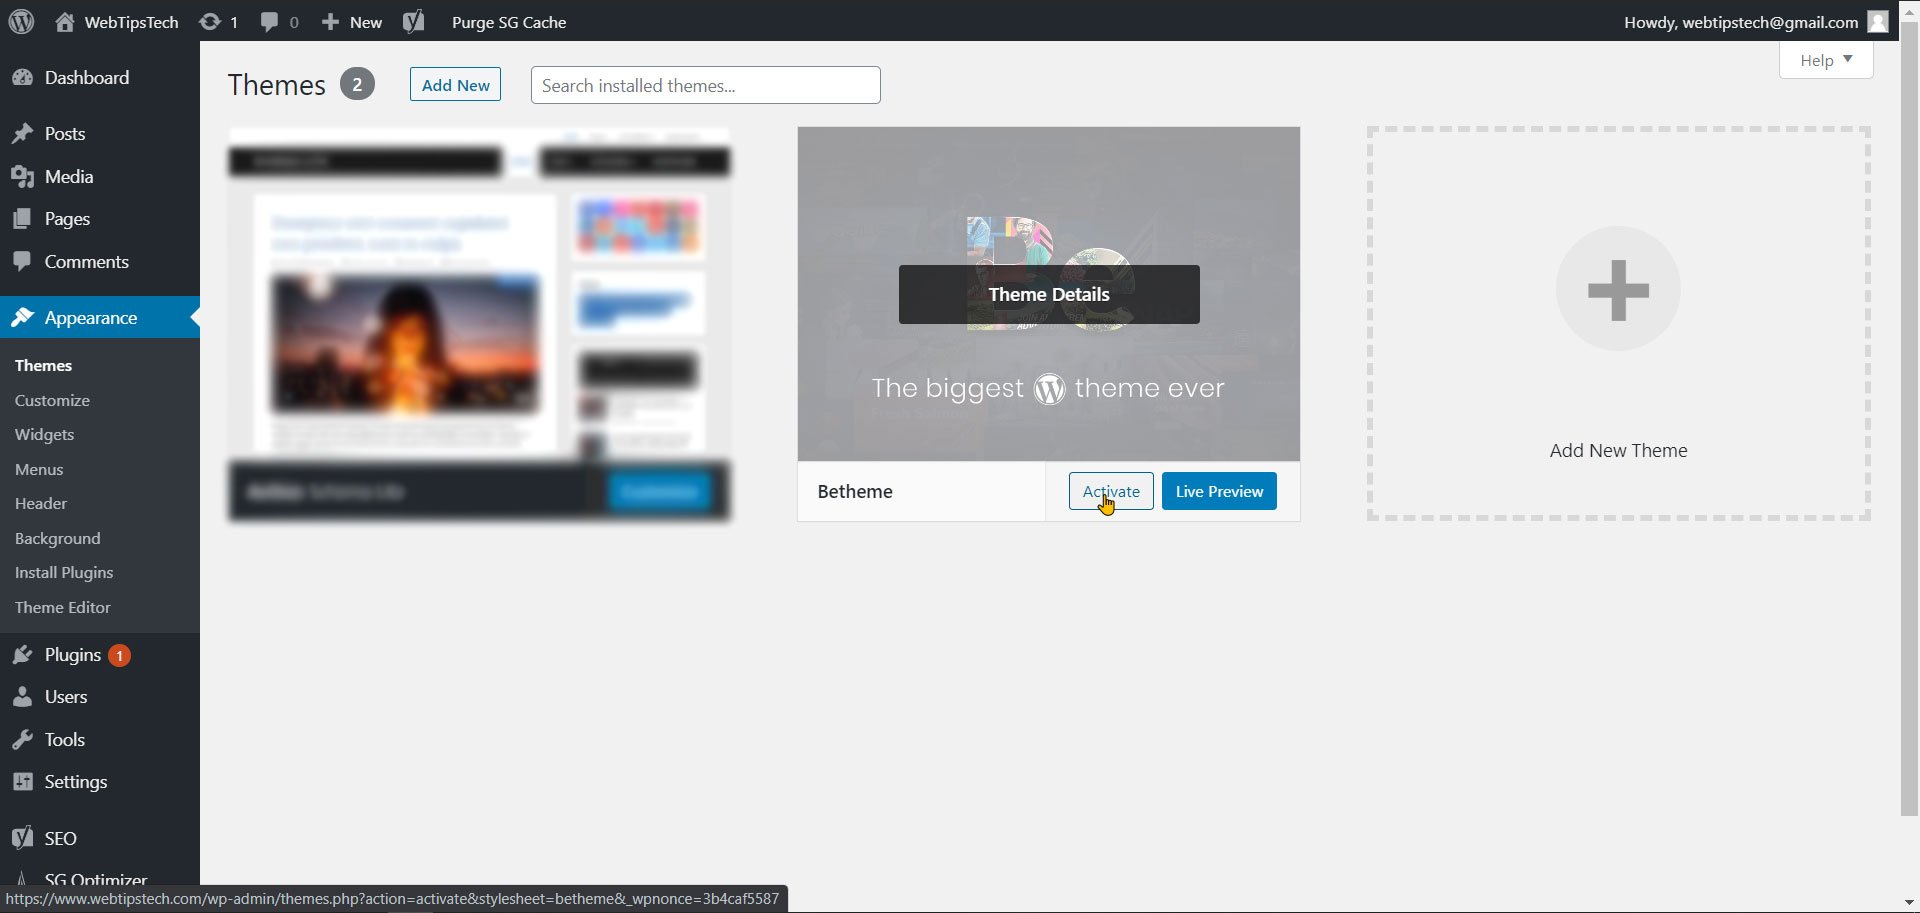
That’s it you have successfully installed your new theme, you can proceed to configure it now.
How To Install A WordPress Theme Using File Manager
For this method, we’ll be using the file manager to upload your premium WordPress theme to your file server. For this example, I’ll be using Siteground. This method will be the same with your hosting provider it may just look a bit different.
Step 1: First, return to the theme folder that you extracted find “themename.zip” and extract its content to a new folder

Step 2: Then head over to your hosting provider dashboard.

Step 3: Find your website and click on site tools then click on file manager.

Step 4: Then navigate to domainname > public_html > wp-content > themes.

Step 5: Within the theme folder click on “folder upload”.

Step 6: Navigate to your extracted theme folder, find the folder that you extracted, click on it, and then click on upload.

Step 7: After uploading the folder your theme would be ready to use.

Step 8: Now head back to your wordpress dashboard click on appearance then themes.
Here you’ll find the theme you just uploaded using the file manager.
Step 9: Click on activate and you’re ready for the next step.

The first thing you’ll need to do after activating a premium theme is to configure it. All premium themes need to be activated to prove that you legitimately own it.
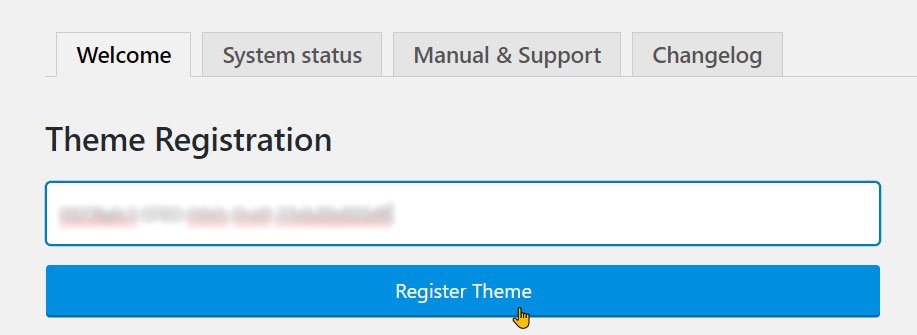
To activate your theme you will need to enter the purchase code that was included with your theme when you purchased it.
A purchase code is a unique code that is provided by Envato to verify that you legitimately own the theme.
How To Find Your Theme’s Purchase Code?
Your theme’s purchase code can be downloaded separately from your ThemeForest downloads page.
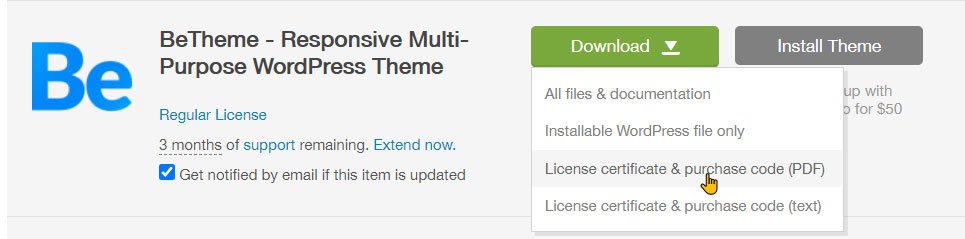
Step 1: Let’s start by heading over to your ThemeForest downloads. From here find the theme that you purchased and click on download. Within the dropdown menu click on “download license certificate & purchase code (pdf)”
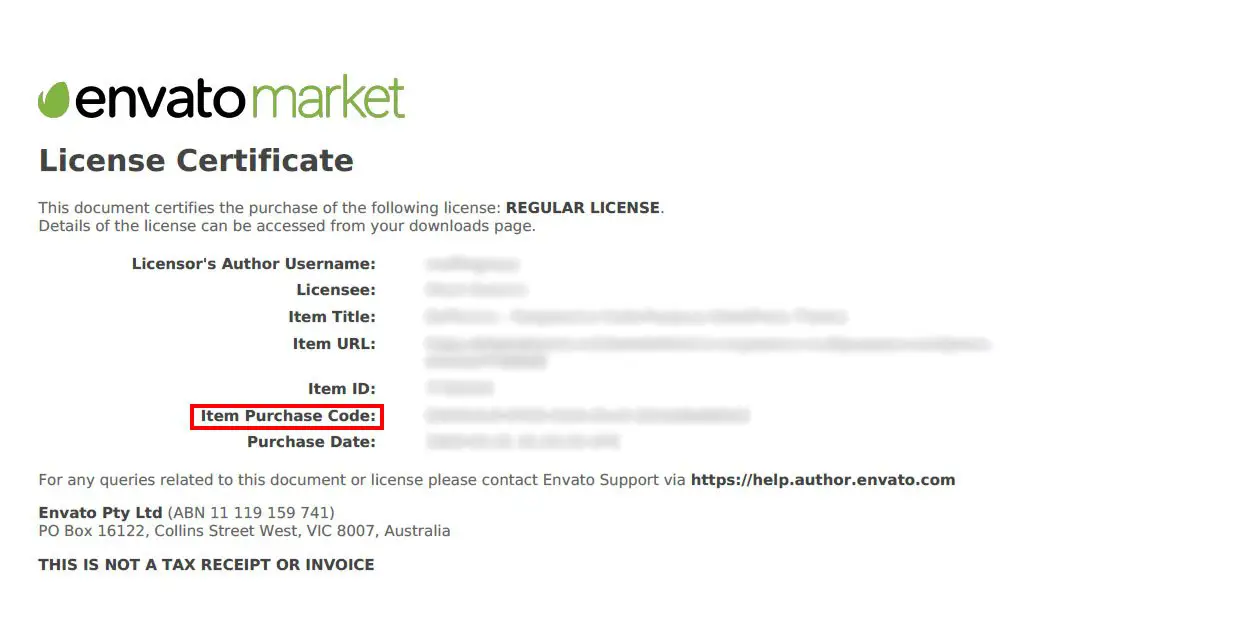
The pdf file will be downloaded to the same location as the compressed zipped theme file.

Step 2: When you’ve located it, open it and look for the line that reads “Item Purchase Code”.
Step 3: When you’ve found your purchase code highlight it, right-click and click on copy. Or you can highlight it and use the keyboard shortcut CTRL + C.
Step 4: After you’ve copied your purchase code return to your WordPress dashboard. Then navigate to your theme’s dashboard.
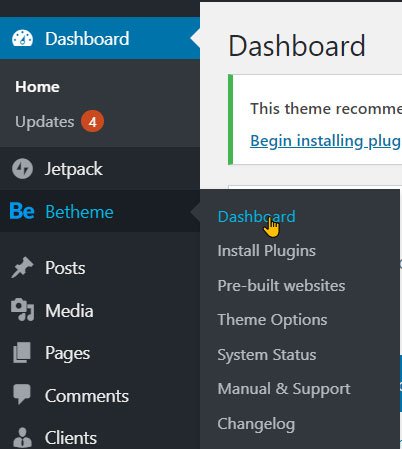
Step 5: Next copy your purchase code into the space provided and click on register.
Some premium themes will come packaged with plugins that are required in order for the theme to function as intended.
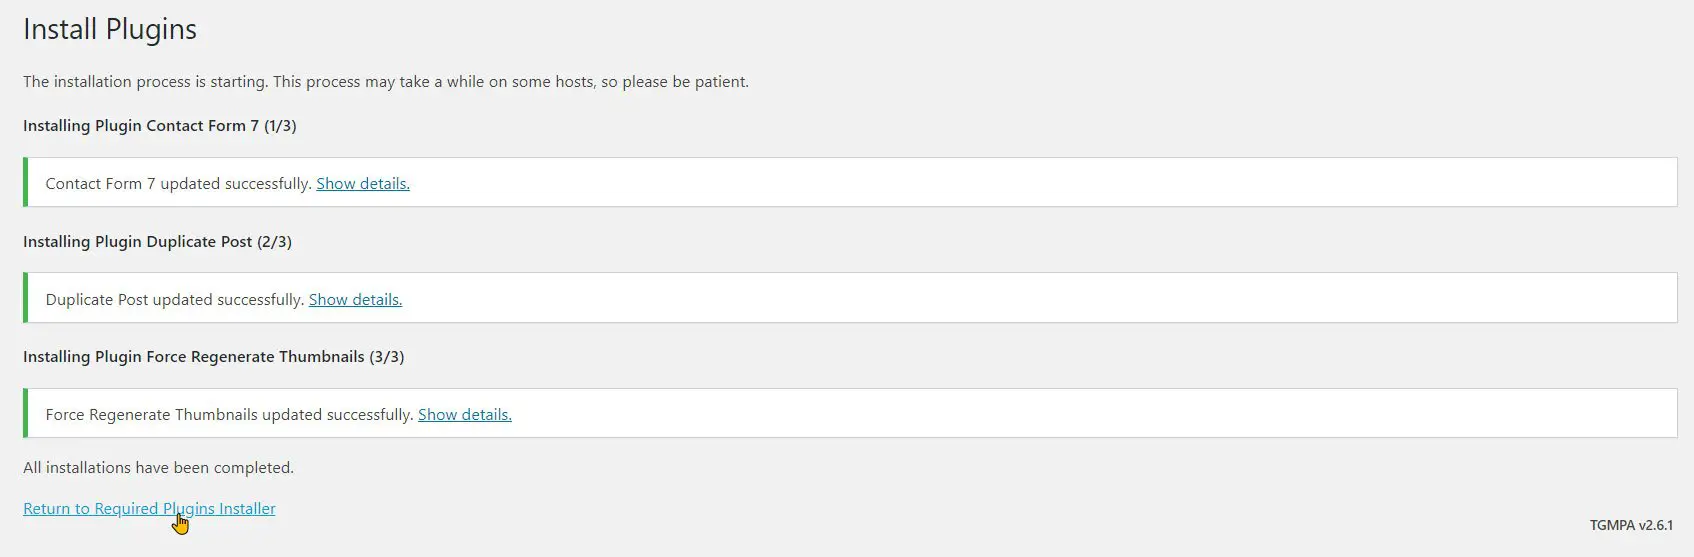
Step 6: On your wordpress dashboard, you’ll see a message prompting you to install the recommended plugins. (You may not see this option until you registered your theme).

Step 7: Click on begin installing plugins then tick the box next to the word plugin, and change the action from bulk action to install.

Step 8: When the plugins are finished installing click on “Return to Required Plugins Installer”
Step 9: Then repeat the previous step to activate them all at once.

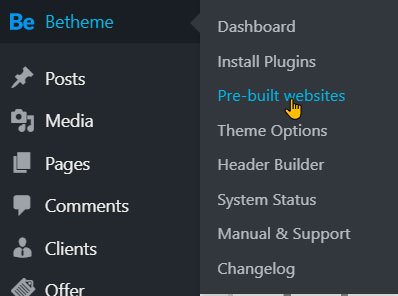
Finally, you’ll need to add some demo content to your website. Most premium themes now provide you with a one-click demo install.
Step 10: Start by clicking on pre-built websites and find one that you like.
Step 11: If you haven’t viewed it before click on the preview button to check it out.
Step 12: Once you’re satisfied with your selection click on install. WordPress will then proceed to add all the necessary pages, images, and other demo content to your website.

When it’s done installing your pre-built website, you can start changing the demo content to fit with the style of your brand.