Using a plugin is one of the most common ways to back up a WordPress site. However, for some users like yourself using a plugin to backup, your website may not be the most ideal option. Many WordPress webmasters create backups without using plugins for the following reasons:
- It reduces the number of plugins that are installed on a WordPress website which in turn increases its loading speed.
- Backing up a WordPress website without plugins improves its security by allowing fewer third party plugins to have access to the website.
- Finally, WordPress backups that don’t utilize plugins allow the user to have full control over each individual file that is being backed up.
There are three methods that you can use to backup your WordPress site without using a plugin. The first method involves creating an instant backup through a reliable web hosting provider. The second method involves enabling daily automatic backups through a reliable web host. The third method involves manually downloading the website’s core WordPress files located in the public_html folder using File Transfer Protocol (FTP) and exporting a copy of the website’s WordPress database using PhpMyAdmin.

Method 1 – Create a Manual Backup Through Your Web Host
For the sake of this tutorial, I will be using screenshots from SiteGound to demonstrate the process of creating an instant backup of your WordPress website via a web host. This method should be similar if not identical to other web hosting providers. However, it is important to keep in mind that not all web hosting providers are the same so this feature may or may not be provided by the one that you use.
If you are interested in a Manage WordPress Web Hosting Plan from Siteground you can pick up their StartUp plan for only $6.99/ per month. Keep in mind that you will need at least the GrowBig plan to have access to five(5) free instant backups each month. However, all of their WordPress web hostings plans offer free automatic daily backups.
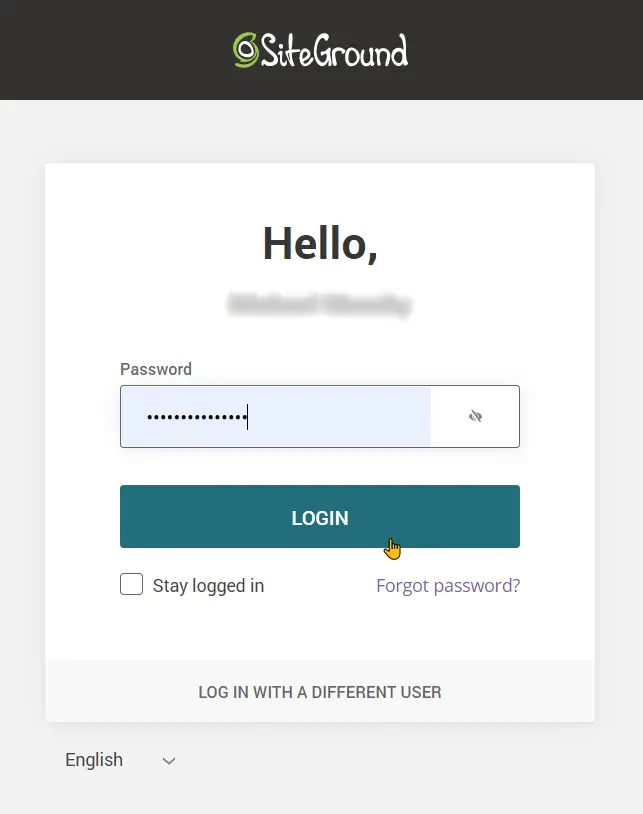
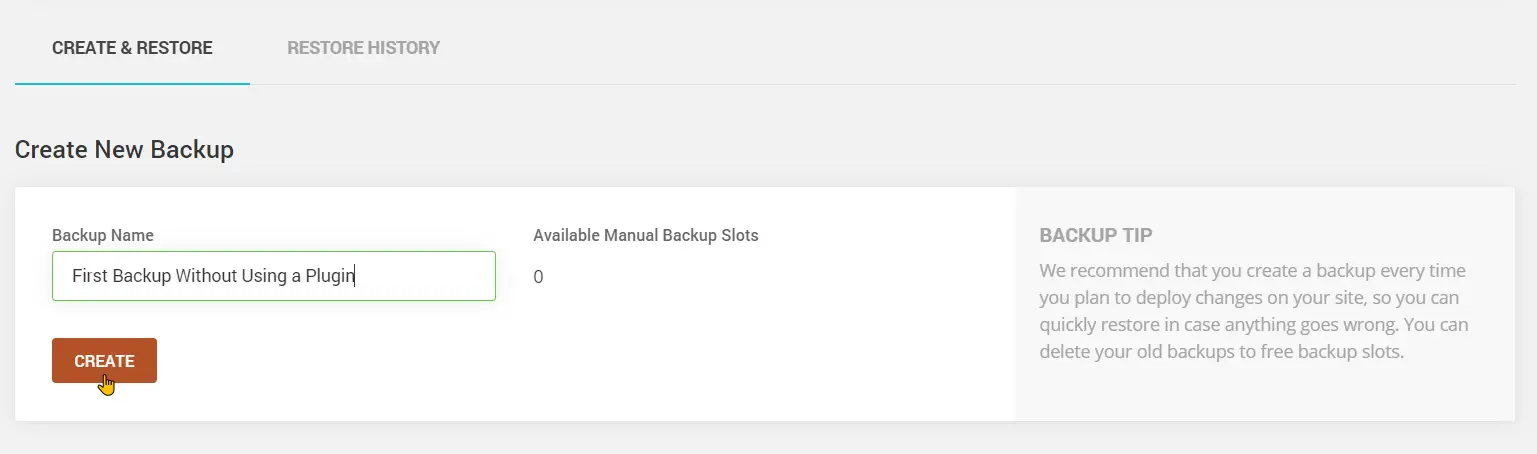
Step 1: Log into your web hosting dashboard.
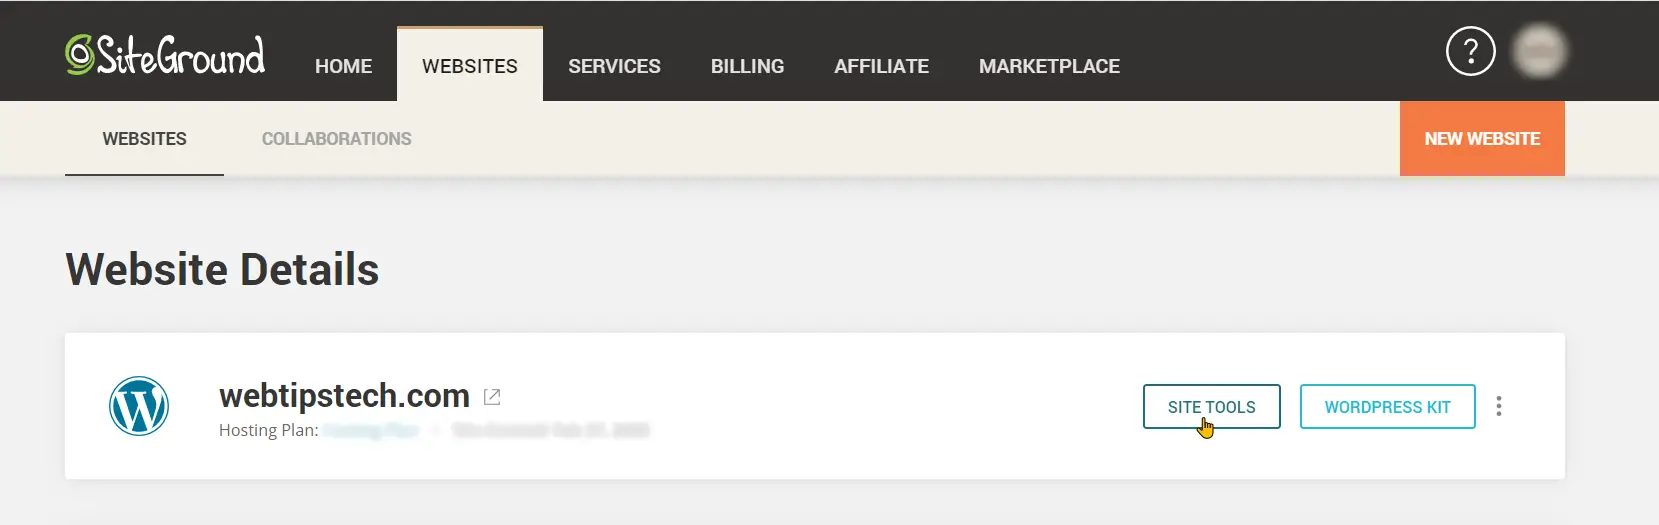
Step 2: Navigate to your website site tools or cPanel.
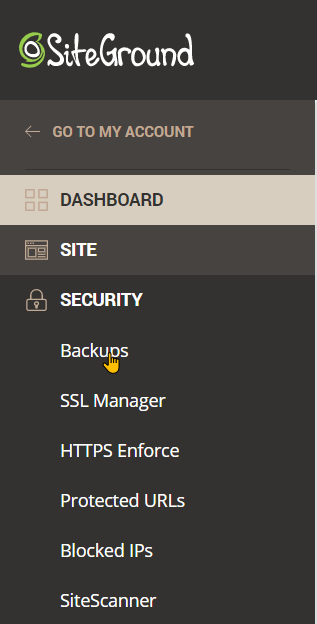
Step 3: Within the site tools or cPanel dashboard locate the “backups” option.
Step 4: Give the backup a name and click on create a backup. (If you’re using the SiteGround starter plan will need to purchase a one-time instant backup for $30.00 which I don’t recommend)
Method 2 – Enable Automatic Daily Backups Through Your Web Host
Step 1: Log in to your web hosting dashboard.
Step 2: Go to site tools or cPanel.
Step 3: Select the “backups” option within cPanel or Site Tools
Step 4: On the backups page, find the option that reads “Manage Backups” or something similar. Here you will see a list of all the automatic daily backups that your web hosting provider has been creating for you.

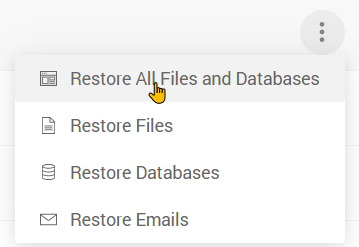
Step 5 (Optional): To restore your WordPress website from these backups hover over the backup that you want to select then click on the ellipsis. (The three vertical dots to the right).

Step 6 (Optional): From the dropdown menu click on “Restore all files and Database”.
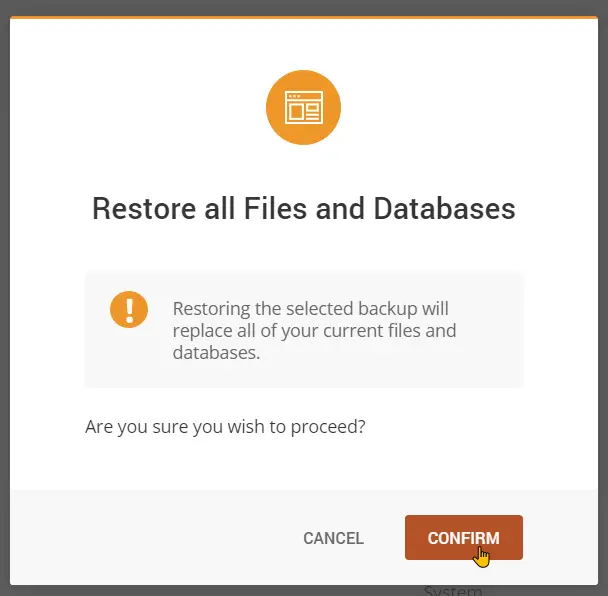
Step 7 (Optional): From the popup confirmation box click on “confirm”.
Method 3 – Download Your Website’s Core Files and Database
To get started with this method we will first need to take a look at what exactly FTP is. File Transfer protocol as the name suggests is a type of protocol used by computers that are connected on networks like the internet to transfer files and information among each other.
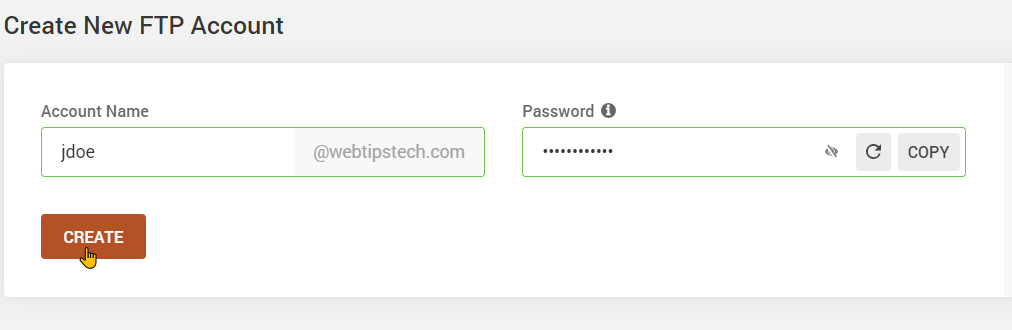
Create an FTP Account
To get started with FTP we will first need to create an FTP account.
Step 1: Log in to your web hosting dashboard.
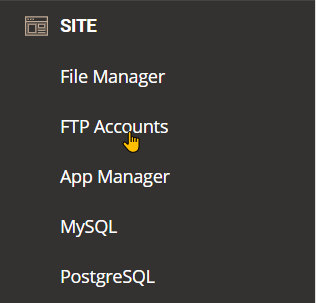
Step 2: Navigate to your cPanel or Site Tools.
Step 3: Locate and click on the “FTP” option.
Step 4: In the “create new FTP account” section enter a username and password and click on “create”.
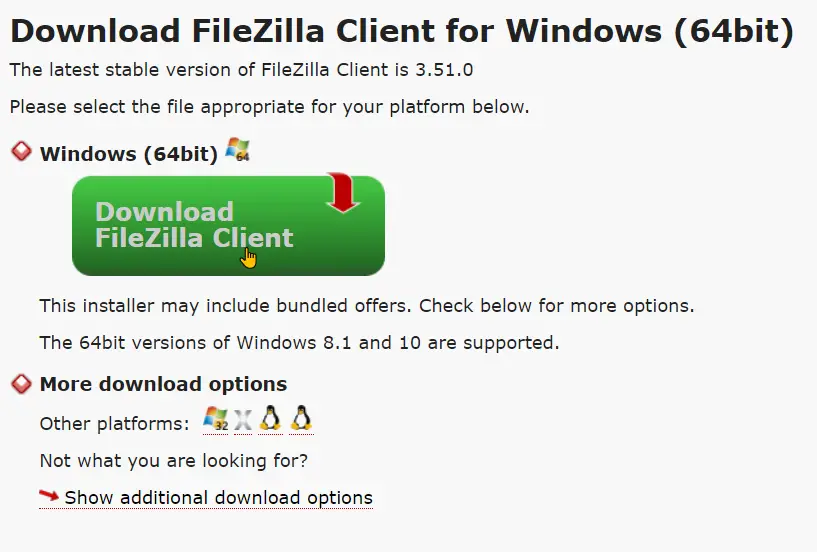
Download Your WordPress Site Files via FileZilla
Step 1: Download and install the FileZilla Client.
Step 2: When the FileZilla Client is installed, launch it and enter the following information in the quick connect bar and then click on “Quickconnect”.
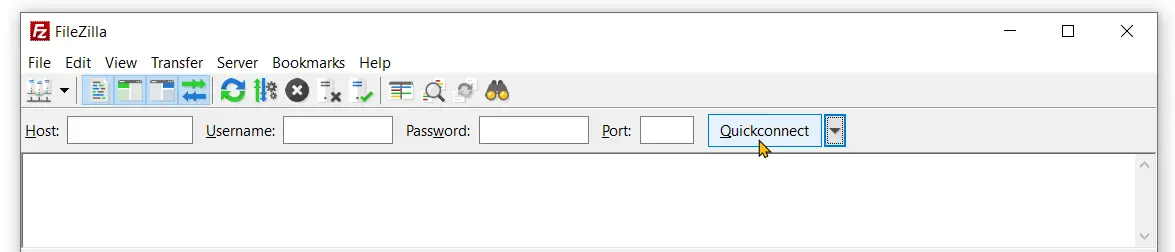
- Host: This is your domain name. (e.g webtipstech.com)
- Username: The username you selected for your FTP account
- Password: The password you selected for your FTP account.
- Port number: The port that you will like to connect to. (For SiteGround users your port number is 21)
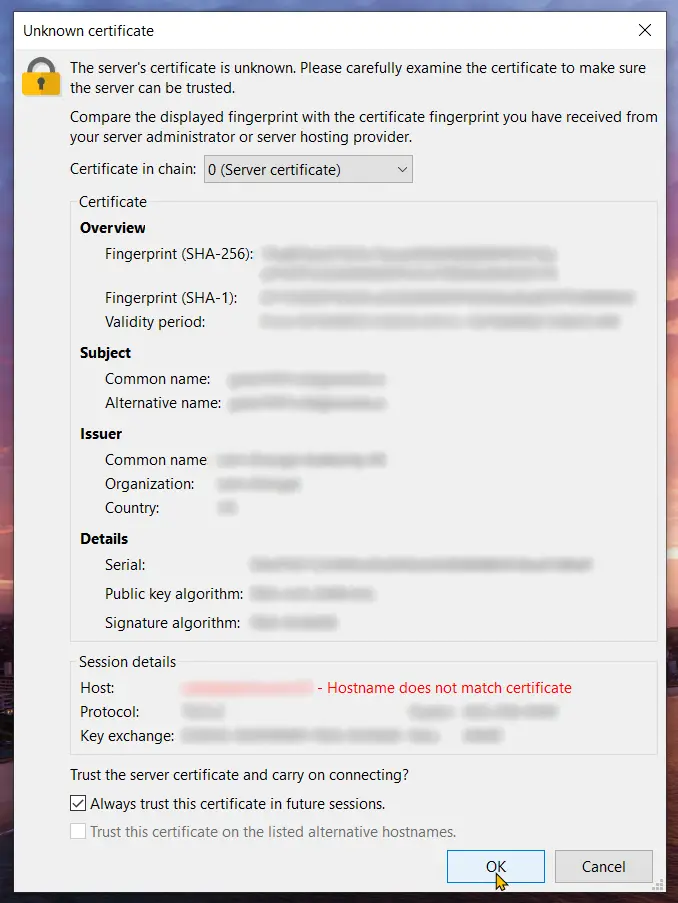
Step 3: If an “unknown certificate” warning comes up select the option that reads “Always trust this certificate in future sessions” and then click on “OK”.
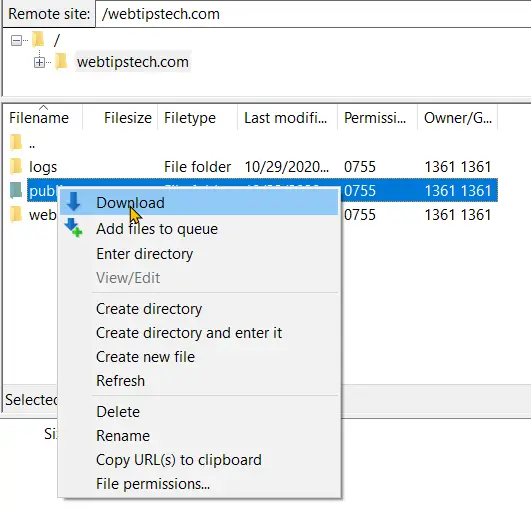
Step 4: within the remote site area you will see your website files. Locate the public_html folder and click download. This may take a while depending on the size of the folder, your internet speed, or the server’s connection speed. When the download is finished you would have successfully made a backup of your WordPress files.
Export Your WordPress Database
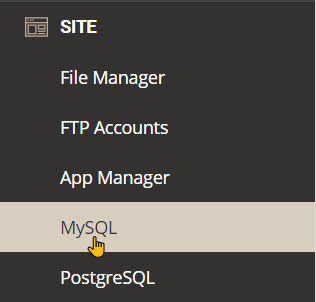
Step 1: From your Site Tools dashboard or Cpanel locate and click on the “MySQL” option.
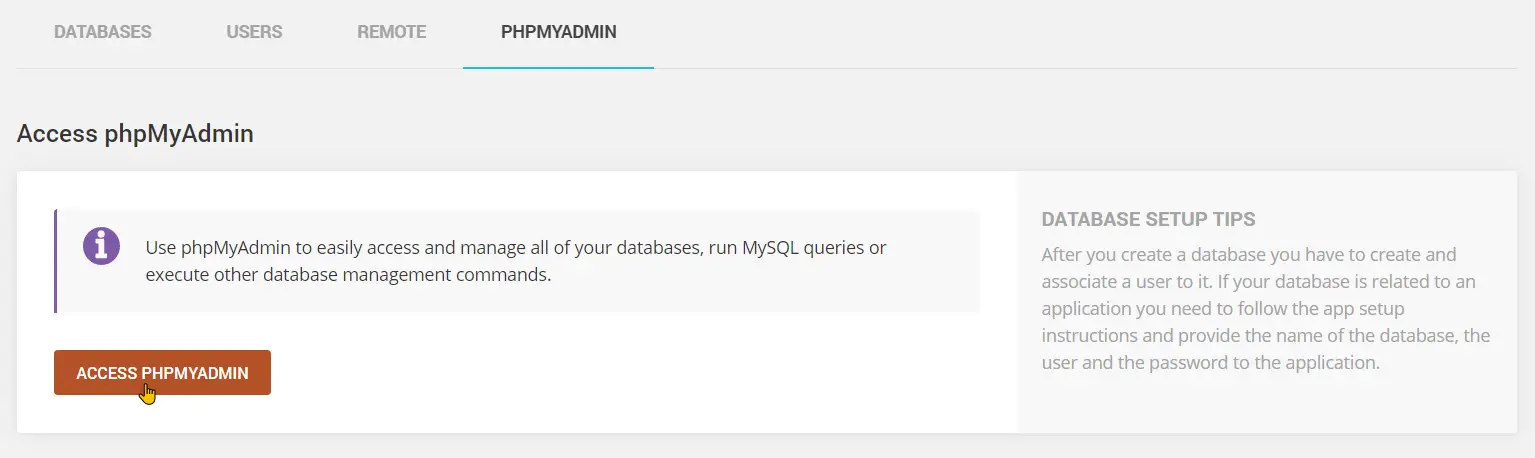
Step 2: In the “Manage SQL” area click on the “PHPMyAdmin Tab” and then click “Access PHPMyAdmin”.
Step 3: In the PHPMyAdmin dashboard, select the database for the website that you want to backup. (For SiteGround users the name of the database will contain a few random letters followed by the domain name of that website withing brackets).

- For other users, if you are having difficulties locating the right database, return to your file manager, locate the public_html folder open it, and then open the wp-config.php file located in that folder.

- Within the wp-config.php file scroll down to the line that reads “The name of the database for WordPress” below that line, you will see the name of your database.

Step 4: After selecting your database, from the menu above click on export.

Step 5: Set the export method to “quick” and set the format to “SQL” and then click on “Go”.

Step 6: When the export is finished you would have successfully backed up your WordPress database.
Step 7: To keep track of your manual backups, create a folder called “WordPress Manual Backups”. Within that folder create another folder and set the name as the date of the backup that you’ve just created. Finally, save your WordPress core files folder and SQL database file within that folder.
Conclusion
Backing up your WordPress website through your web hosting provider is the best option for beginners who don’t want to use a backup plugin. If you fall within that category and you aren’t that tech-savvy I don’t recommend that you attempt backing up your wordpress site manually.