You may want to backup and restore your WordPress site to a new server for several reasons. Maybe you’re developing a new website on a test server and would like to move it to a live server. Or maybe, you’re like me, and you’ve had enough with your current hosting provider and would like to move your website over to a better web host.
Whatever your reasons for migrating your wordpress site, the process can seem intimidating especially, if you’ve never done it before or you aren’t really tech-savvy. Issues such as losing data during the migration or even the downtime that may be experienced if you fail to point your domain to your new hosting provider can lead to further frustration.

Backup Your WordPress Website
Step 1: Log in to your WordPress dashboard.
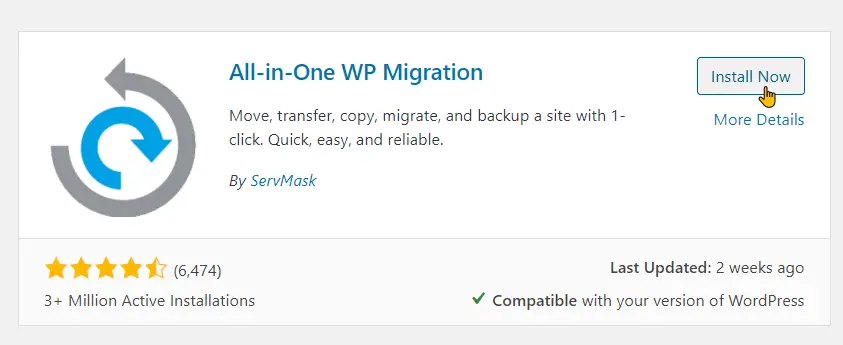
Step 2: Install and activate the All-in-One WP Migration plugin.
Step 3: From the menu on the left hover over the All-in-One WP Migration option and select export.

Step 4: Click on the “export to” button and from the list of available options select “file”.
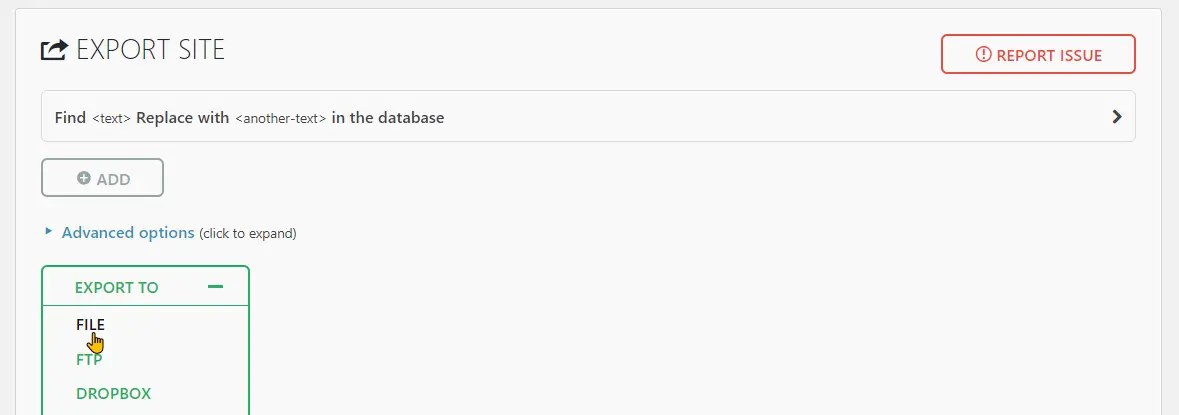
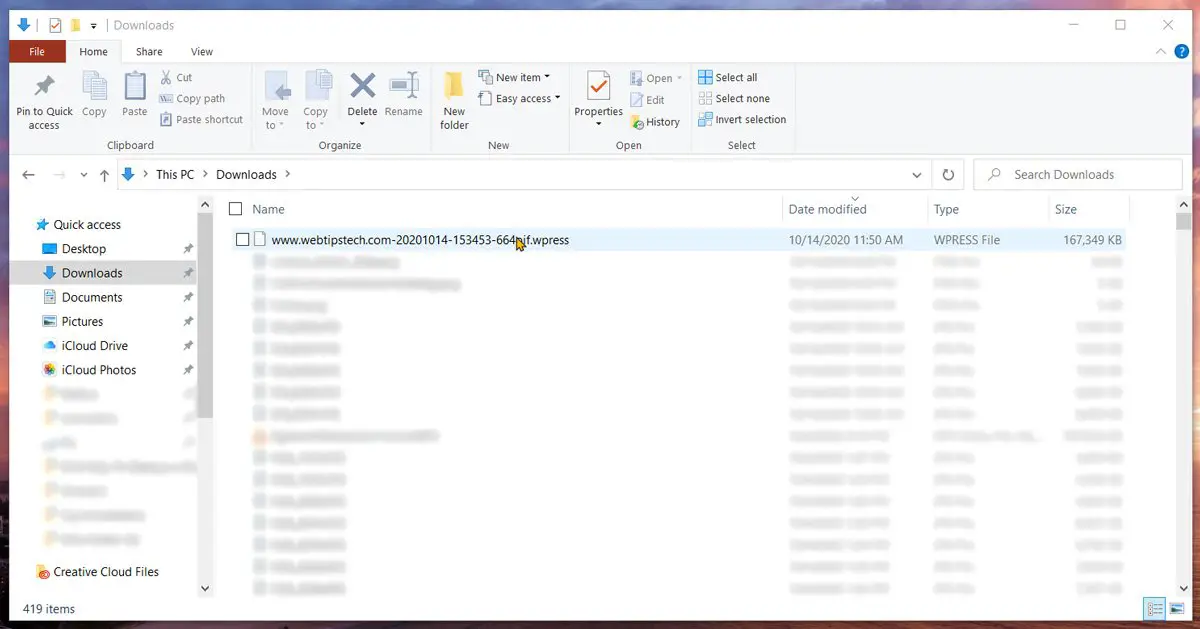
Step 5: When the plugin has finished creating your backup click on download.

Purchase a New Web Hosting Plan
If you haven’t yet selected a new web hosting provider you may want to consider Siteground as a potential candidate. I switched from Bluehost after being with them for a year to SiteGround and I have no regrets at the moment. SiteGround has excellent reliability, customer service, and a dedicated plugin that automatically optimizes your website for really fast page load times.
SiteGround also provides a dedicated migration plugin and tutorial to help you easily transfer your current website over to their servers. Additionally, if you would prefer a done for you migration SiteGround also provides a professional migration service that is done by their experts.
If you would like to transfer your WordPress website to SiteGround you can purchase one of their managed wordpress hosting plans which start at just $4.99 per month and follow along with the rest of this article or follow along with SiteGround’s tutorial.

Restore Your WordPress Website On The New Server
Step 1: Log into your new web hosting account.
Step 2: Install WordPress and login to your dashboard.
Step 3: Install the All-in-One WP Migration plugin.
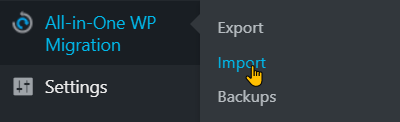
Step 4: In the WordPress dashboard menu hover over the All-in-One WP Migration option and select “import”.
Step 5: On the following screen click on “import from” and select “file”.
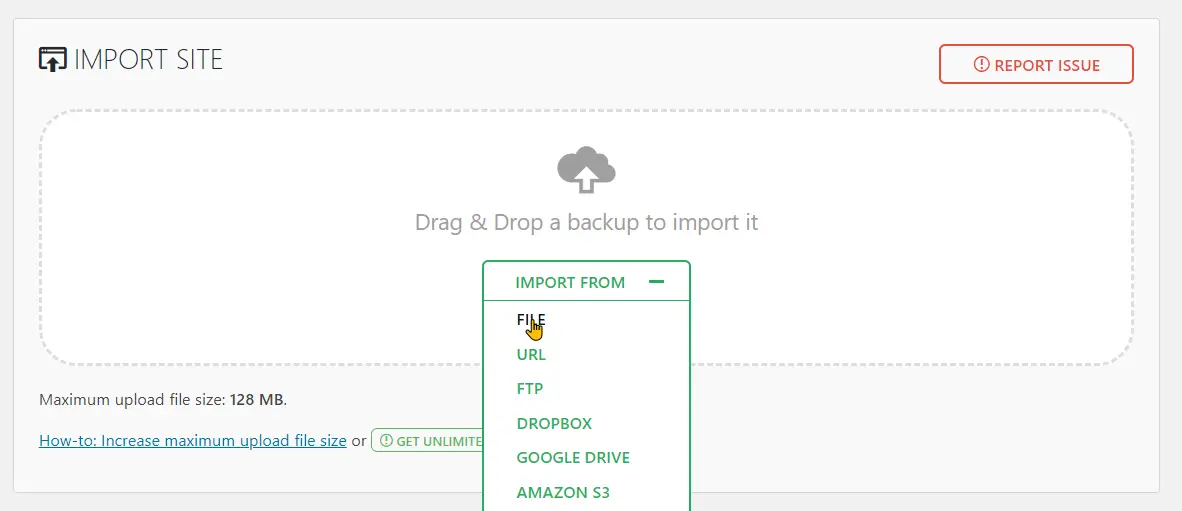
Step 6: Select the backup you made from your old site and click on upload.
Update Your DNS Nameserver Settings
Finally, If you are not planning on using a new domain name when you migrate your website, you will either need to transfer your domain to your new host provider or point your current domain to the new location of your website by updating the nameserver settings.
I recommend using the nameserver method if you registered your domain with a domain registrar like GoDaddy or Namecheap. On the other hand, If you registered your domain with your old hosting provider it may be best to transfer your domain to the new hosting provider for easier payments and control.
However, a domain transfer adds additional charges to the migration process since it requires a mandatory domain renewal of at least one year with the new domain registrar.
Since my domain is registered with SiteGround for the sake of this tutorial I will be showing you how to change the DNS nameserver settings for a domain that is registered with SiteGround. Keep in my that this process will be similar to other hosting providers/domain registrars.
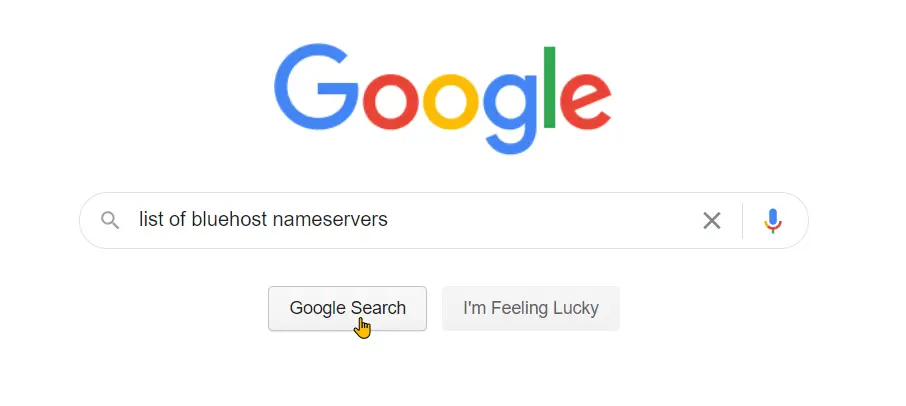
Step 1: Find the list of DNS nameservers provided by your new hosting provider. (You can type into google “list of hosting-provider-name nameservers”)
For SiteGround, you can find the list of nameservers here:
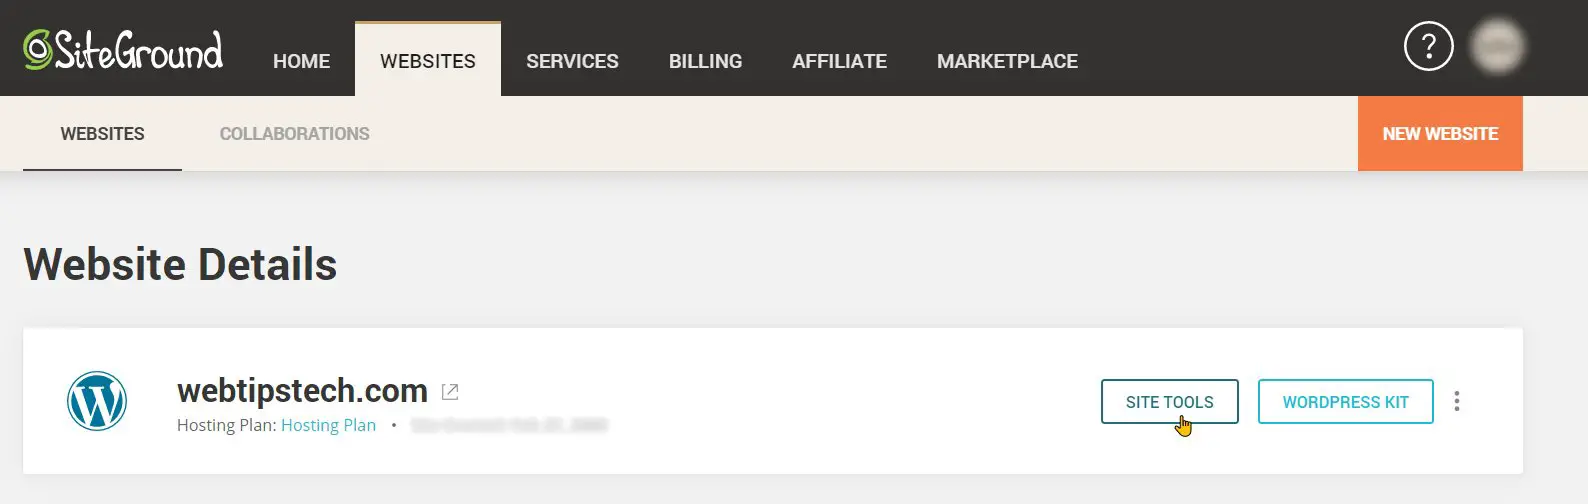
- Log into your SiteGround dashboard.
- Click on the website tab then select site tools.
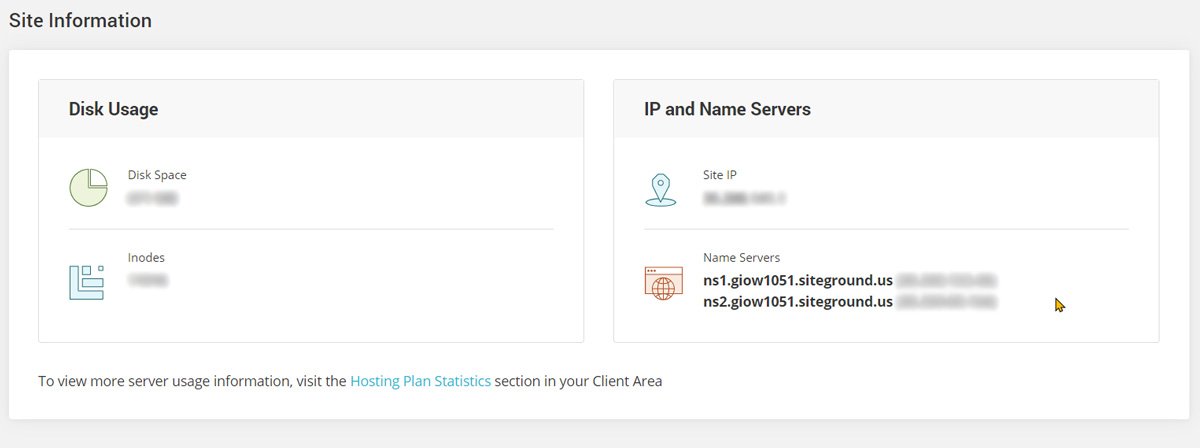
- Scroll down to site information, and you will find SiteGround’s nameservers within the box to the right.
Step 2: Log in to your domain registrar account. (For me it is SiteGround).
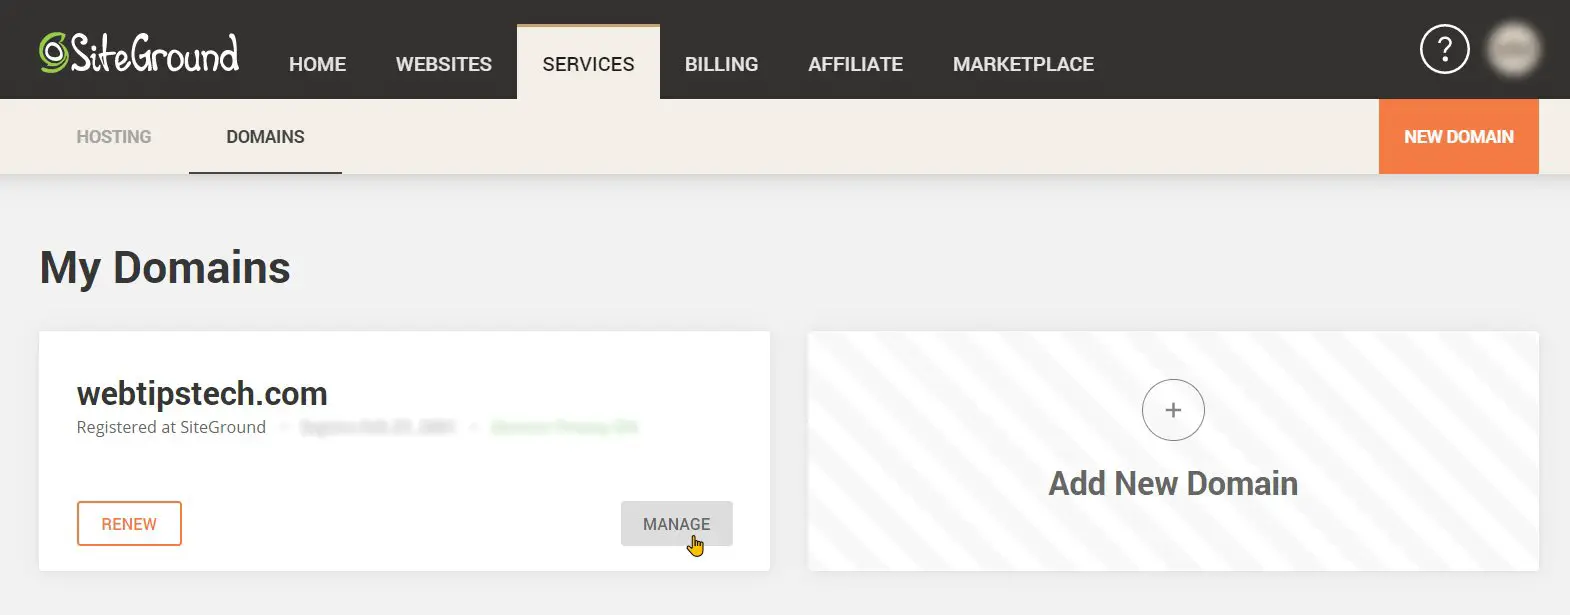
Step 3: From your SiteGround dashboard select the services tab then click on domains. Find the domain that you would like to update the nameservers setting for and click on manage.
Step 4: Locate and click on the option that reads “manage nameservers” or something similar.
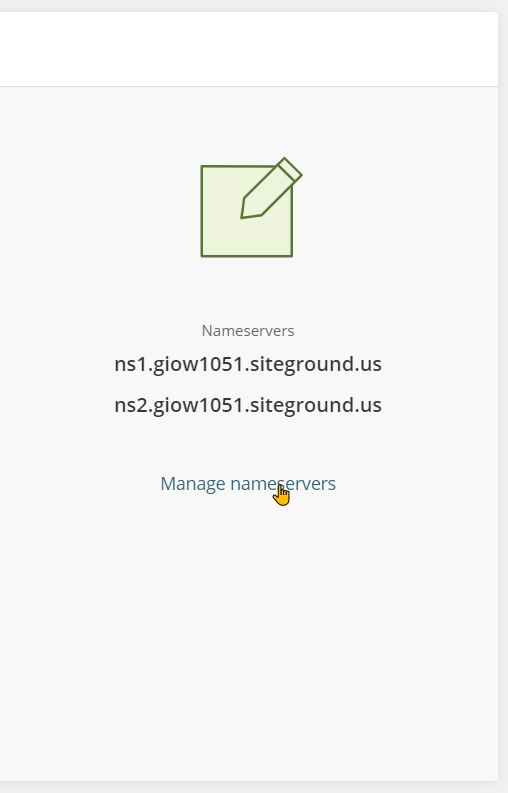
Step 6: You should then see two to four nameserver fields depending on your domain registrar. Update the corresponding fields with the nameservers of your new hosting provider. (NameServer1 will begin with ns1 and Nameserver2 will begin with ns2 and so on.)

Step 7: After updating the nameserver settings of your domain you will need to wait for the process of domain propagation to take place. This process usually takes a few hours but in some cases, it’s been known to take up to two days.
All-in-one WP Migration Import Stuck Problem
Although rare it’s possible that you may experience an import problem when it comes to restoring your website on the new server using All-in-one wp migration.
These errors may range from your restore progress bar being stuck at 0.00%, 0.01%, 0.02%, or even at 99% or 100% without any further progress.
If this is the case one quick fix that you can try is to use another migration plugin such as UpdraftPlus or BackupBuddy. However, in my experience, this hasn’t yelled any positive results. For you, this may be different so it’s worth the shot.
For a guaranteed fix, you can follow along with this other article titled “All-in-One WP Migration Import Stuck Solved“ which covers this issue in great detail.