Although Google Docs lacks a basic text rotation feature, you can still accomplish the desired effect by utilizing text boxes within the drawing tool.
To do this, simply click on “Insert” in the top menu of Google Docs, then select “Drawing” and choose “New.” Within the drawing tool, create a text box and enter your desired text. From there, you can easily rotate the text to your liking and insert it into your document.

In this article, we’ll walk you through the steps on how to rotate text in Google Docs using text boxes. So, let’s get started!
Step 1 – Open a Blank Google Doc
1 – Launch your web browser and navigate to Google Docs.
2 – Once you’re on the Google Docs homepage, locate and click on the plus icon to create a new, blank document.

Step 2 – Create a TextBox
1 – In the blank document, place your cursor at the desired location where you want to insert the rotated text.

2 – Navigate to the top menu and click on “Insert.”

3 – Then, hover your mouse pointer over the “Drawing” option.

4 – A slideout menu will appear. Click on “New” to create a new drawing.

5 – Locate the toolbar within the drawing tool and click on the “Text box” icon.

6 – Choose an empty space on the canvas and click and drag your mouse pointer to create a text box of your preferred size.

7 – Finally, enter your desired text into the text box.

Step 3 – Rotate the TextBox
1 – Begin by clicking on the border of the text box to select it.

2 – Position your mouse pointer over the circular handle located at the top of the text box.

3 – Left-click and hold, then move your mouse to the left, right, up, or down to manually rotate the text box to your desired orientation.

4 – If you prefer a fixed 90-degree rotation, right-click on the circular handle.

5 – In the contextual menu that appears, hover your cursor over the “Rotate” option.

6 – From the options available, select “Rotate Clockwise by 90 degrees” to rotate the text box to the right, or choose “Rotate Counter-Clockwise by 90 degrees” to rotate it to the left.

Step 4 – Position The TextBox In The Document
1 – After achieving the desired rotation of the text box, click on the “Save and Close” button to insert the rotated text into the document.

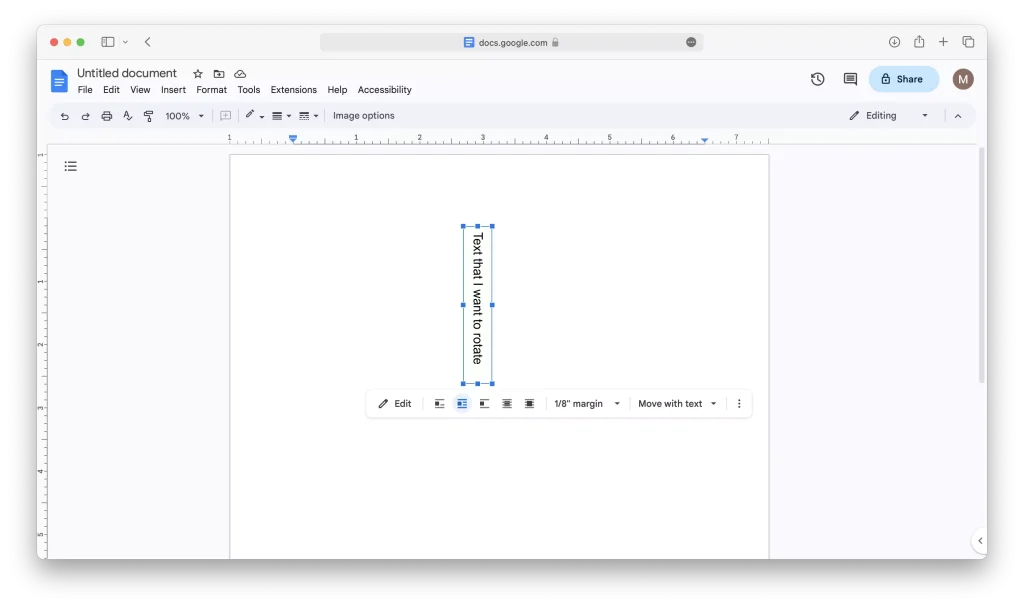
2 – Click on the inserted textbox to select it

3 – In the menu that appears, click on the ellipsis (three dots) located at the end.

4 – Within the dropdown menu, click on the “All Image Options” button.

5 – In the image options menu, locate and click on the “Text Wrap” option.

6 – From the available options, choose either “Wrap Text,” “Break Text,” “Behind Text,” or “In Front of Text” to allow for free movement of the text box. (My preferred text wrap option is “Wrap Text”)

7 – After selecting your preferred text wrap option, close the image option menu.

8 – Finally, click on the text box and while holding the click, drag the text box to your desired location within the document.
In a nutshell
By following the steps in this tutorial you will be able to adjust the orientation of your text to a custom angle or a fixed 90-degree rotation.
Additionally, don’t forget to explore the text wrap options to precisely position the text box to your liking. Go ahead and give it a try.