Email scheduling is a feature in Gmail that allows you to send an email to your recipient after a set period of time. Many new users are unfamiliar with this feature.

Here is what you need to know about scheduled emails in Gmail.
1 – Can I Schedule An Email To Be Sent Later In Gmail?
Yes, in Gmail, you can schedule an email to be sent to your recipient at a later date.
How To Schedule Emails In Gmail
1 – From your Gmail inbox, click the compose button.

2 – Enter your recipient’s email address, and give the email a subject.
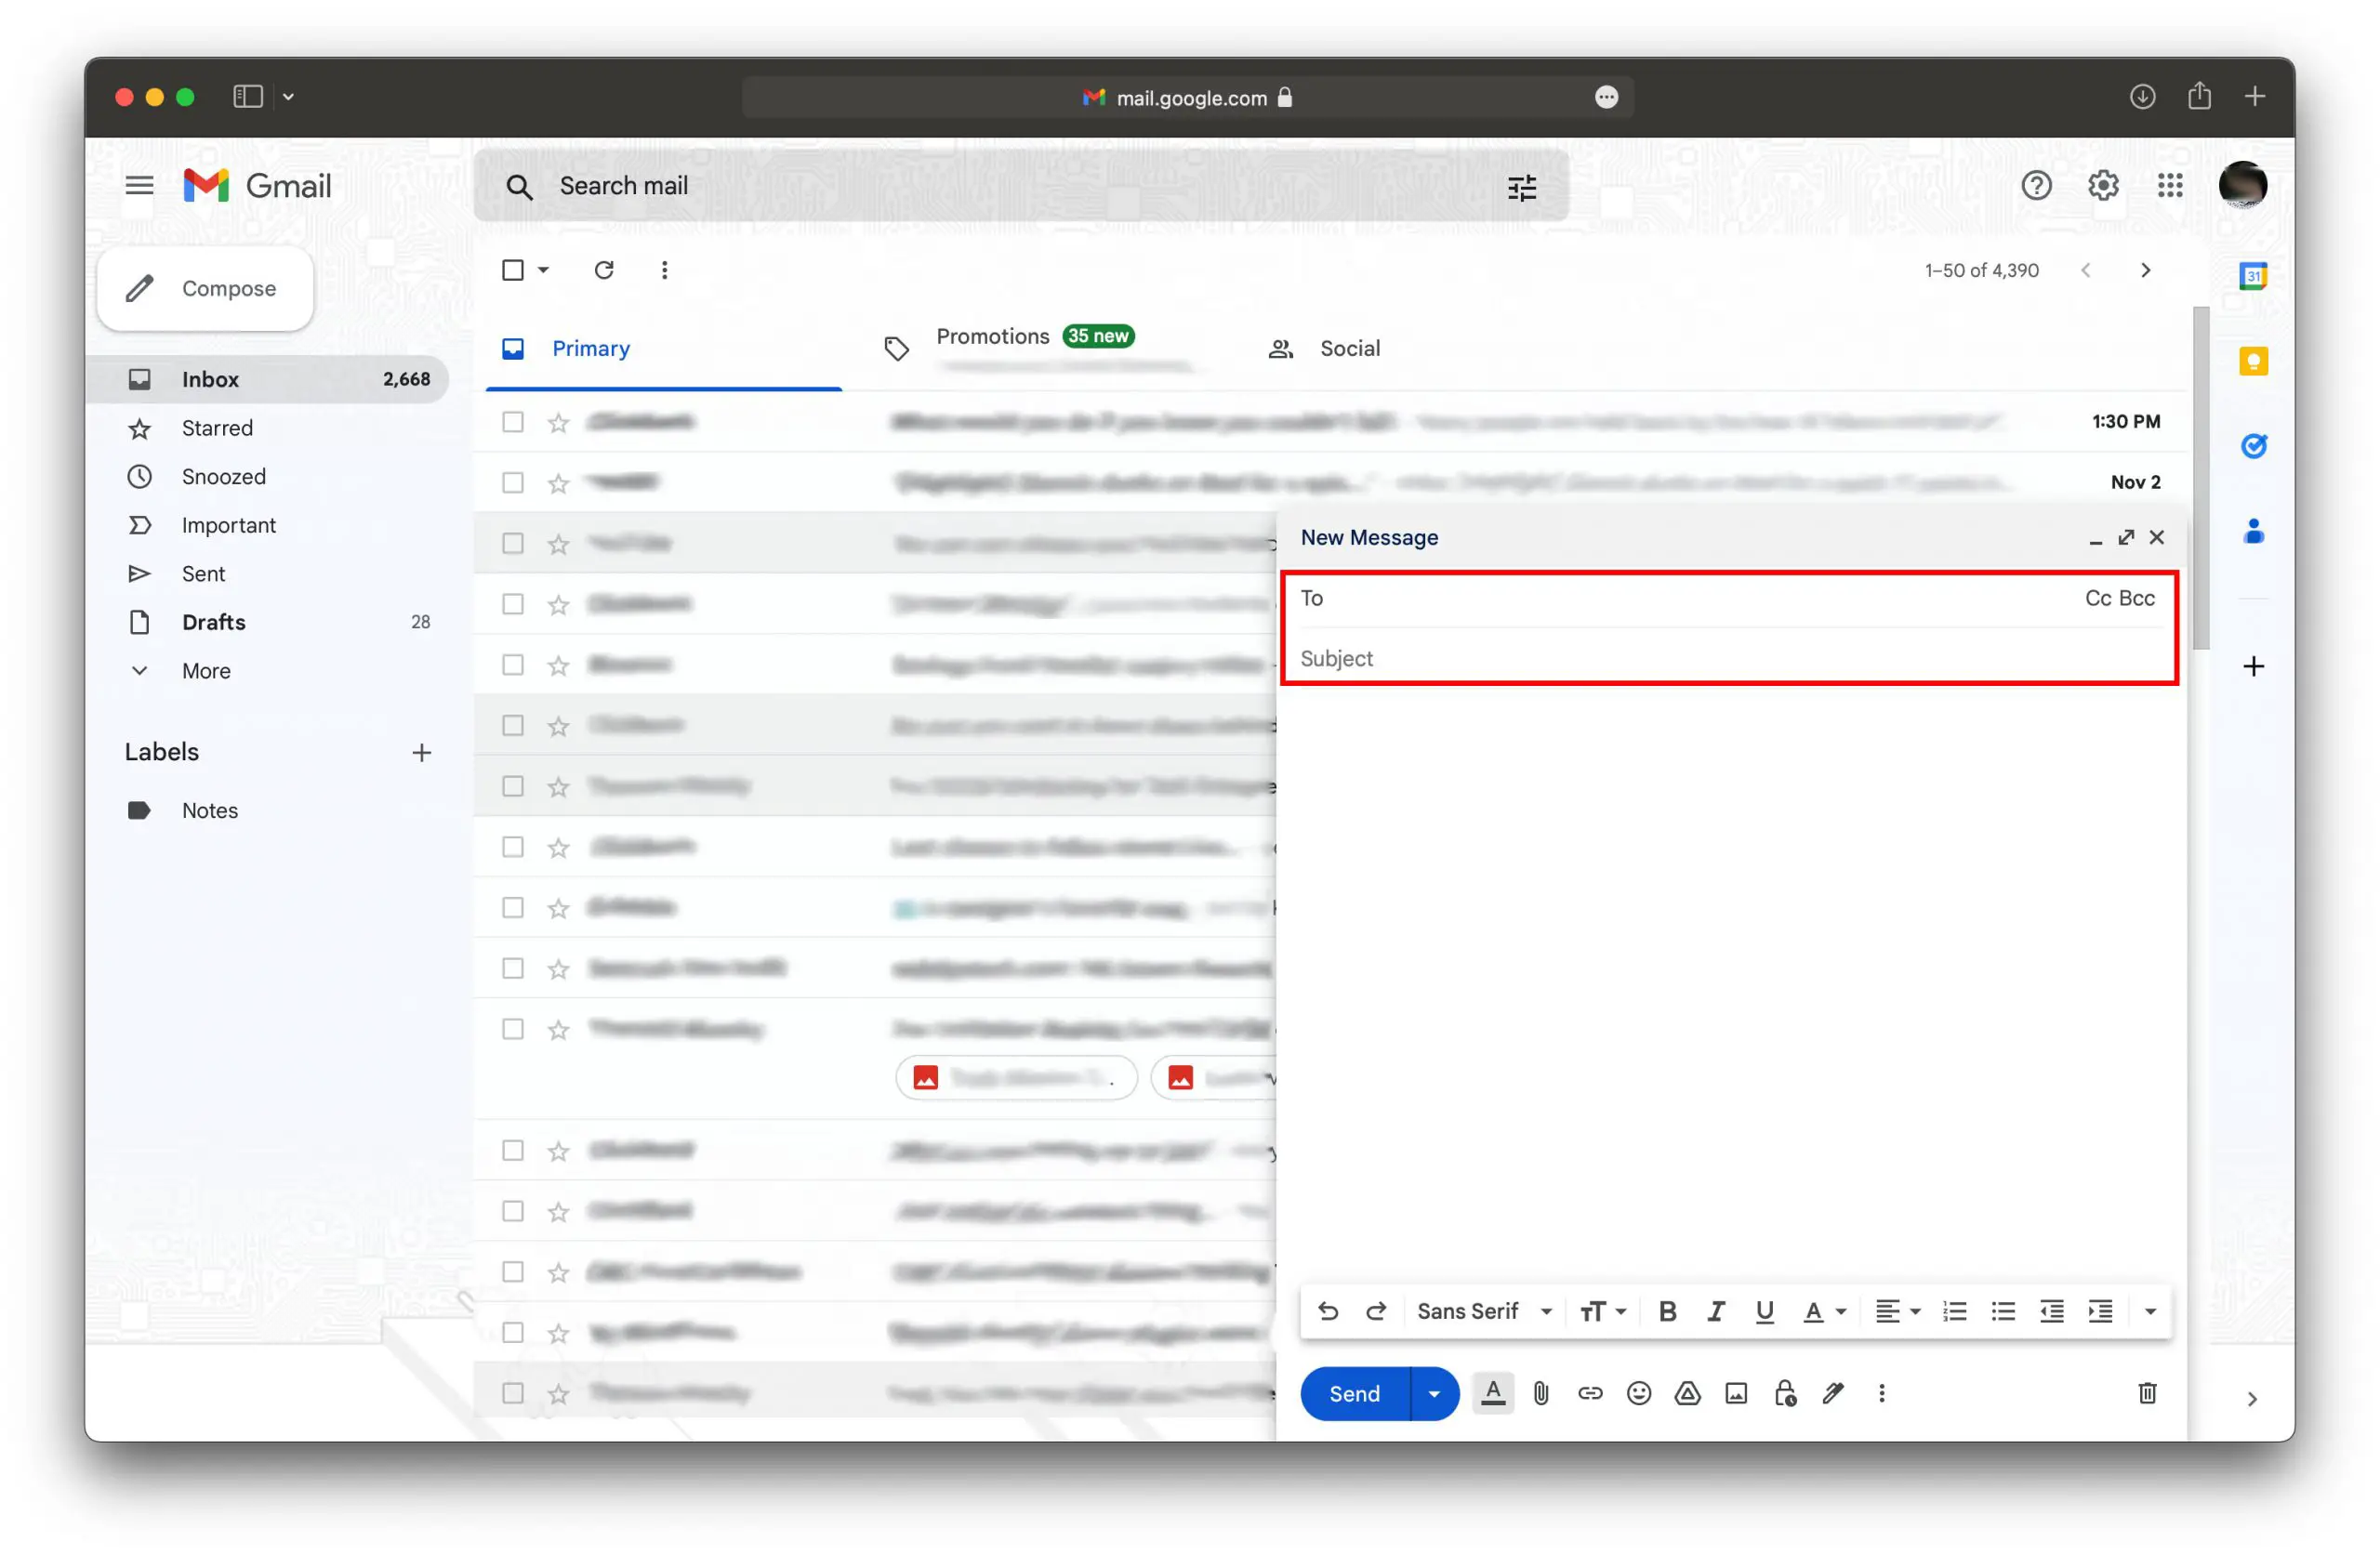
3 – Add a message to the email and add any attachments.

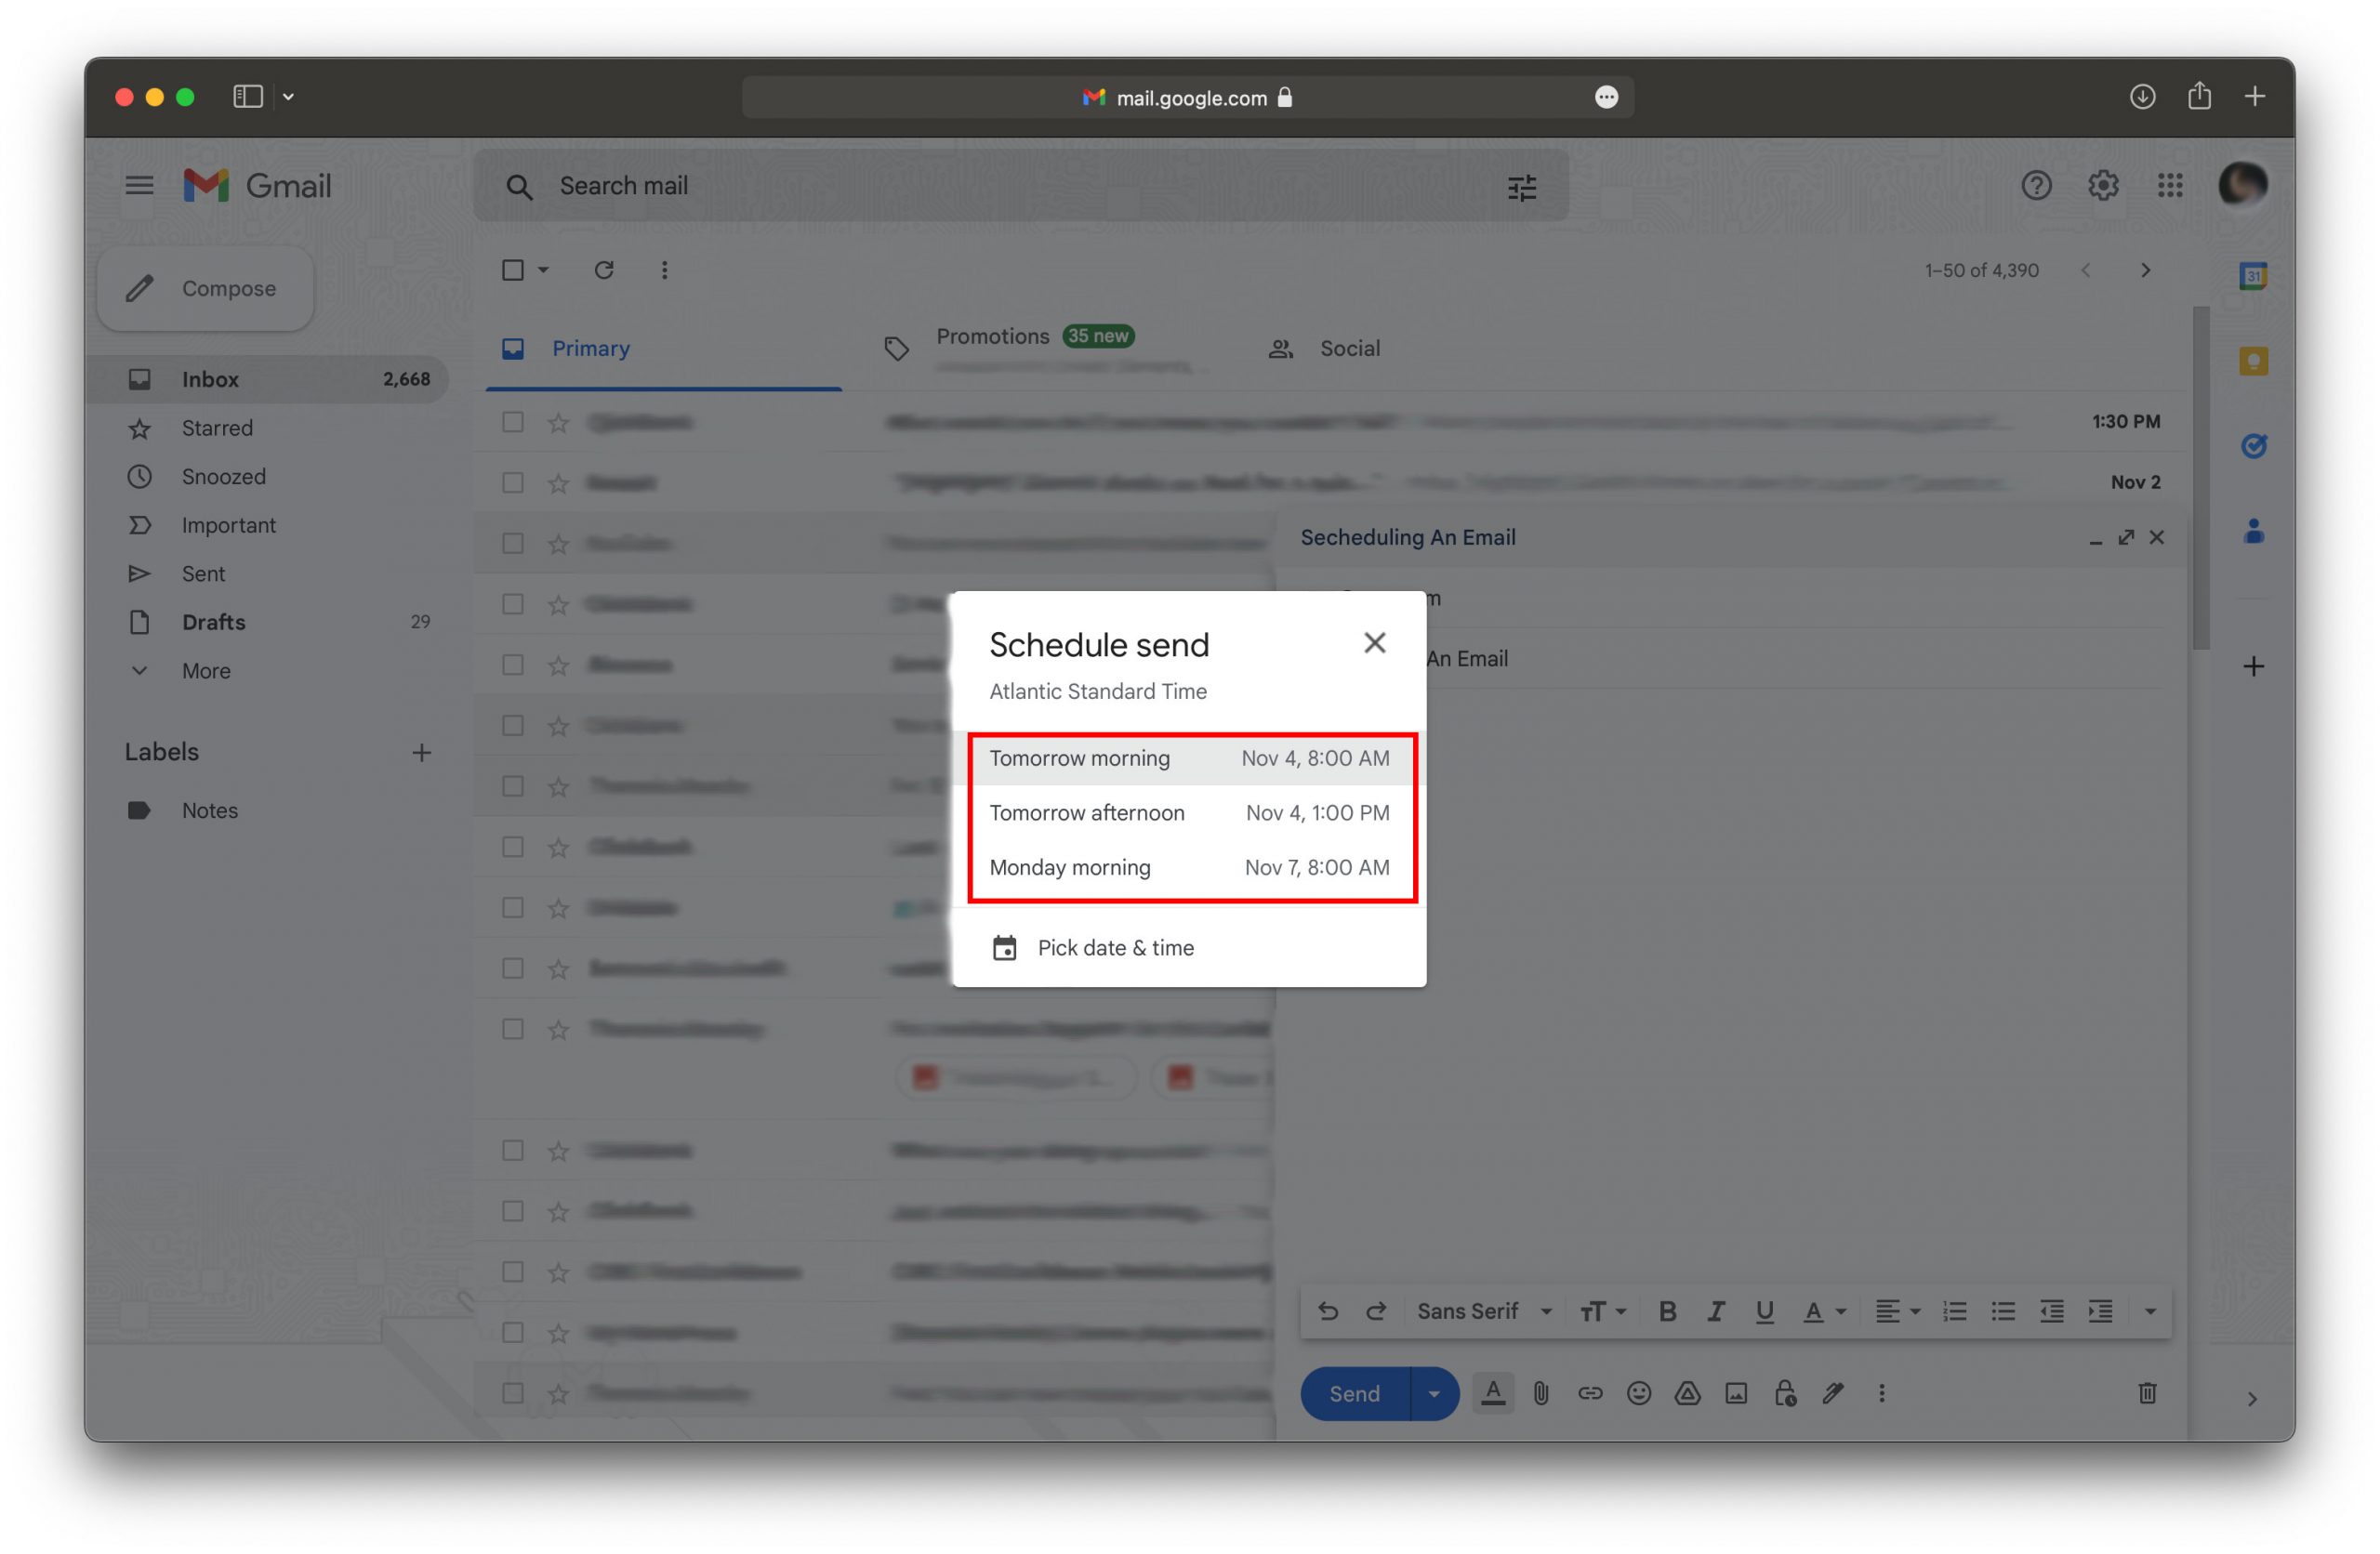
4 – Click the downward-facing arrow next to the send button and select the schedule send option.

5 – Select one of the suggested dates to immediately schedule the email.
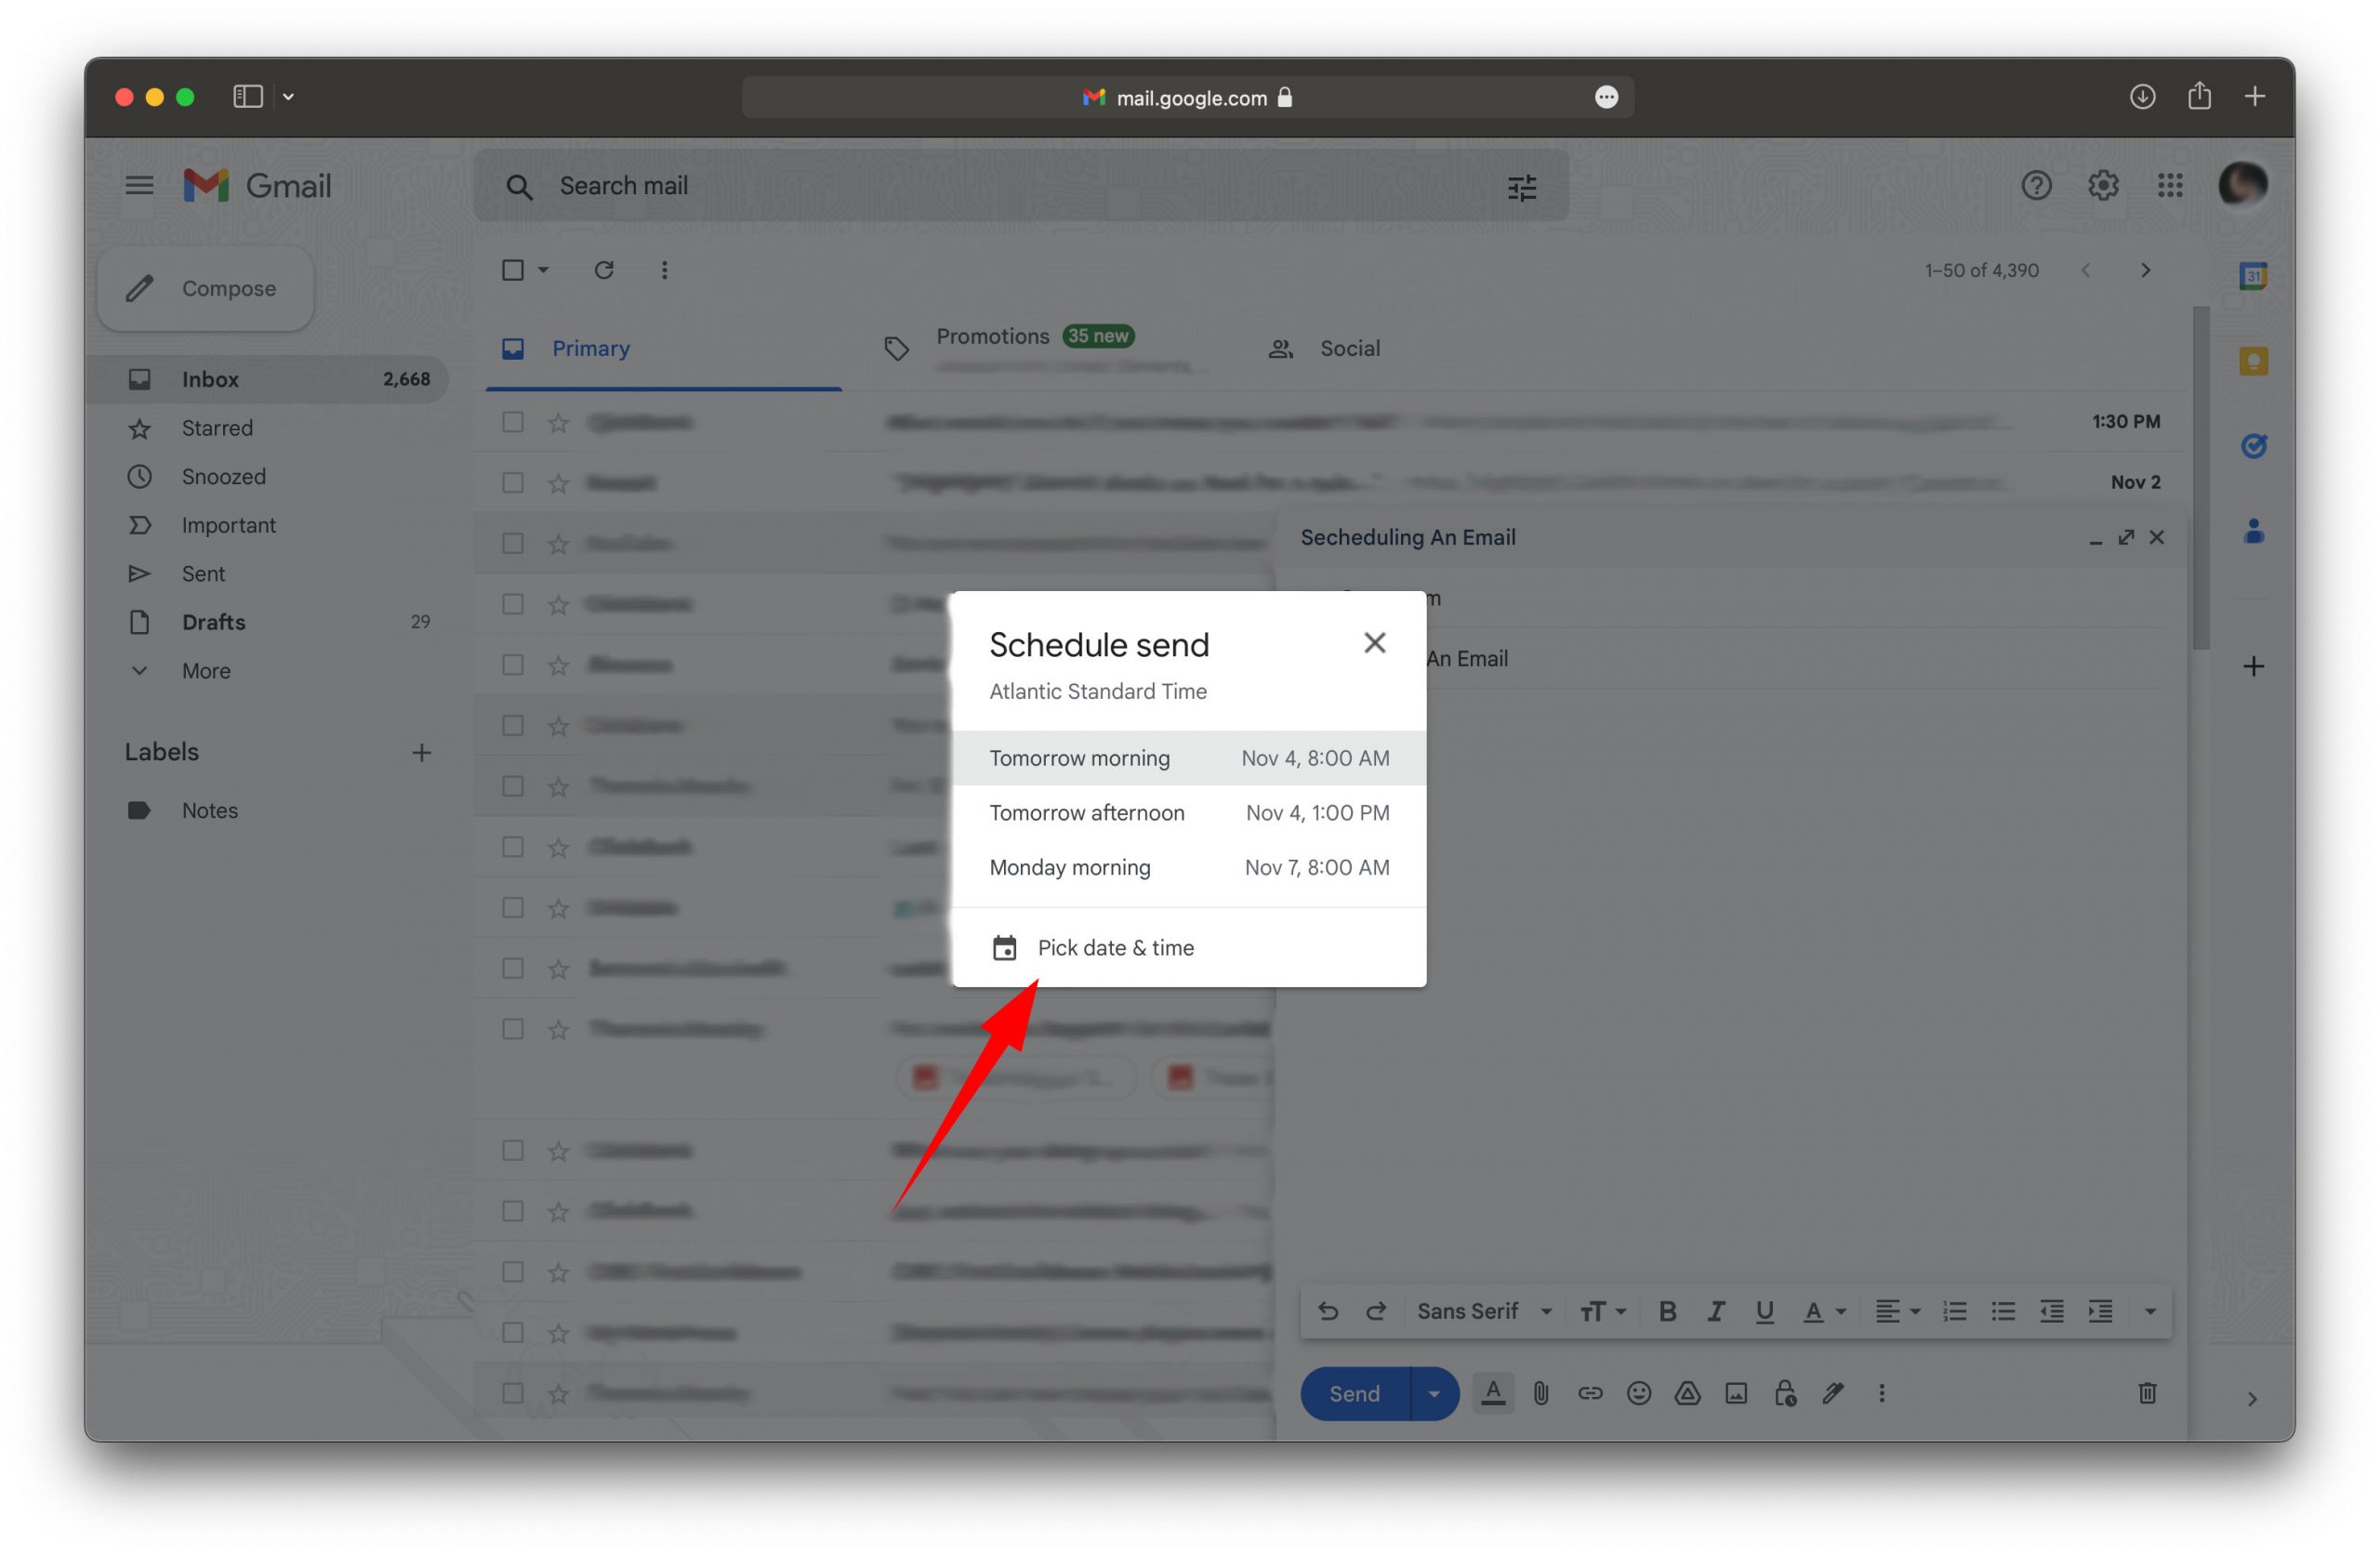
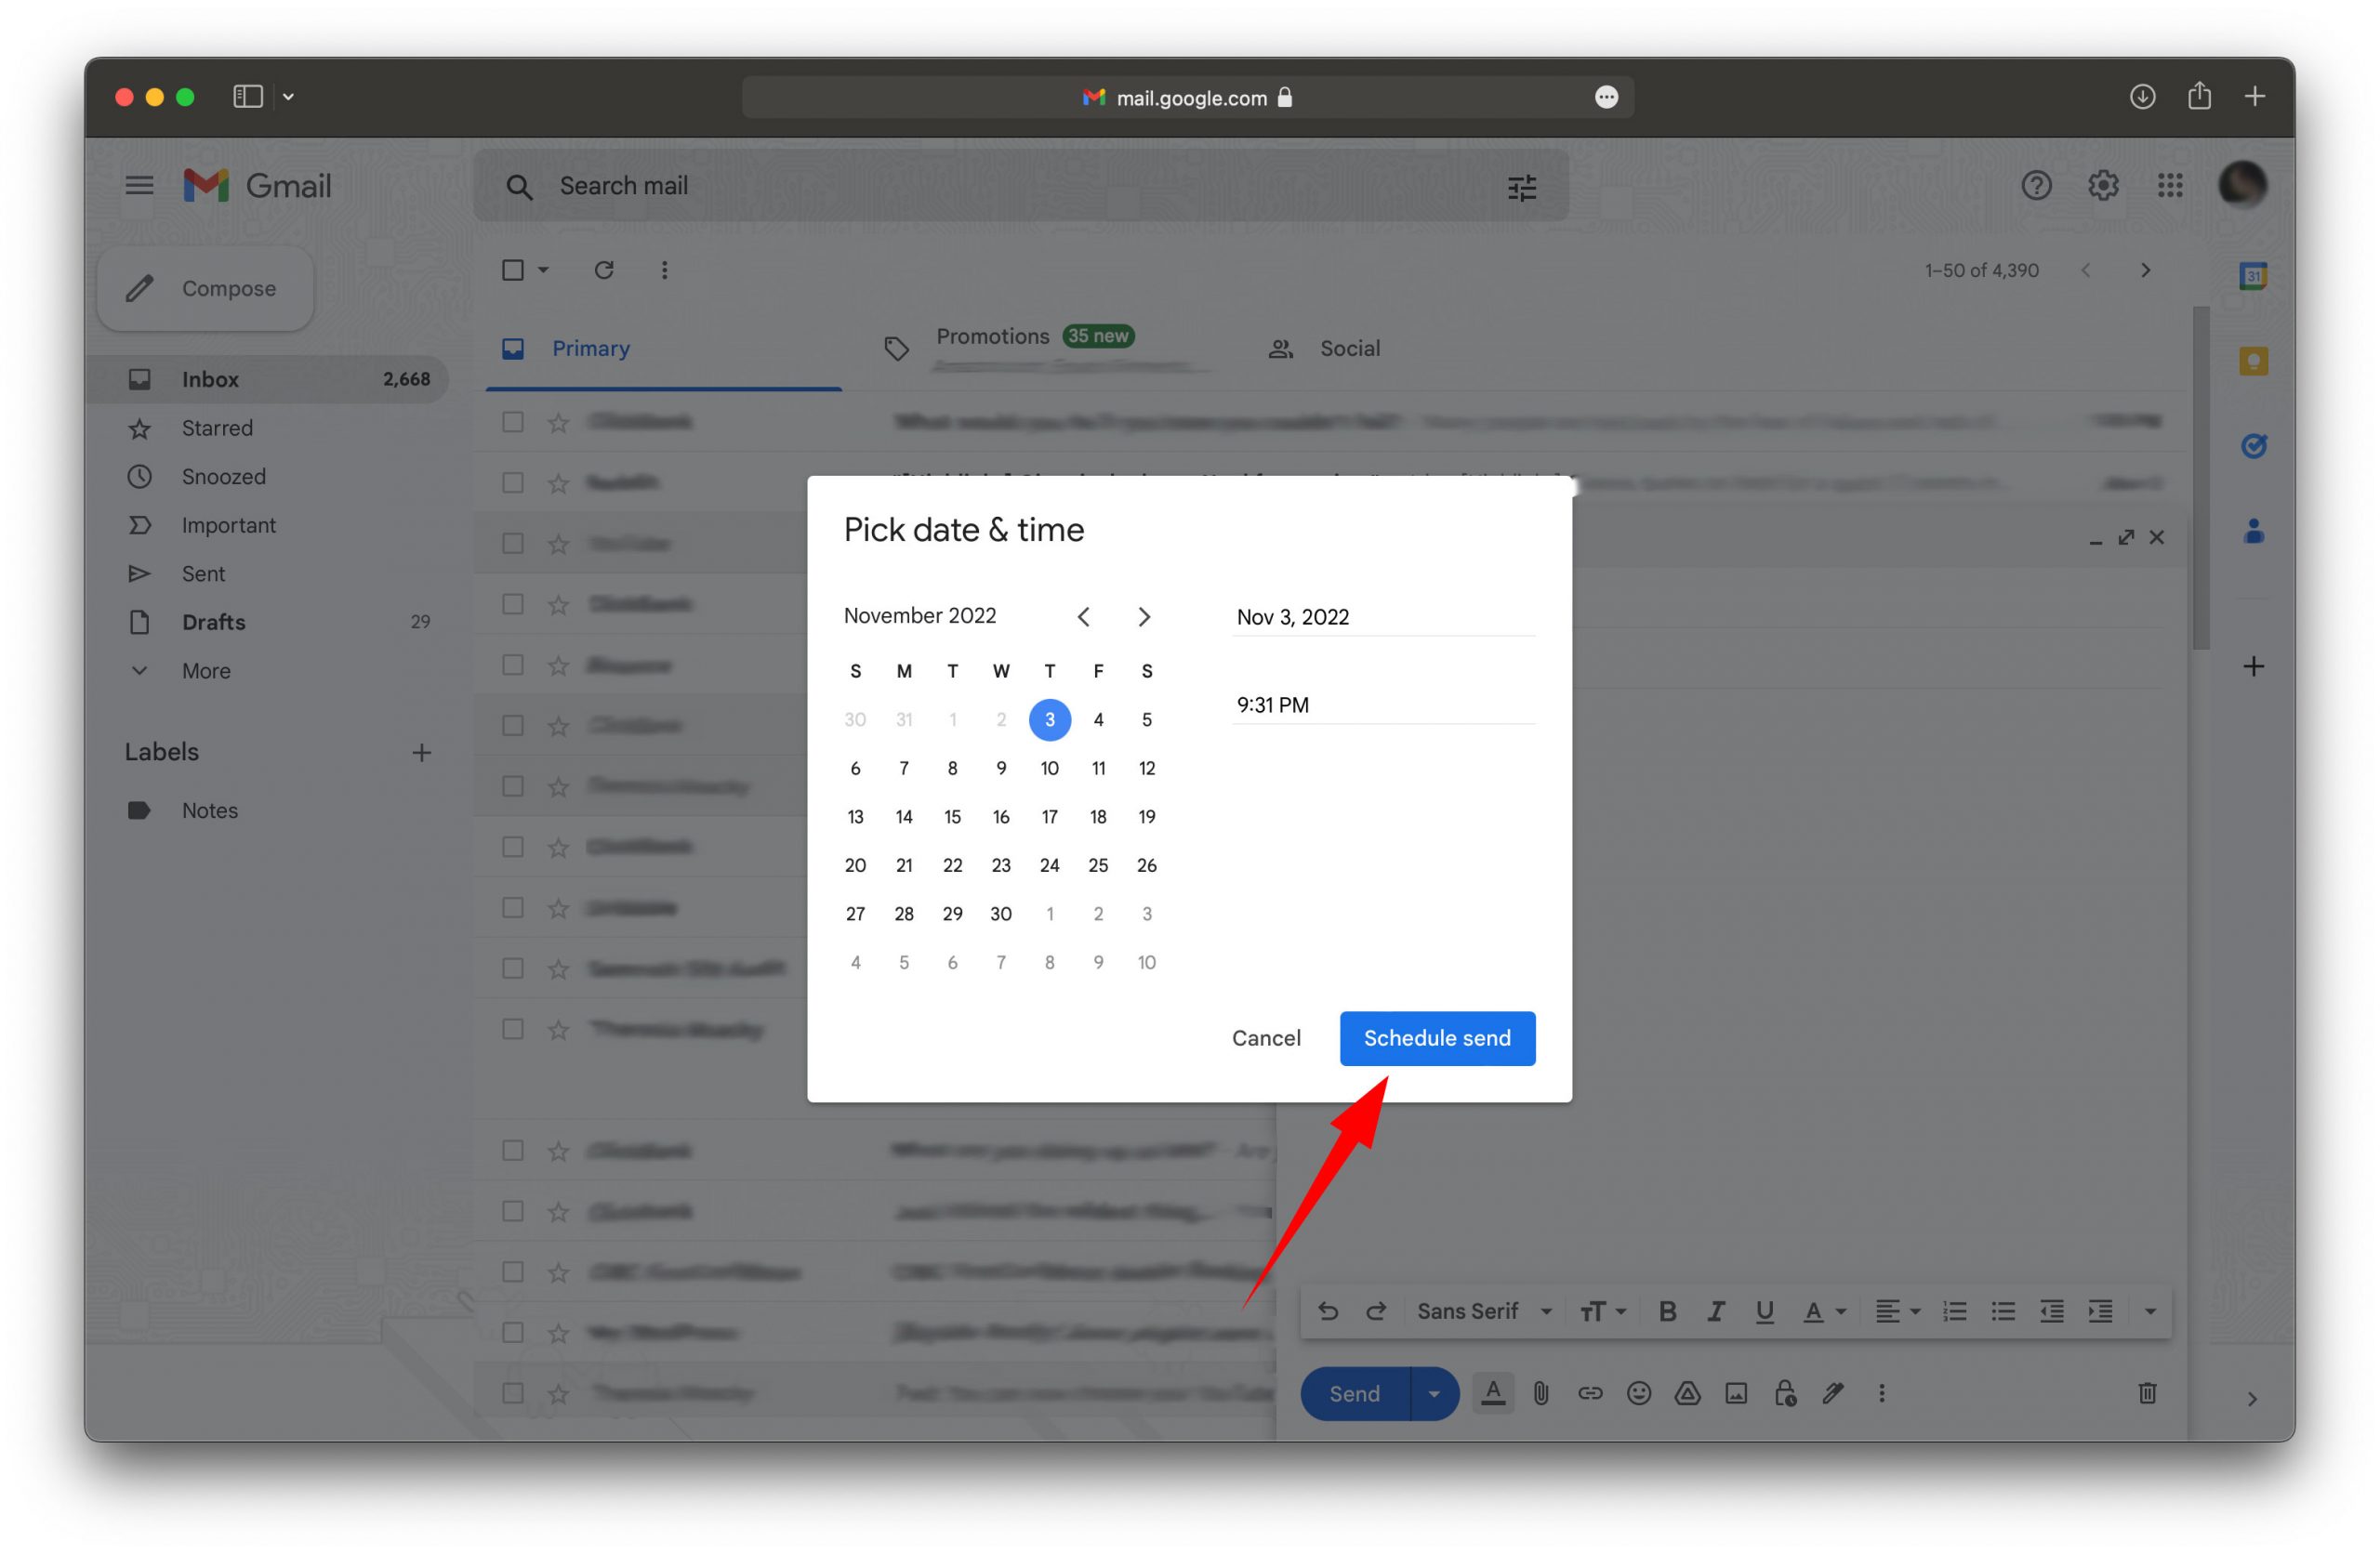
6 – To enter a date that is not on the list, click the pick date and time option.
7 – Enter a custom date and time, then click the schedule send button.
2 – Will A Scheduled Email Send If Computer Is Off Gmail?
Yes, a scheduled email will be sent even if the device you used to schedule the email is not powered on.
When you schedule an email, it is stored on a Google server, which is on 24/7. The scheduled email will then be sent from the server to your recipient at the scheduled time and date.
3 – Does Gmail Schedule Send Work Offline?
Yes, the Gmail schedule feature will send scheduled emails even if your device is offline. However, your device must be online to initially schedule an email.
4 – Does Gmail Need To Be Open For Scheduled Emails?
No, once you have scheduled the email, Gmail no longer needs to be open for that email to be delivered when the scheduled time has arrived.
5 – Can Someone Tell An Email Was Scheduled In Gmail?
No, your recipient will not be able to tell if an email they received was sent immediately or if you had it scheduled to be sent on the day they received it.
Even if the recipient inspects the email, they will not find any additional email headers indicating that it was scheduled.
Additionally, the time stamp displayed underneath your sender information on their end will be the date and time that they received the email.
6 – Can You Tell If An Email Was Scheduled In Gmail?
As the recipient, there is no way of telling if an email was scheduled. The sender is the only person who would know how it was sent.
7 – Can You Cancel A Scheduled Email In Gmail?
Yes, in Gmail, you can cancel a scheduled email anytime before the scheduled time has arrived.
How To Cancel A Scheduled Email In Gmail?
1 – From your Gmail inbox, click the scheduled label.
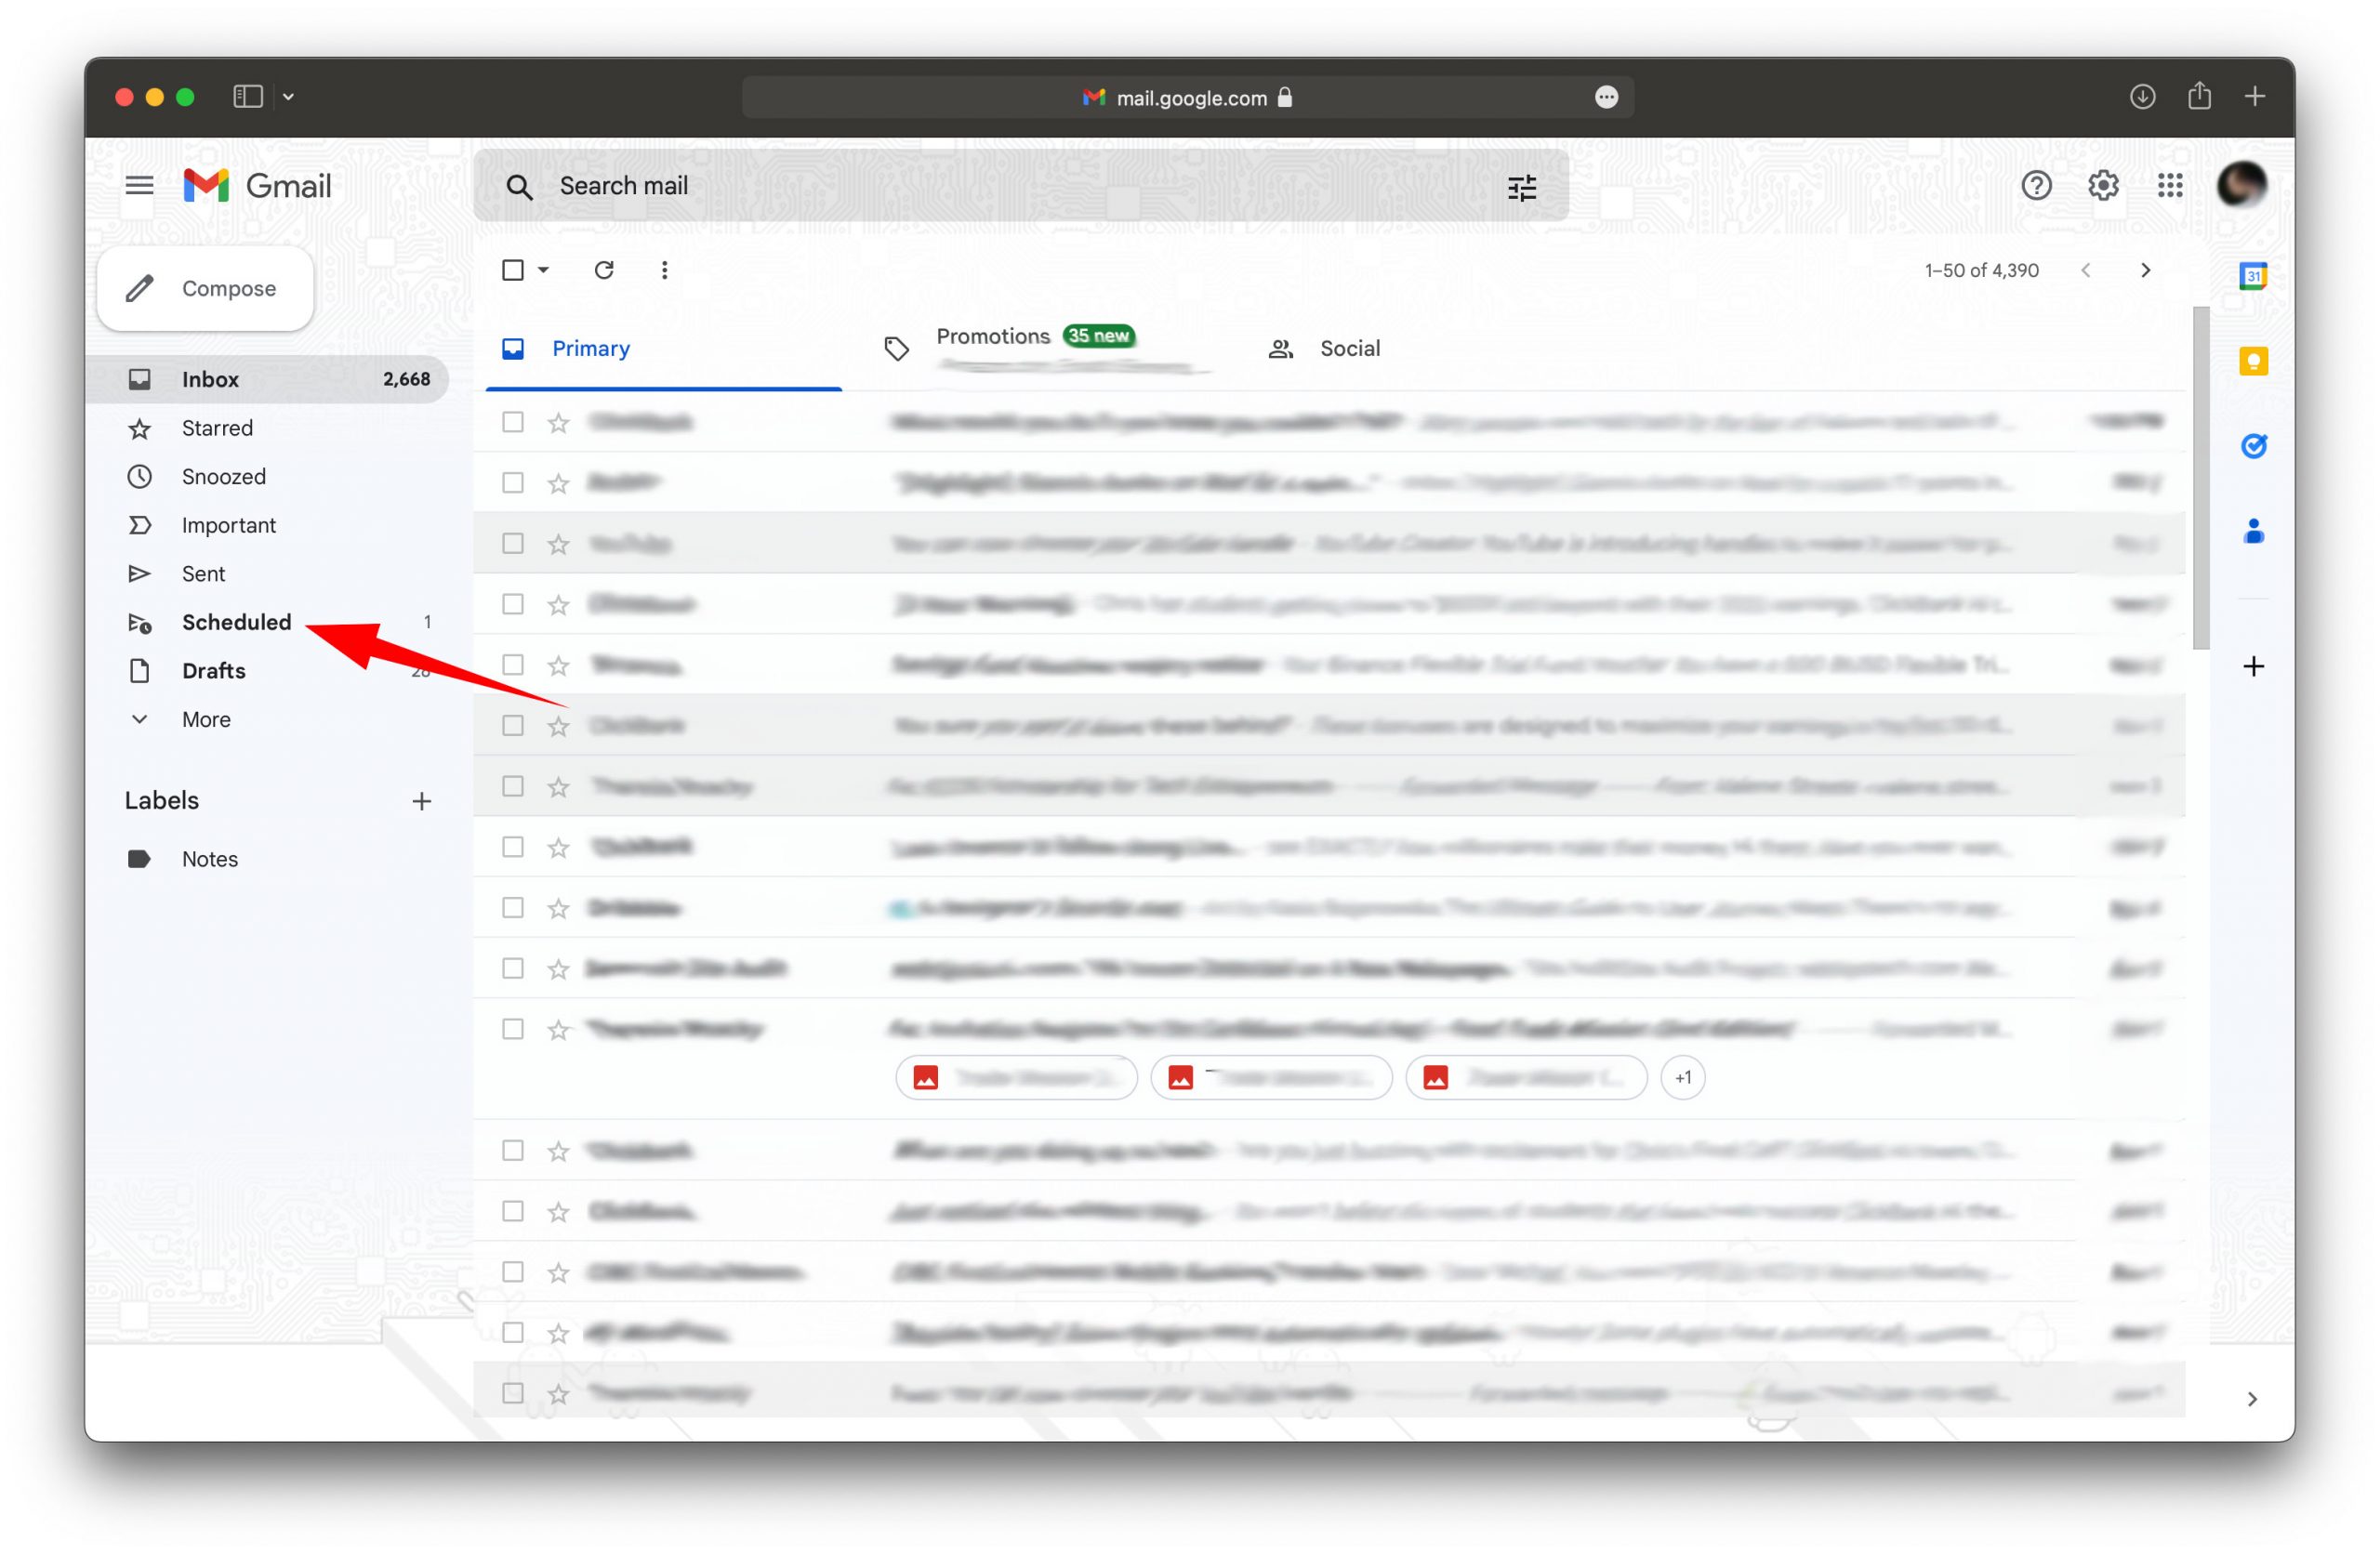
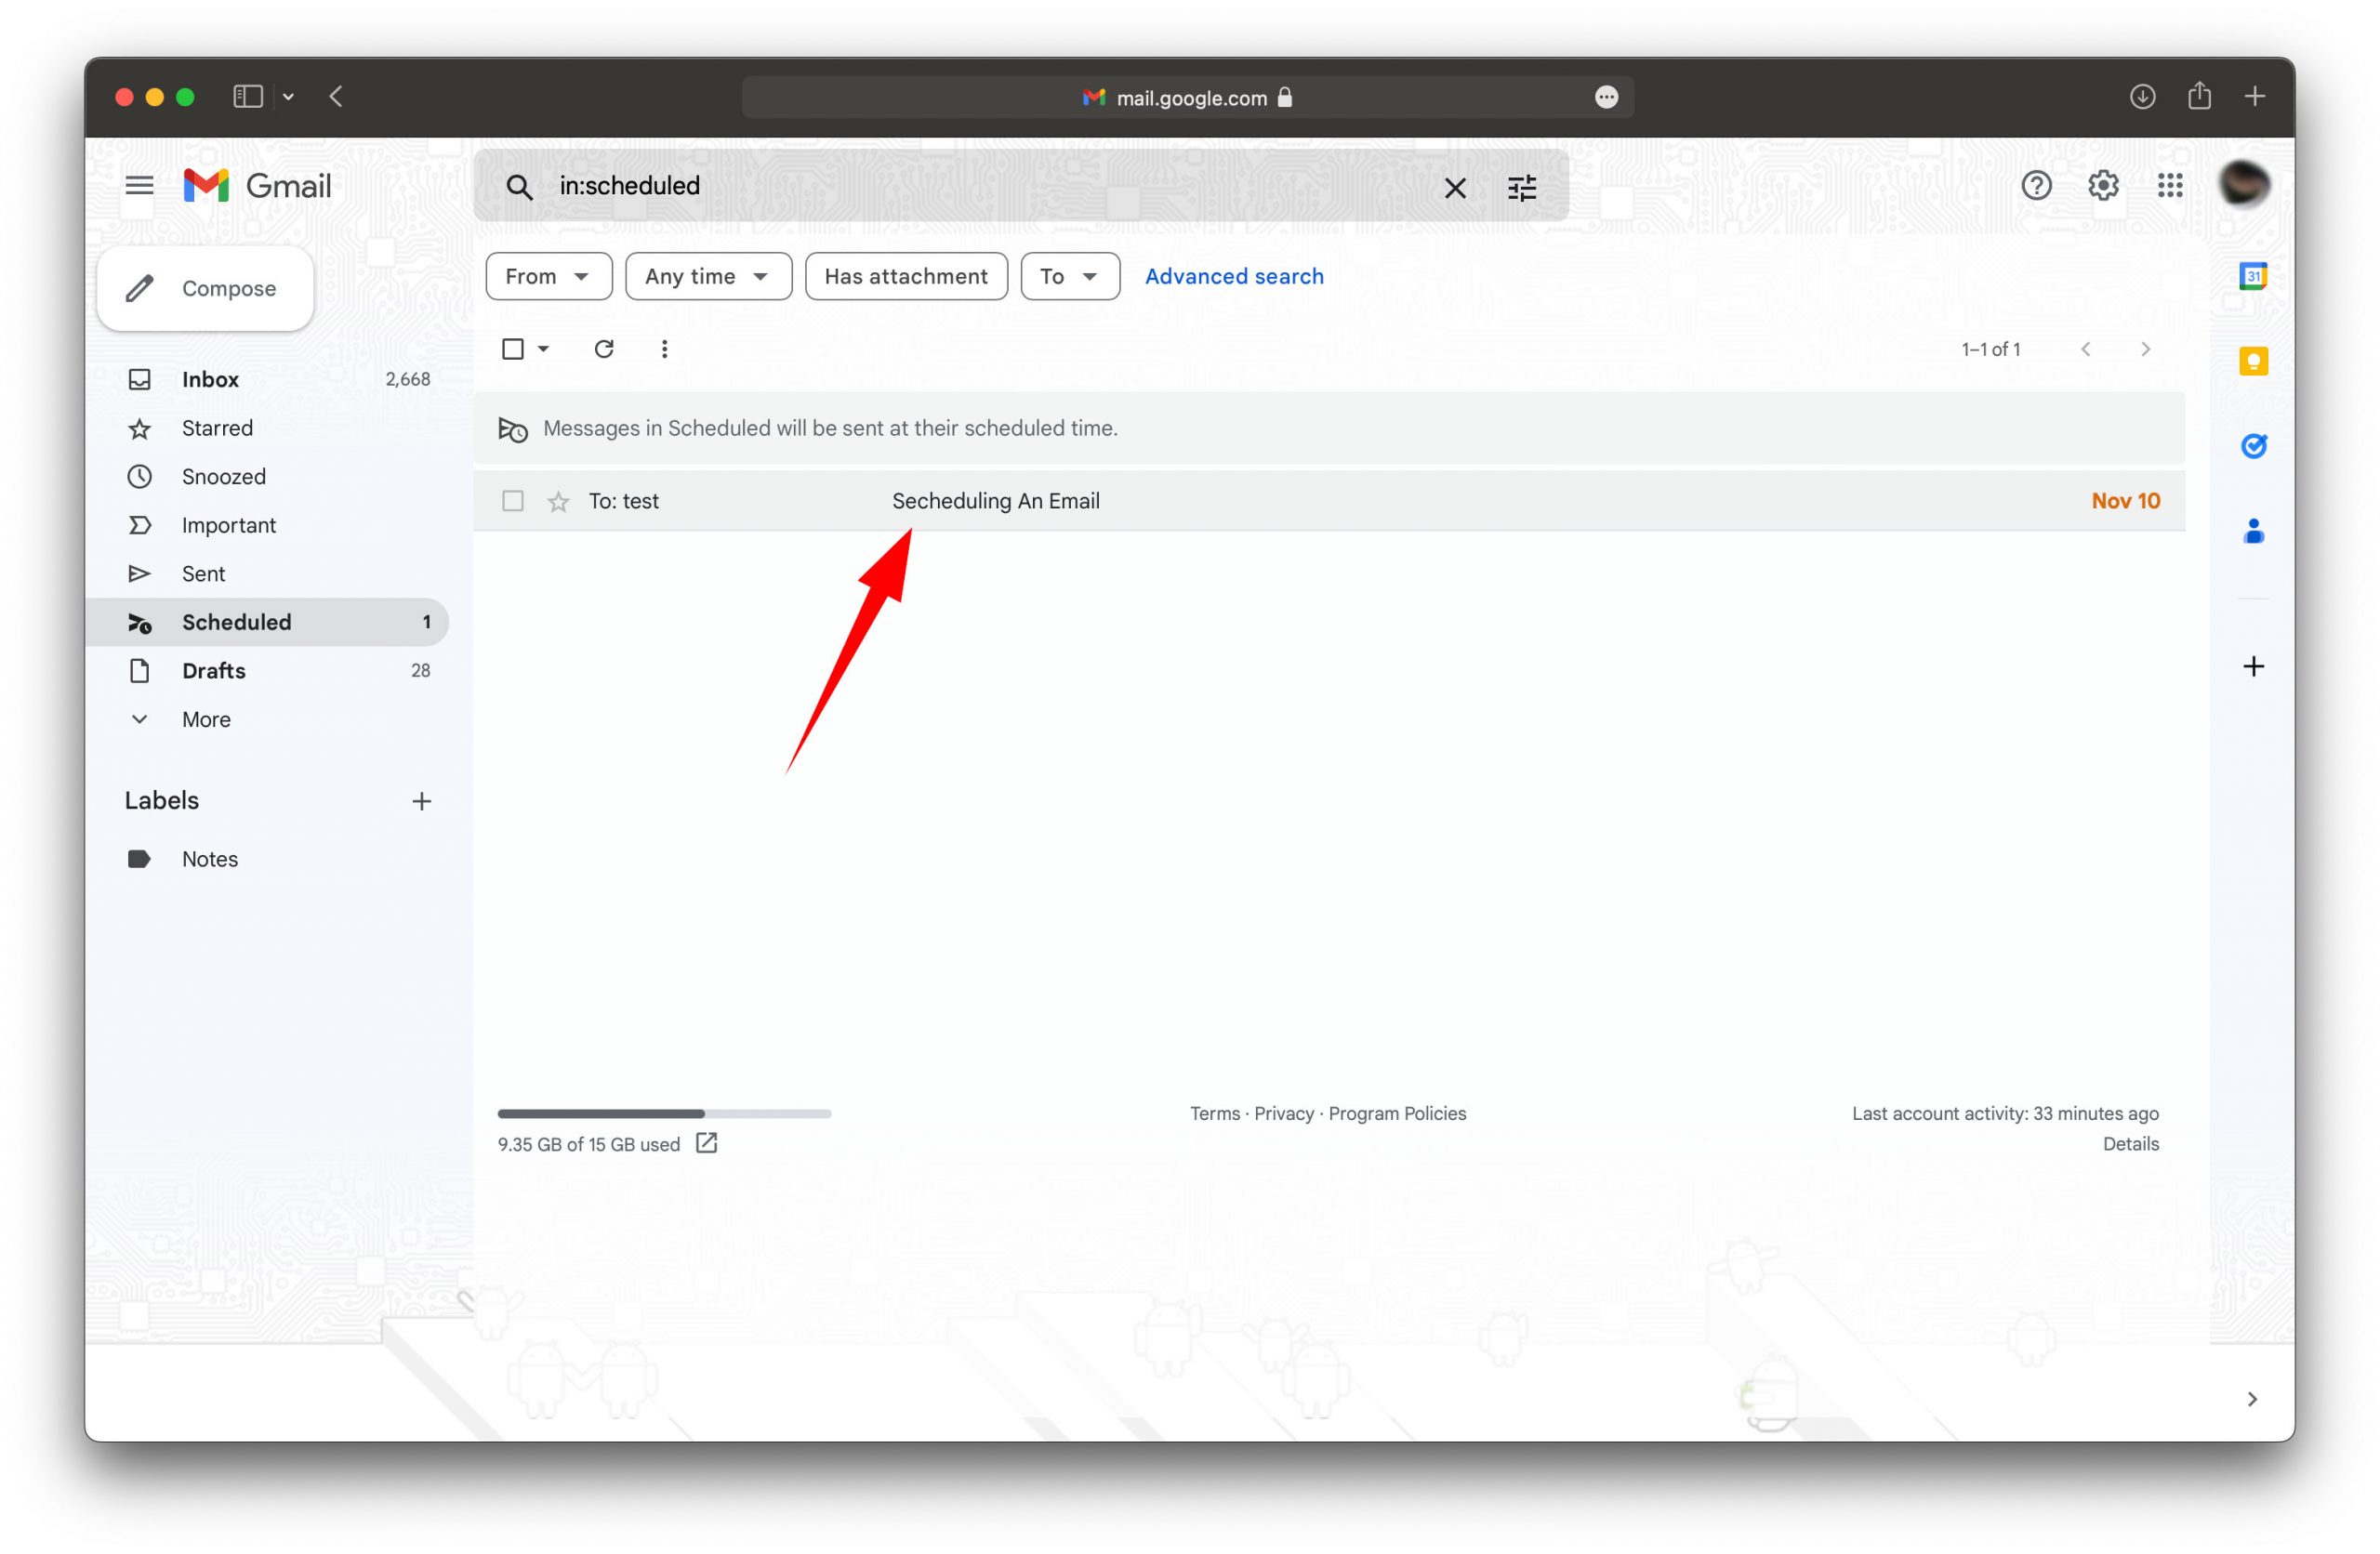
2 – Locate the scheduled email and open it.
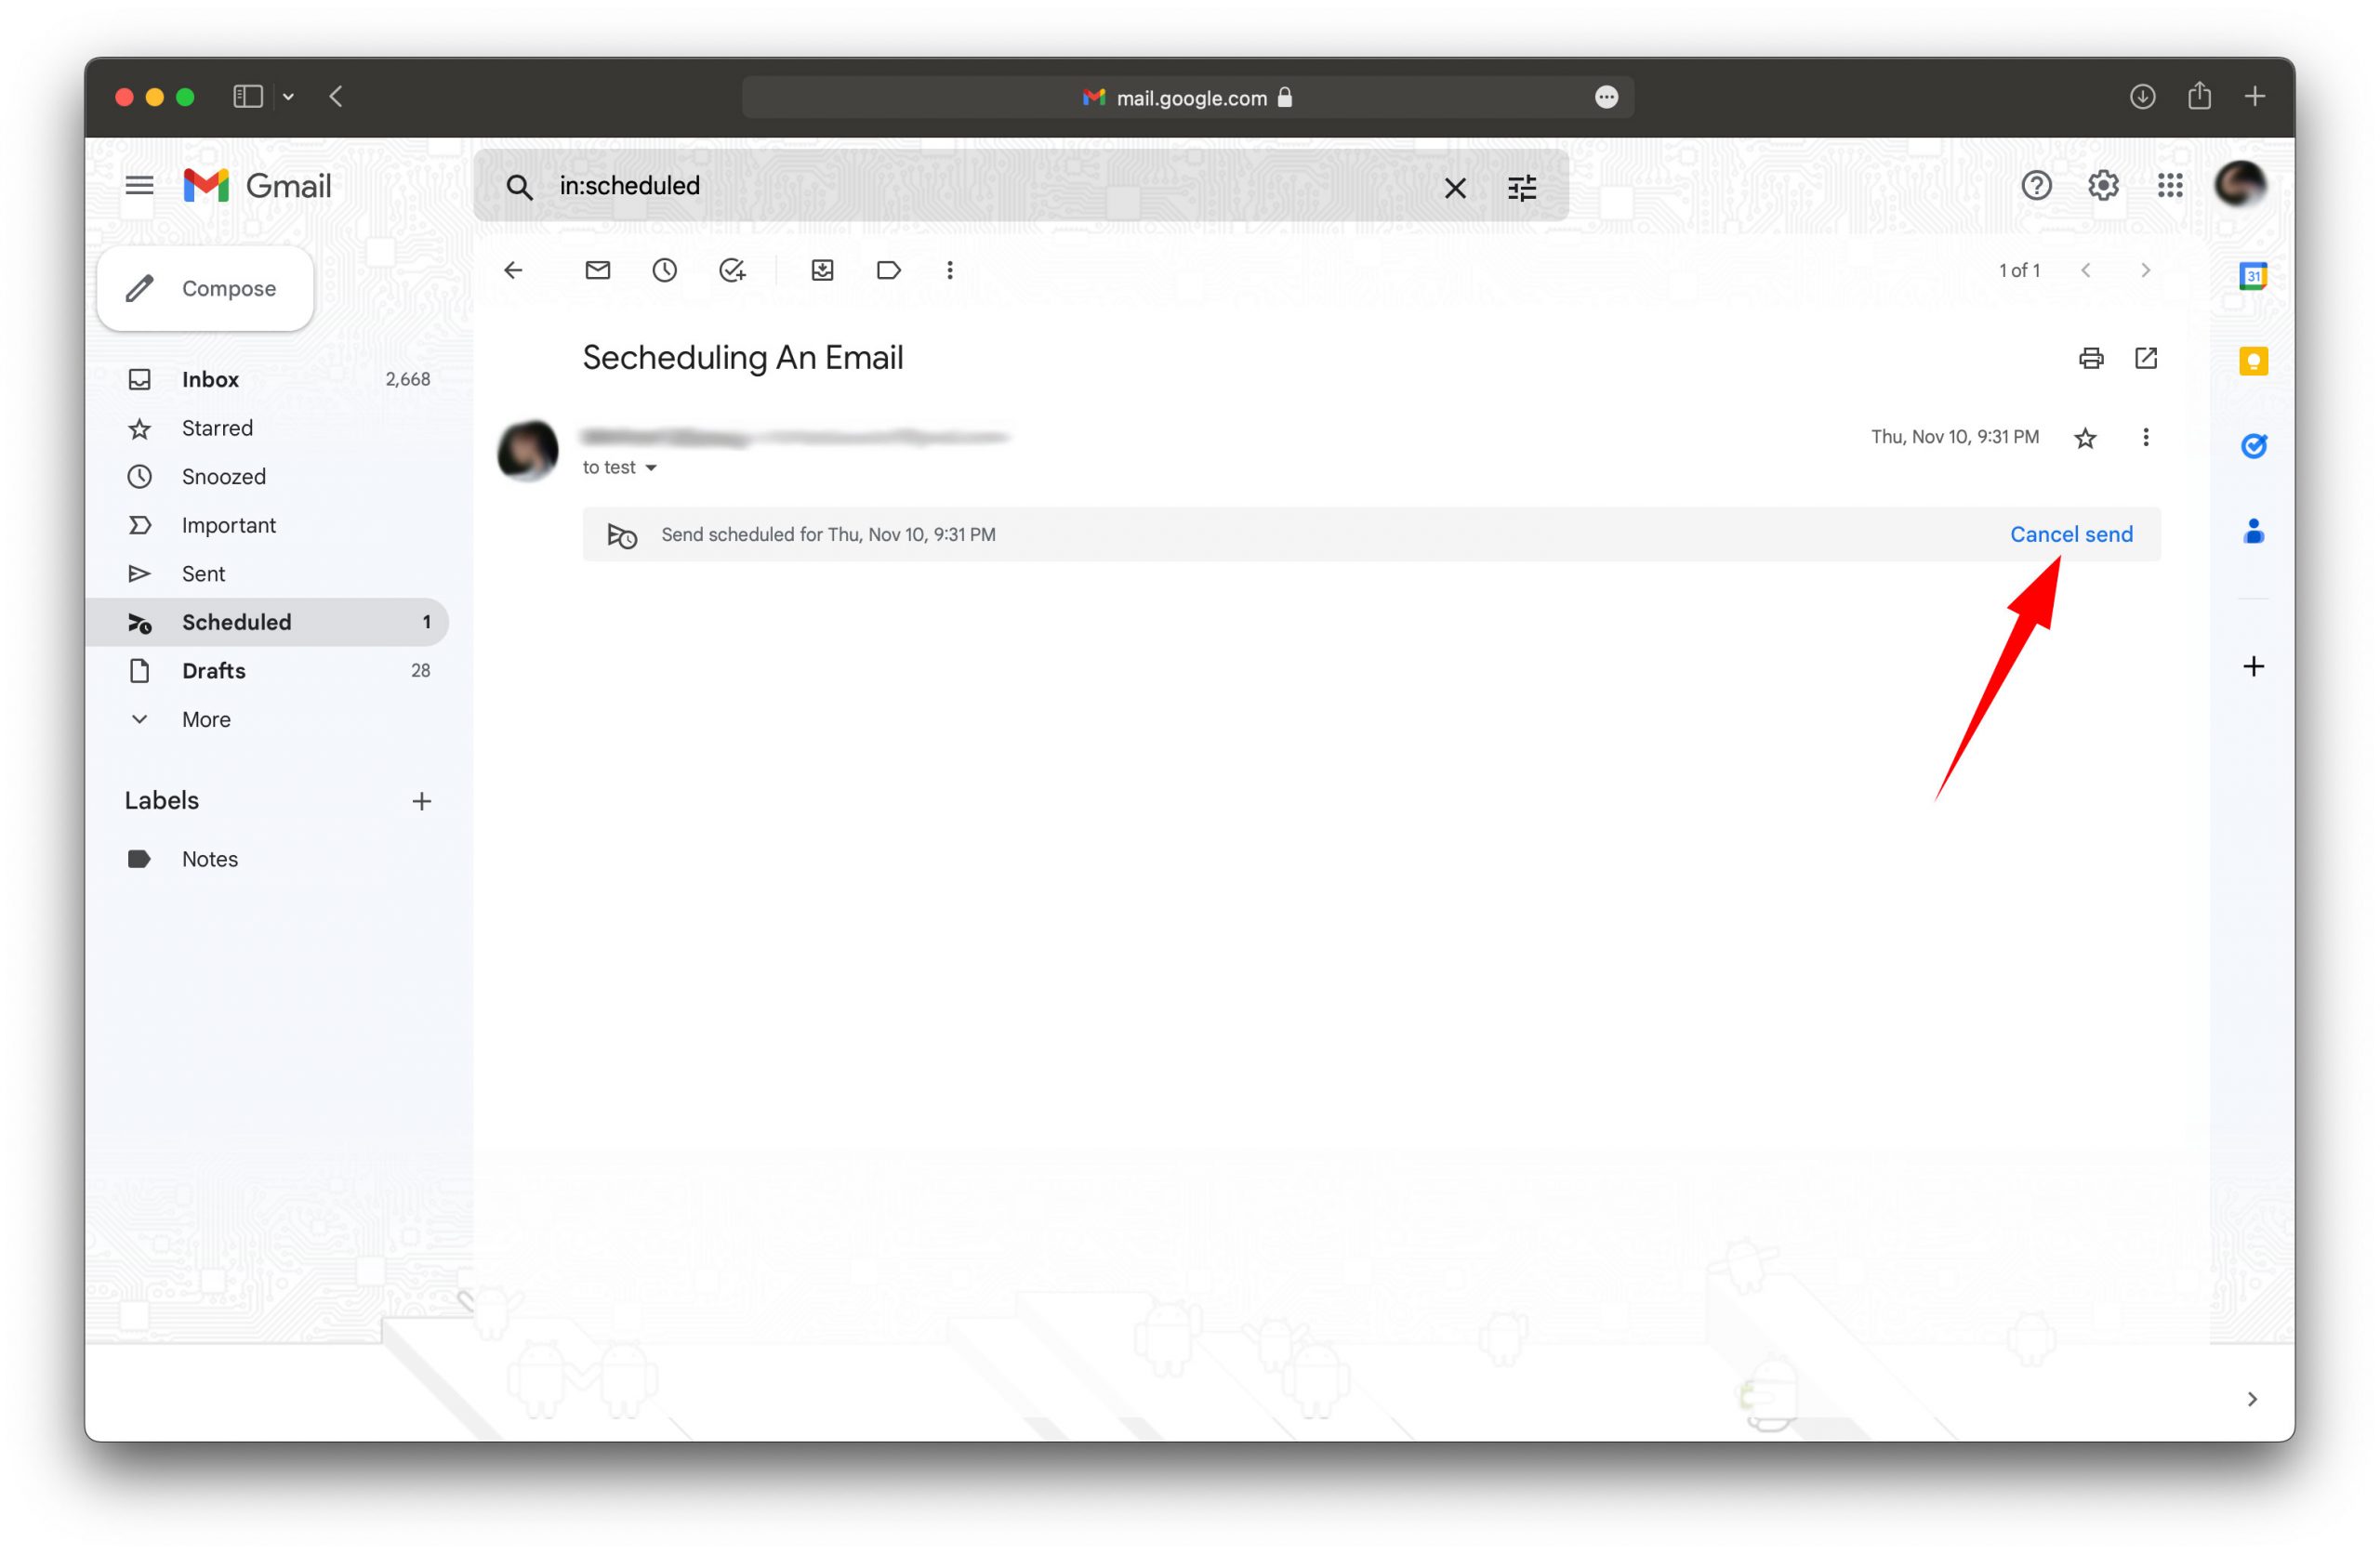
3 – Click the cancel send button at the top right of the page.
8 – How To Edit A Scheduled Email In Gmail?
1 – From your Gmail inbox, navigate to the scheduled label.
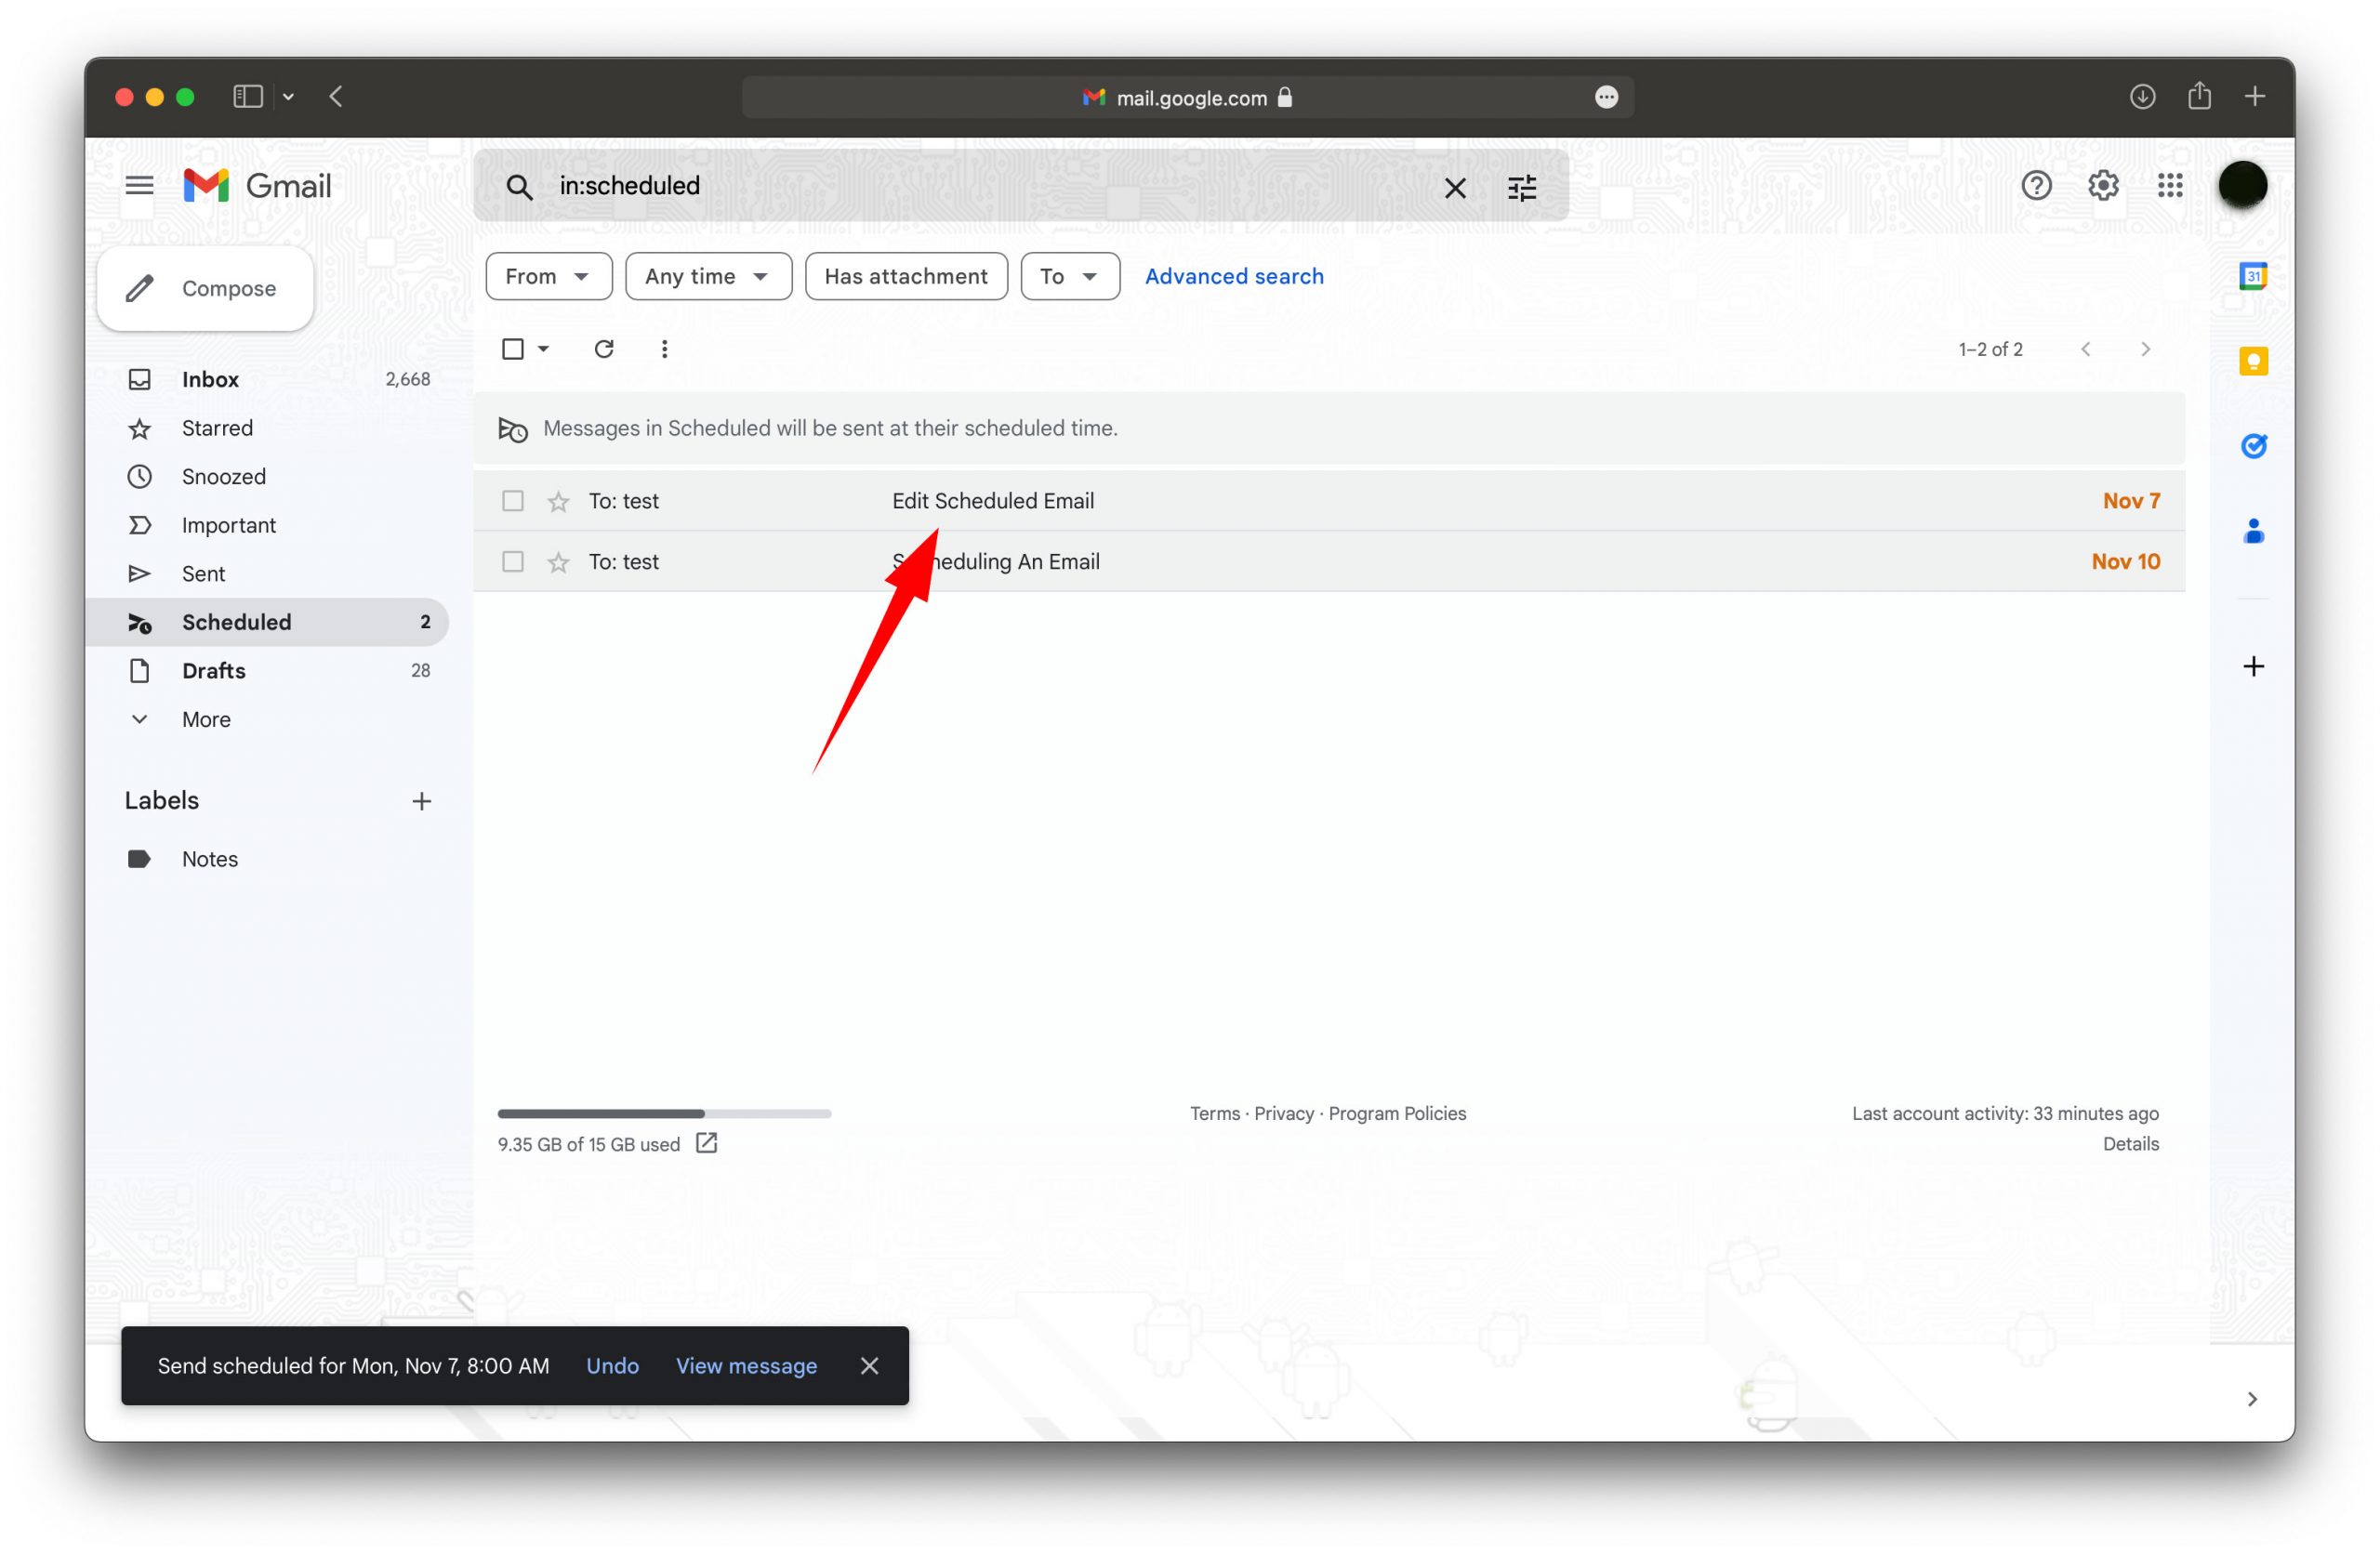
2 – Find the email that you want to edit and open it.
3 – Click the cancel send button at the top right of the page.

4 – Make your desired changes to the email.
5 – After making your changes, schedule the email again.

You can only edit a scheduled email before the scheduled send time has arrived.
9 – Can You Schedule A Recurring Email In Gmail?
There is no built-in feature in Gmail to schedule recurring emails. However, you can use the Boomerang for Gmail Chrome extension to enable this feature in Gmail.
How To Schedule Recurring Emails In Gmail?
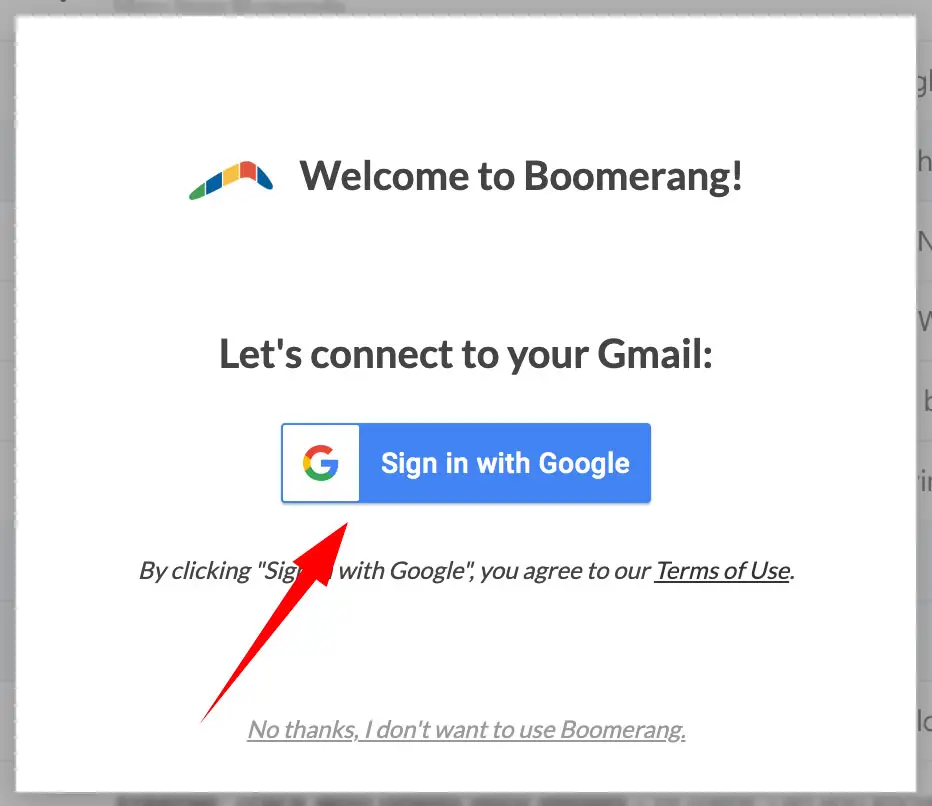
1 – Install the “Boomerang for Gmail” Chrome extension. After installing the extension, you will be redirected to your Gmail inbox.

2 – Click the sign-in with Google button on the welcome to Boomerang popup box.
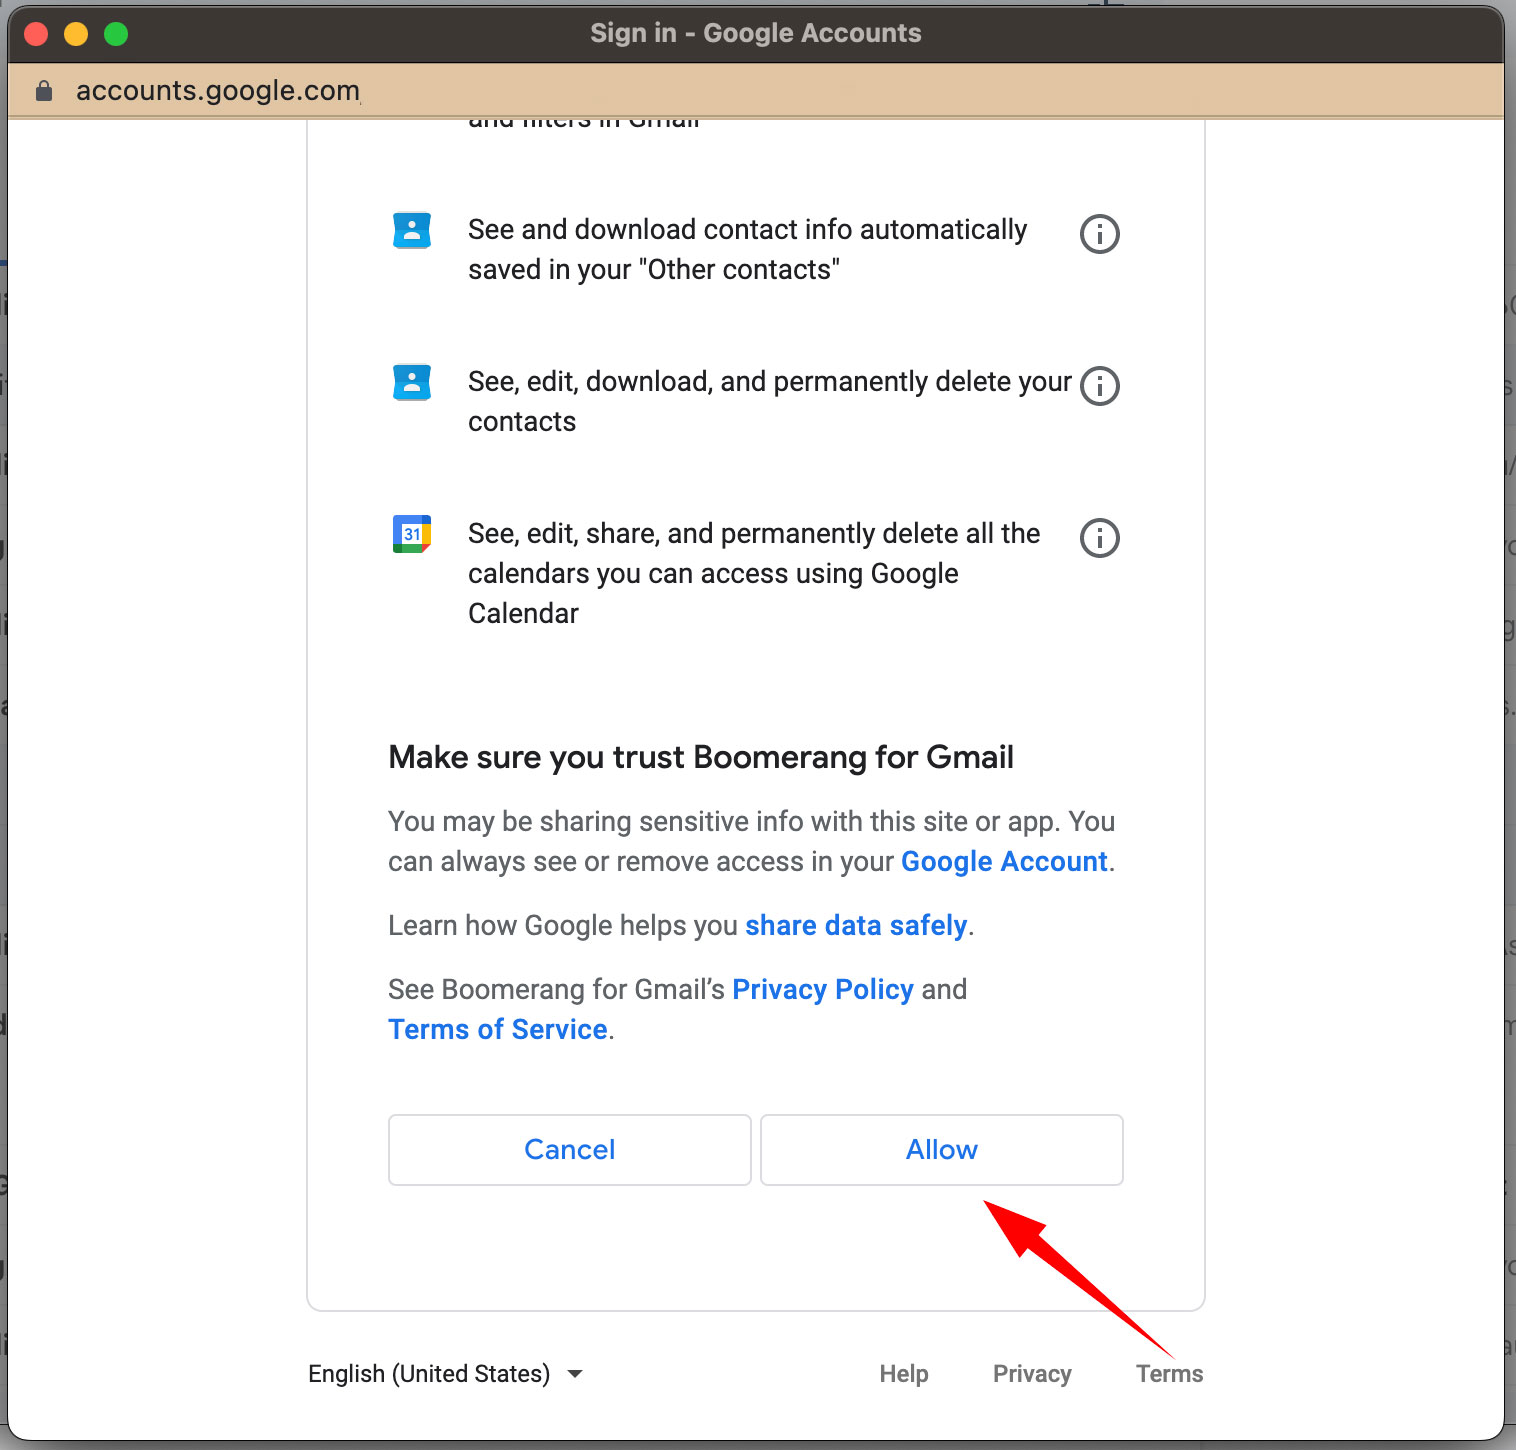
3 – Select the Gmail account that should connect to the boomerang extension.

4 – Allow boomerang access to your Gmail account.
5 – Skip or watch the optional tutorial videos.
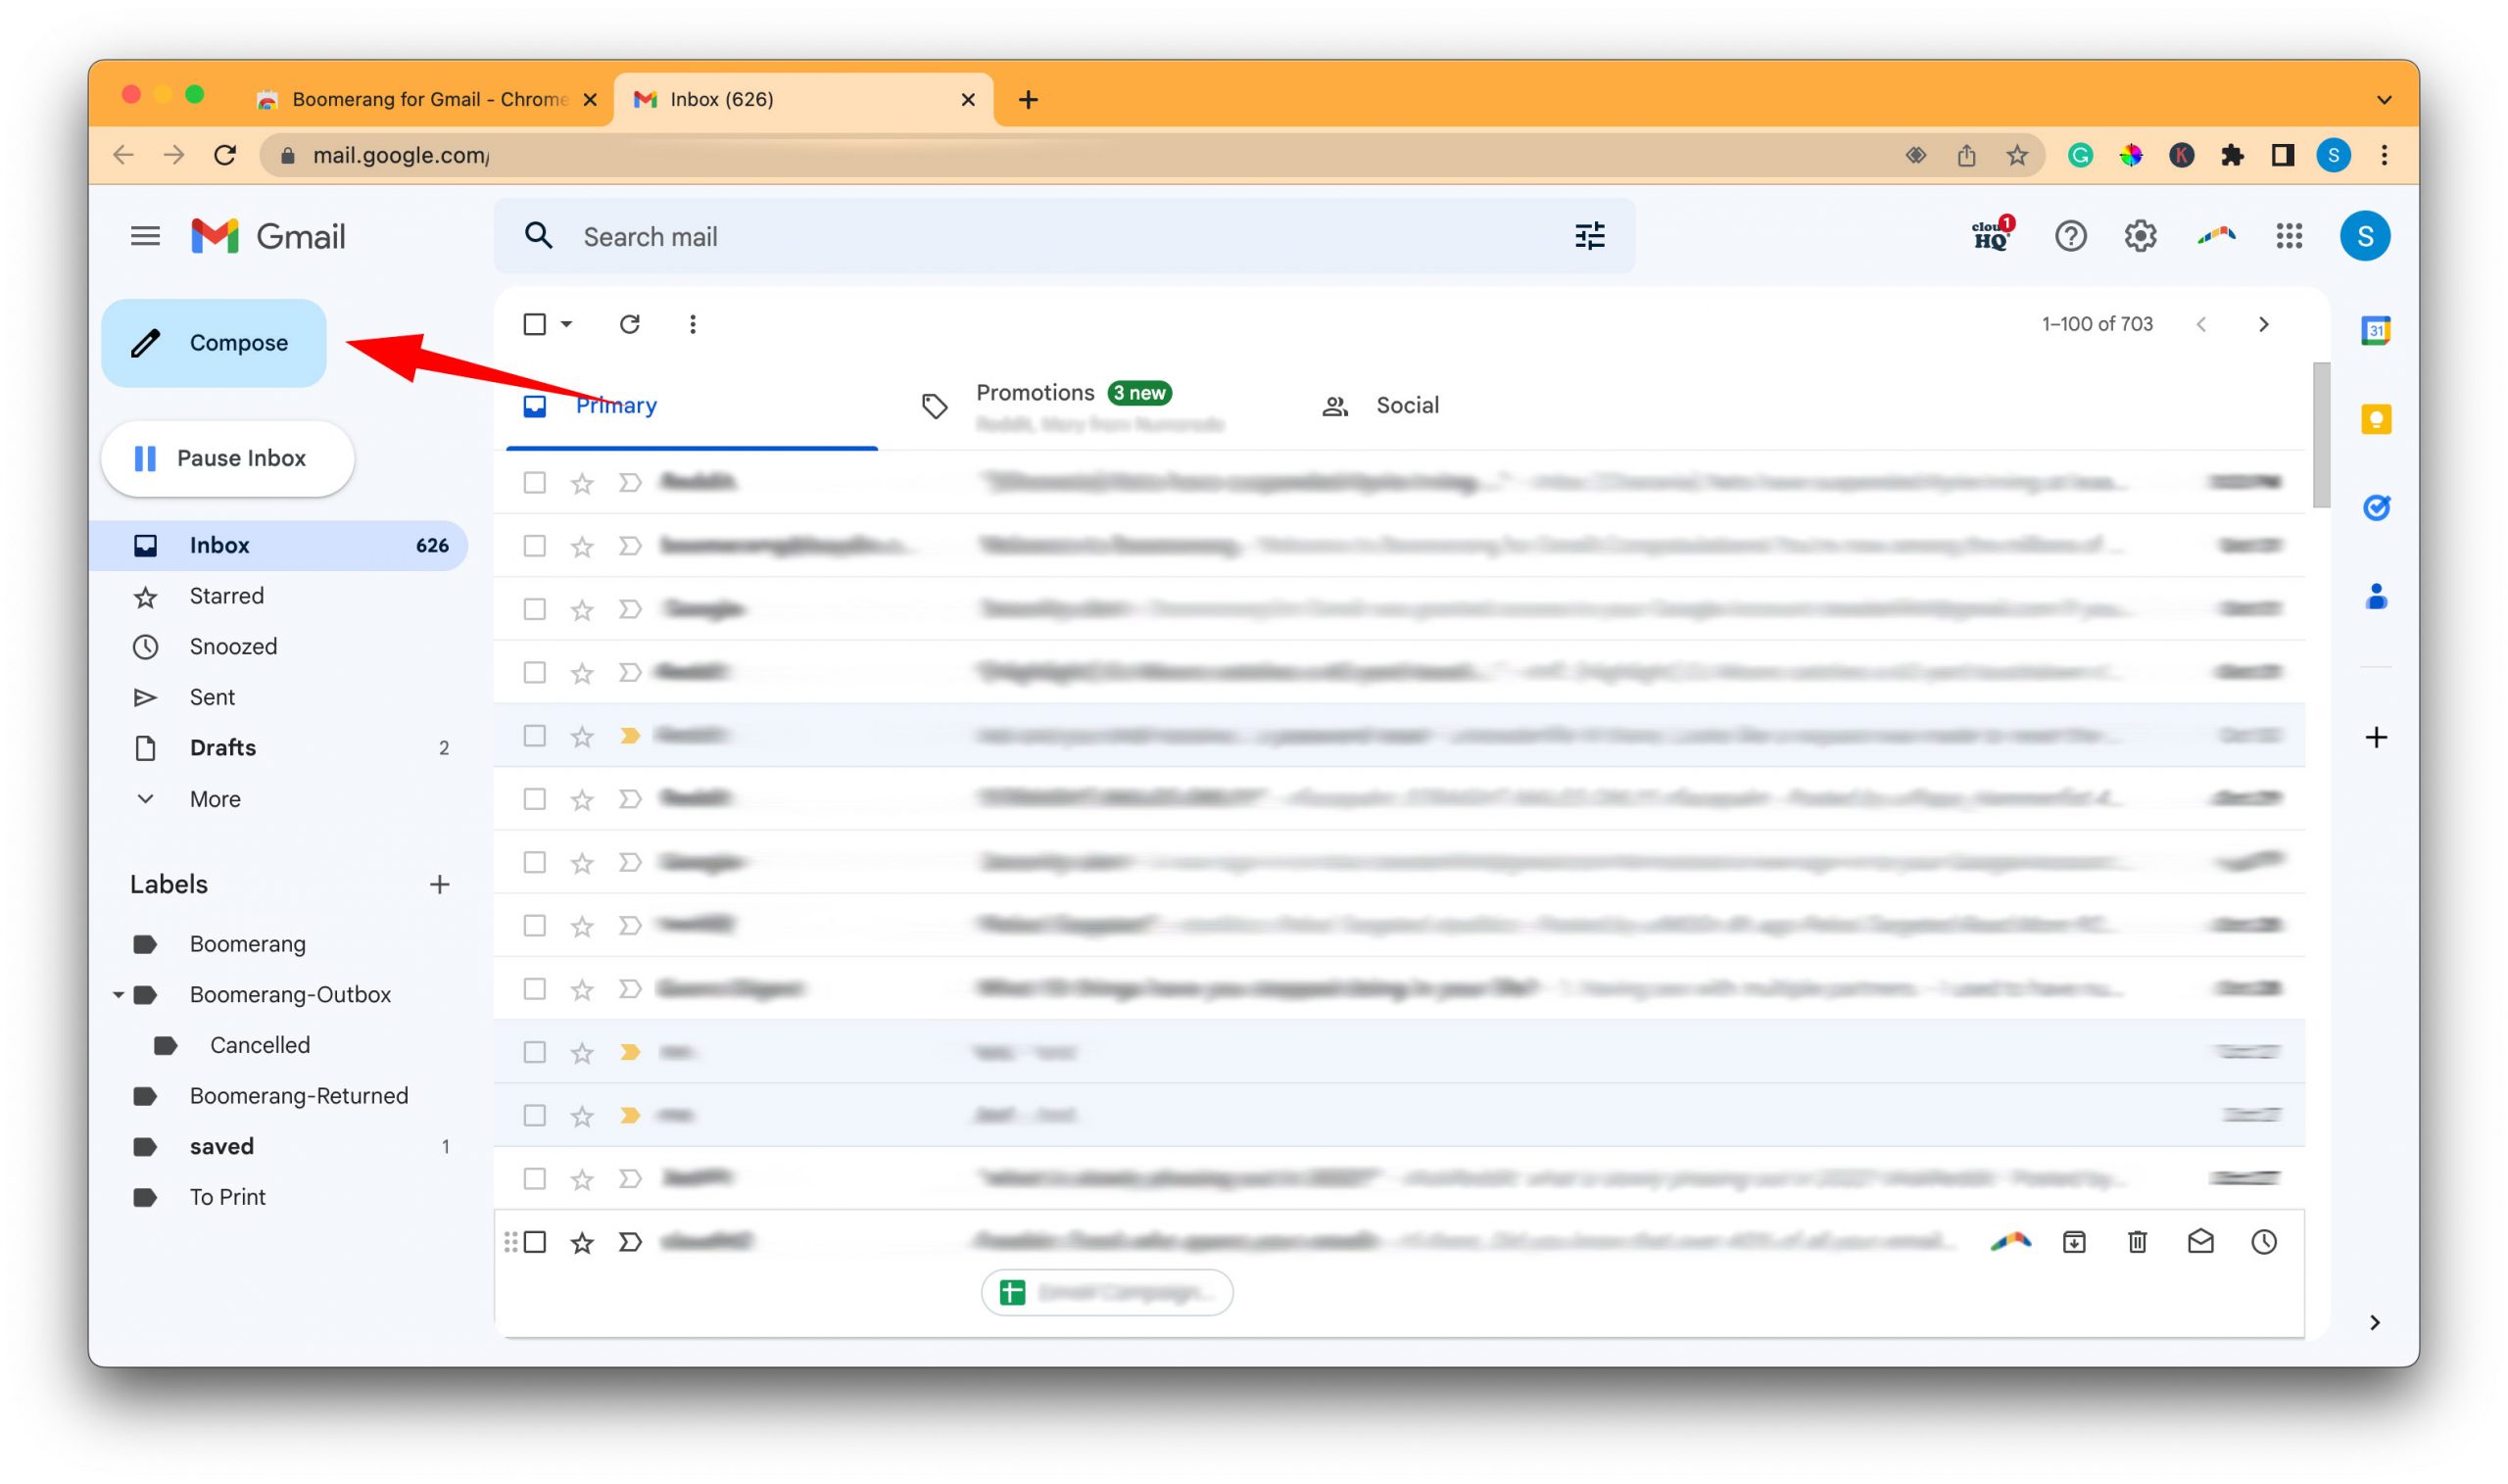
6 – Click on the compose button at the top left of the page.
7 – Enter your recipient’s email address and give the email a subject.
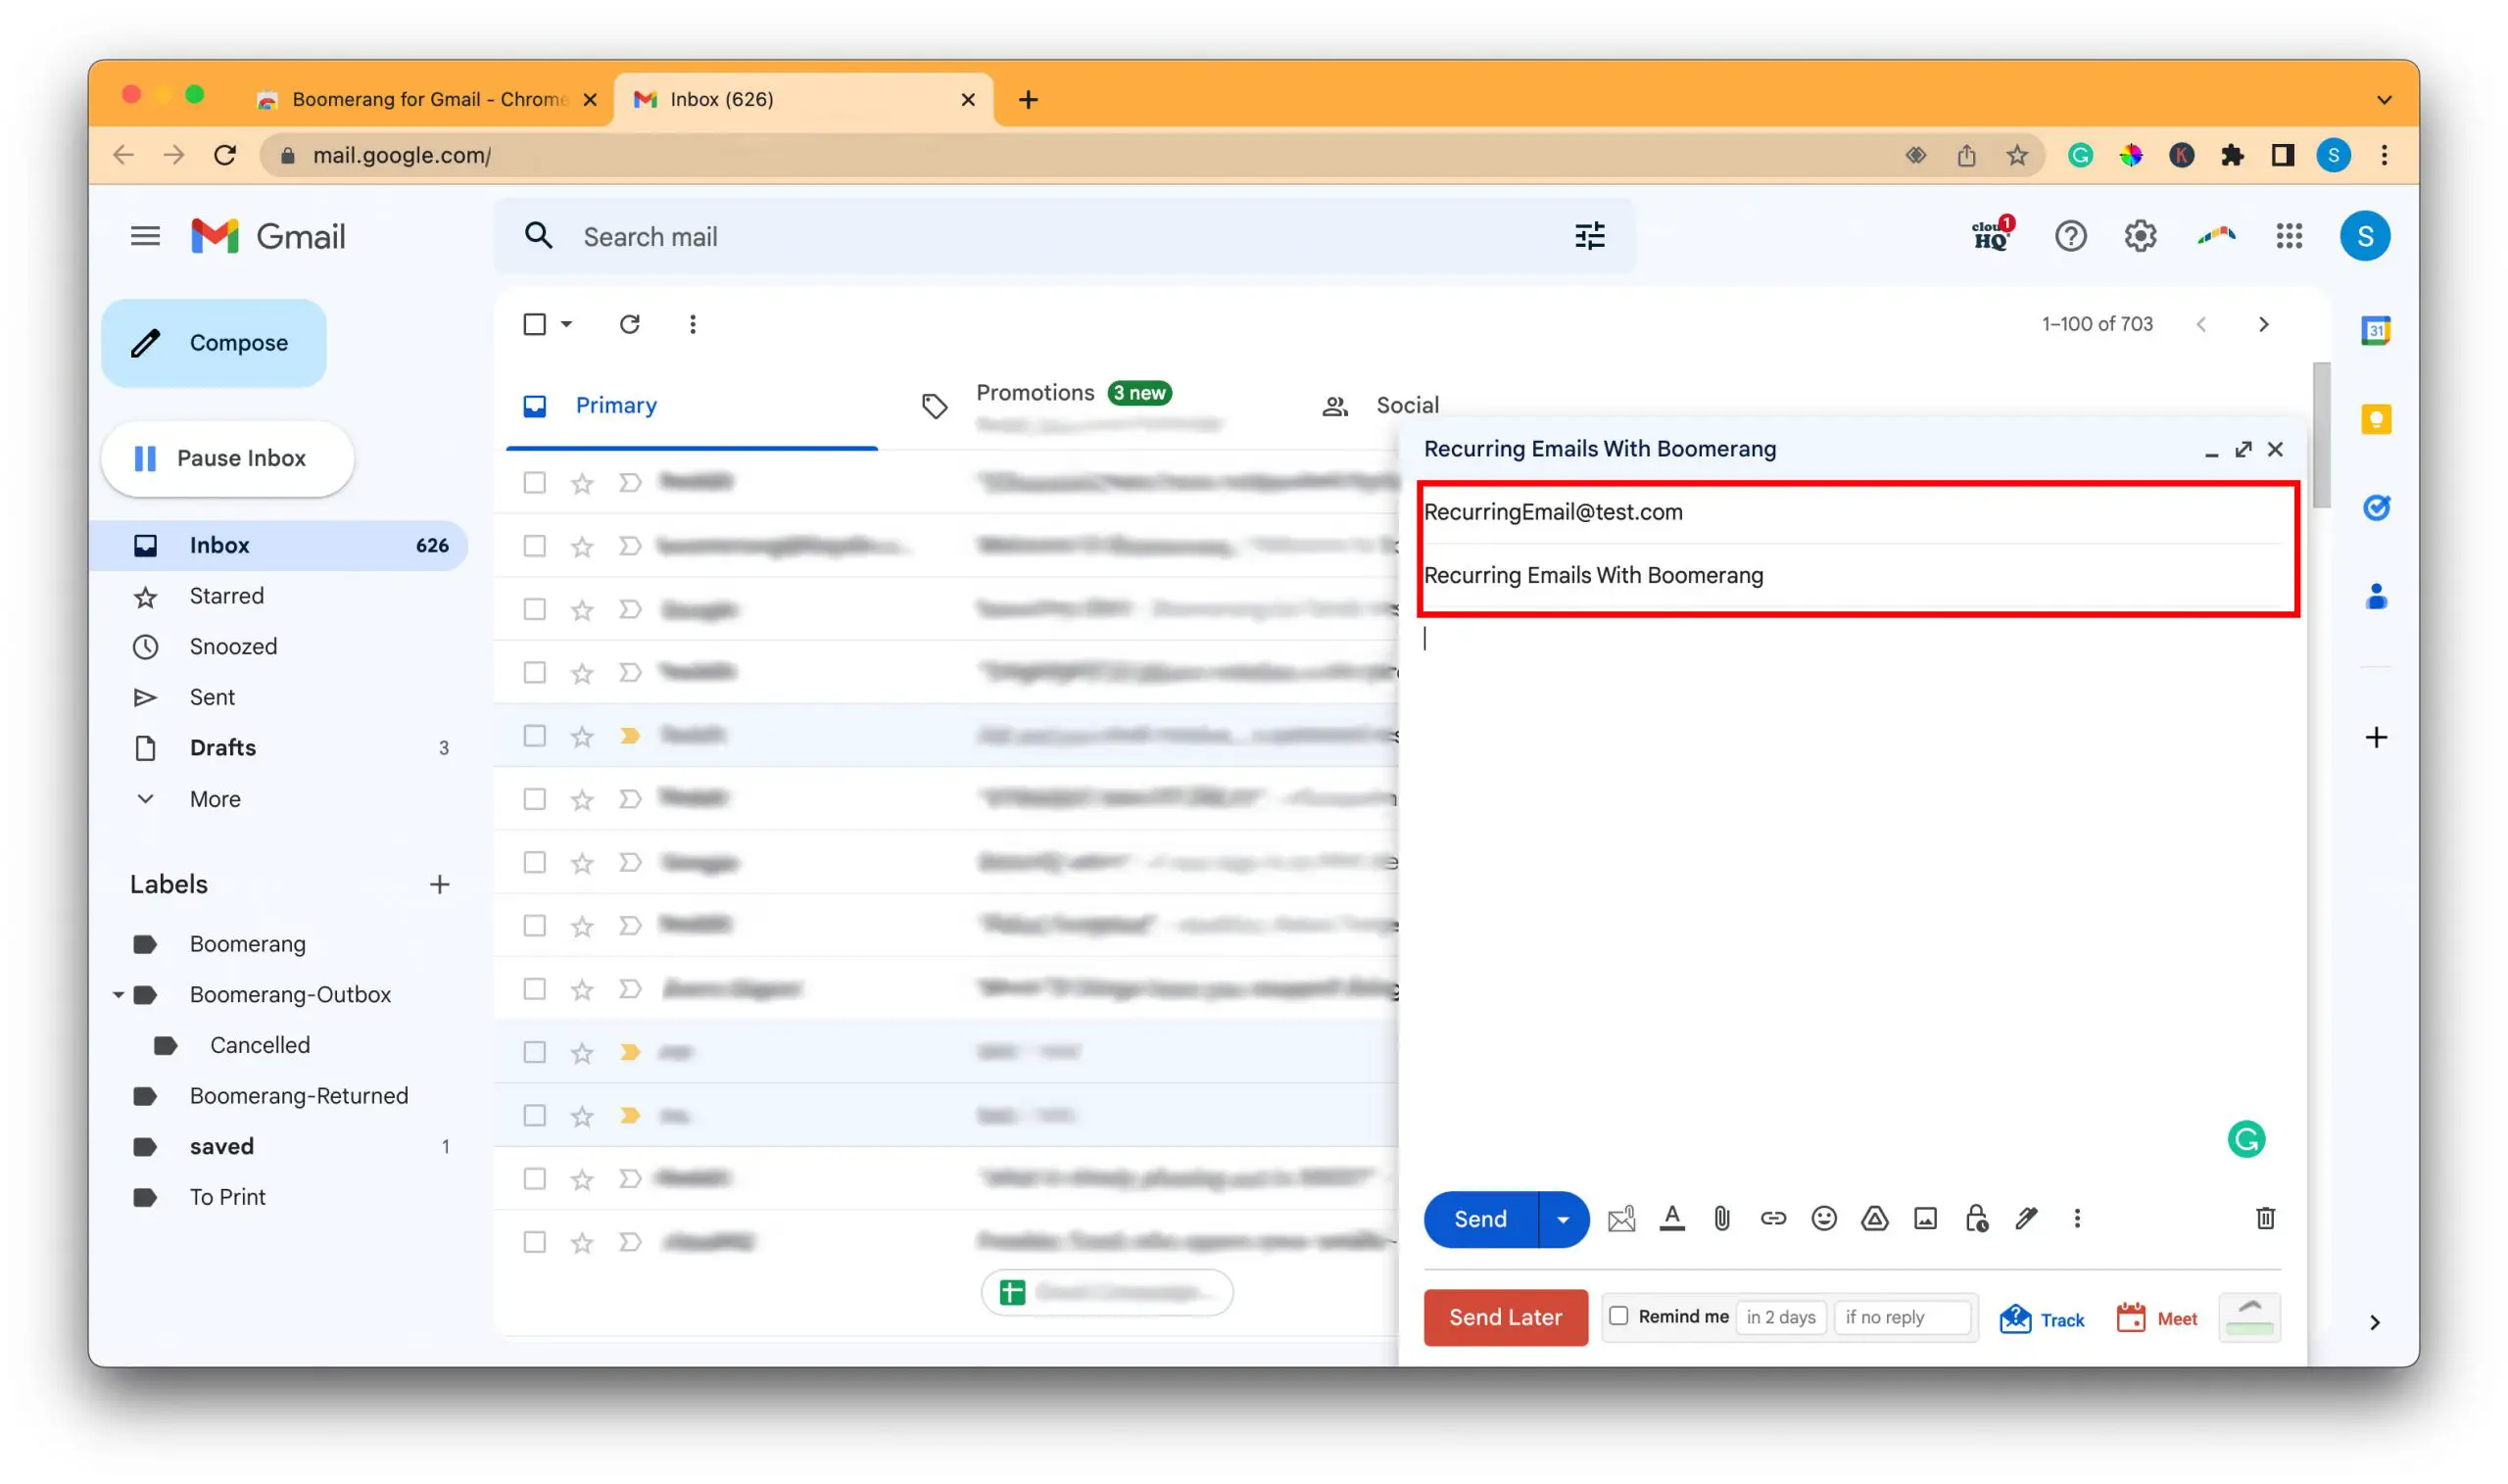
8 – Write the email and add any attachments.
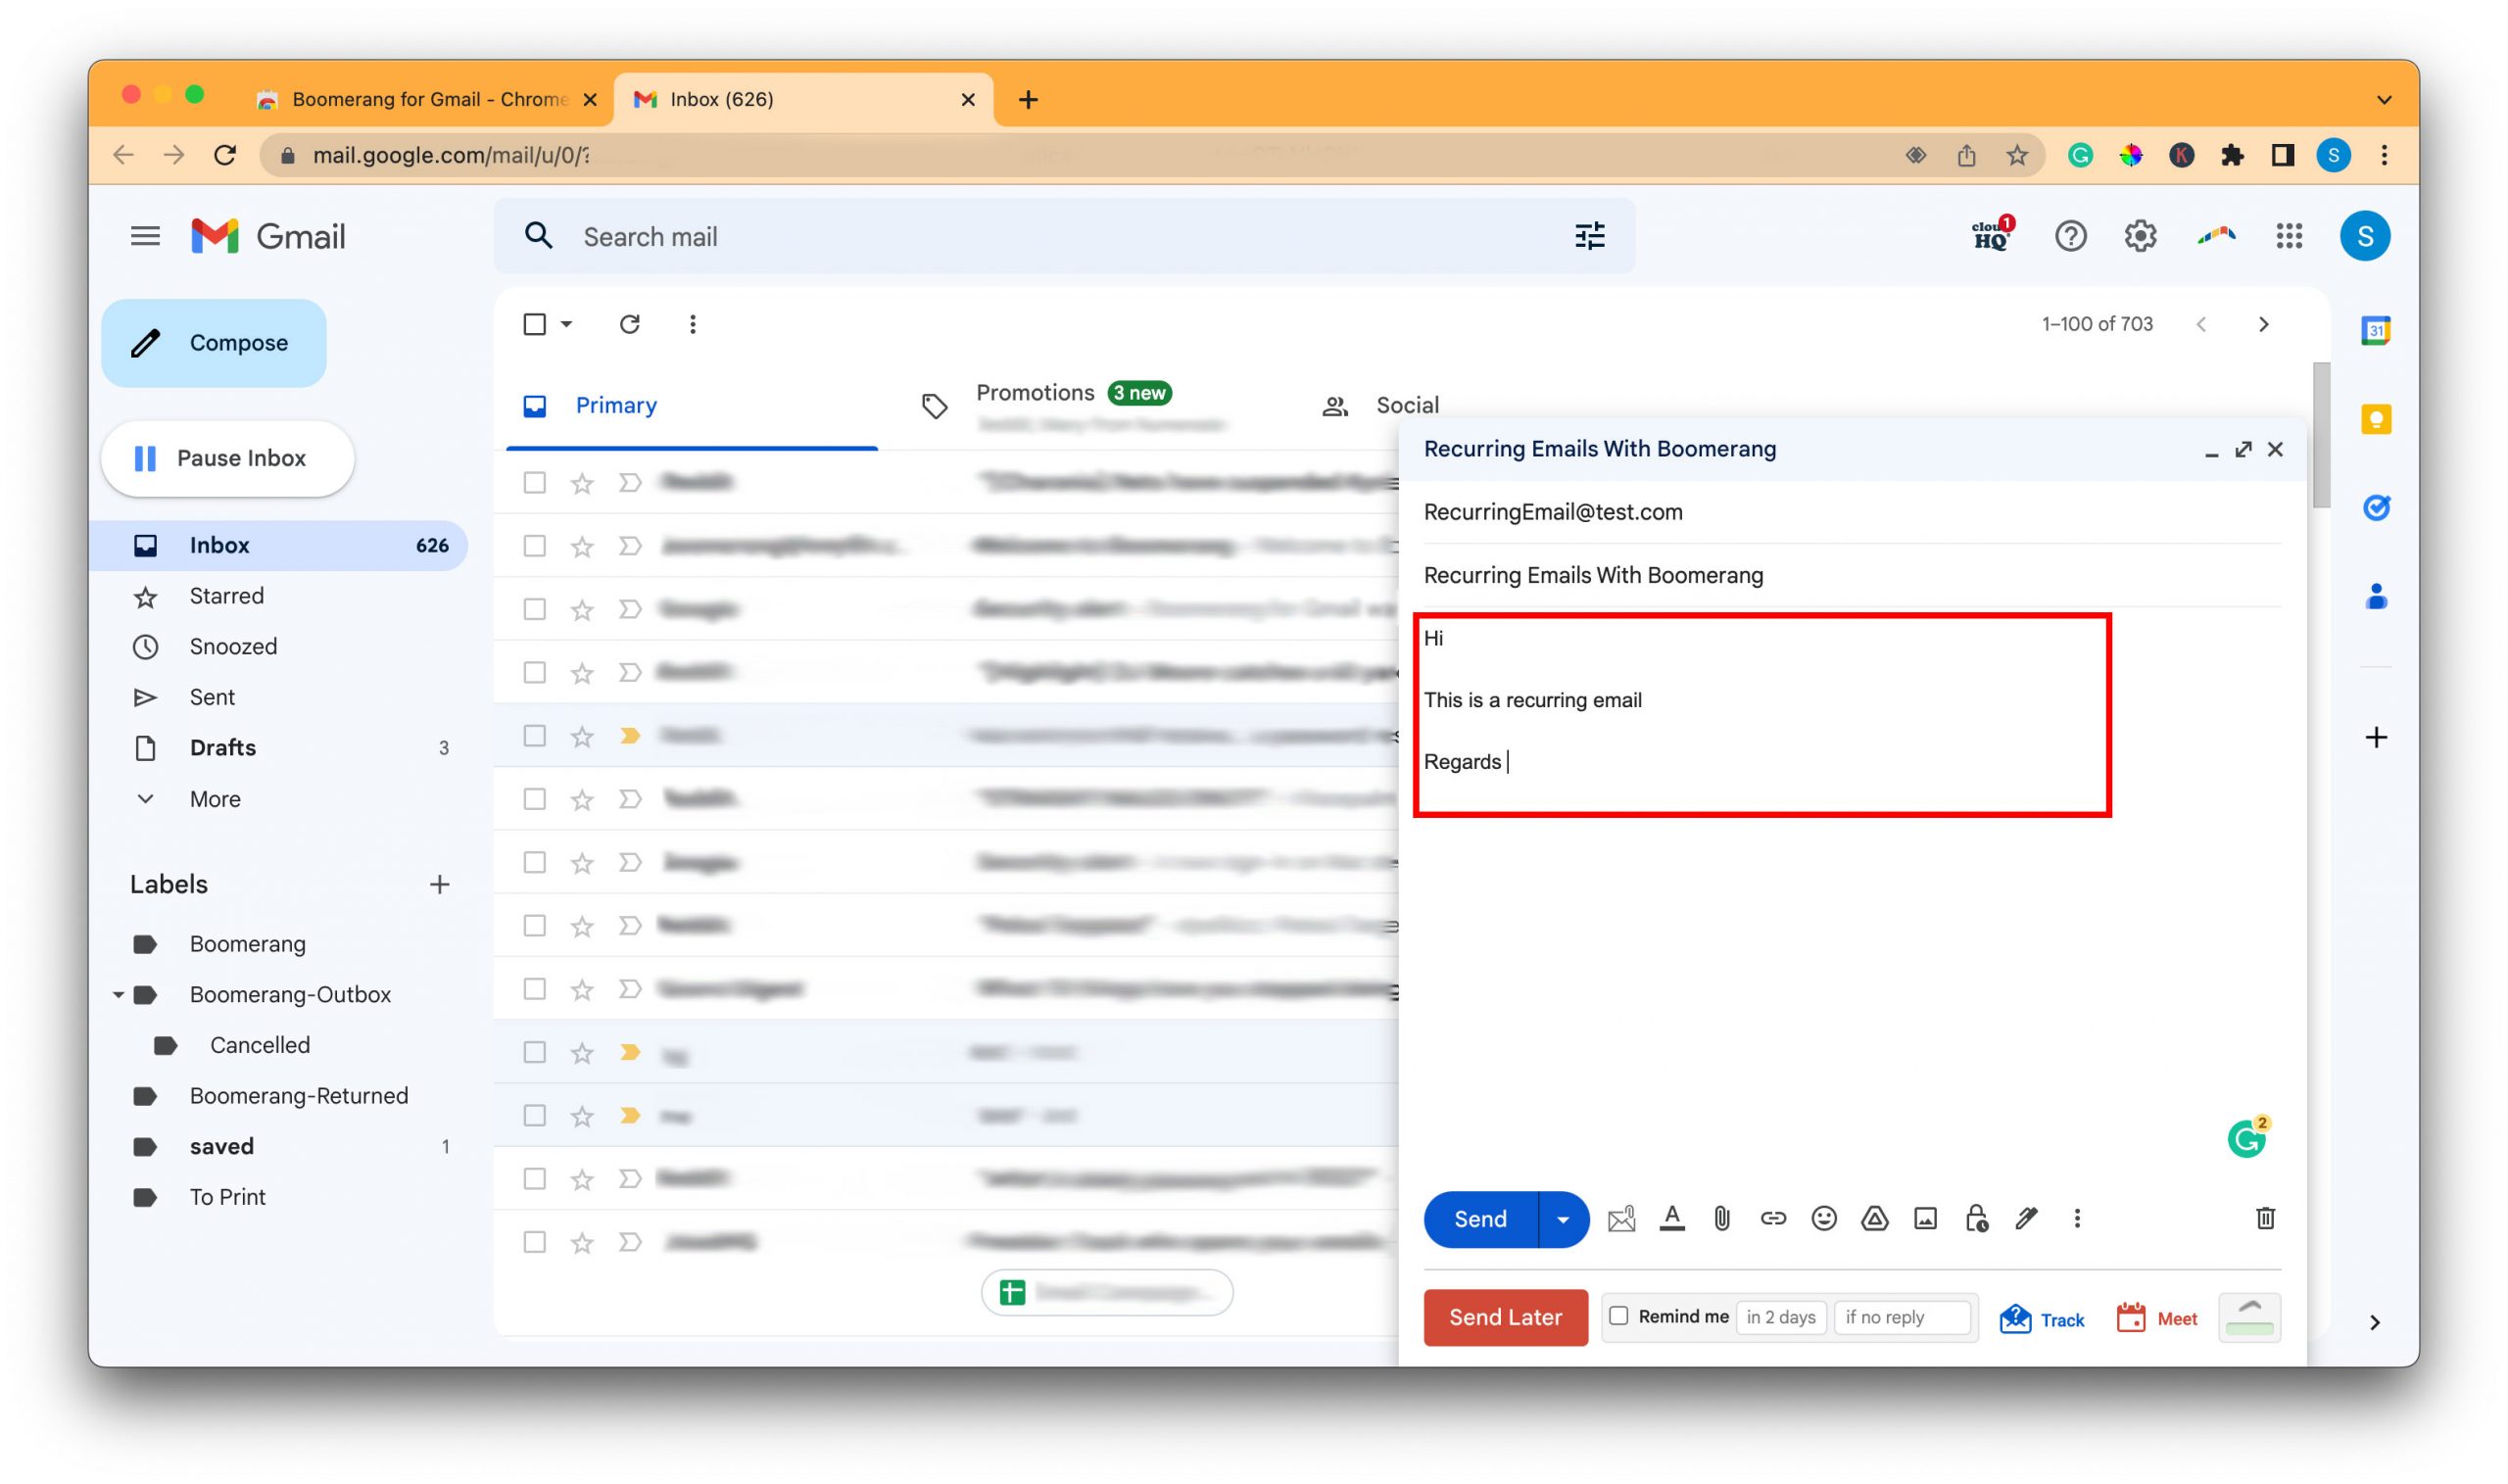
9 – Click the send later button at the bottom of the compose box.
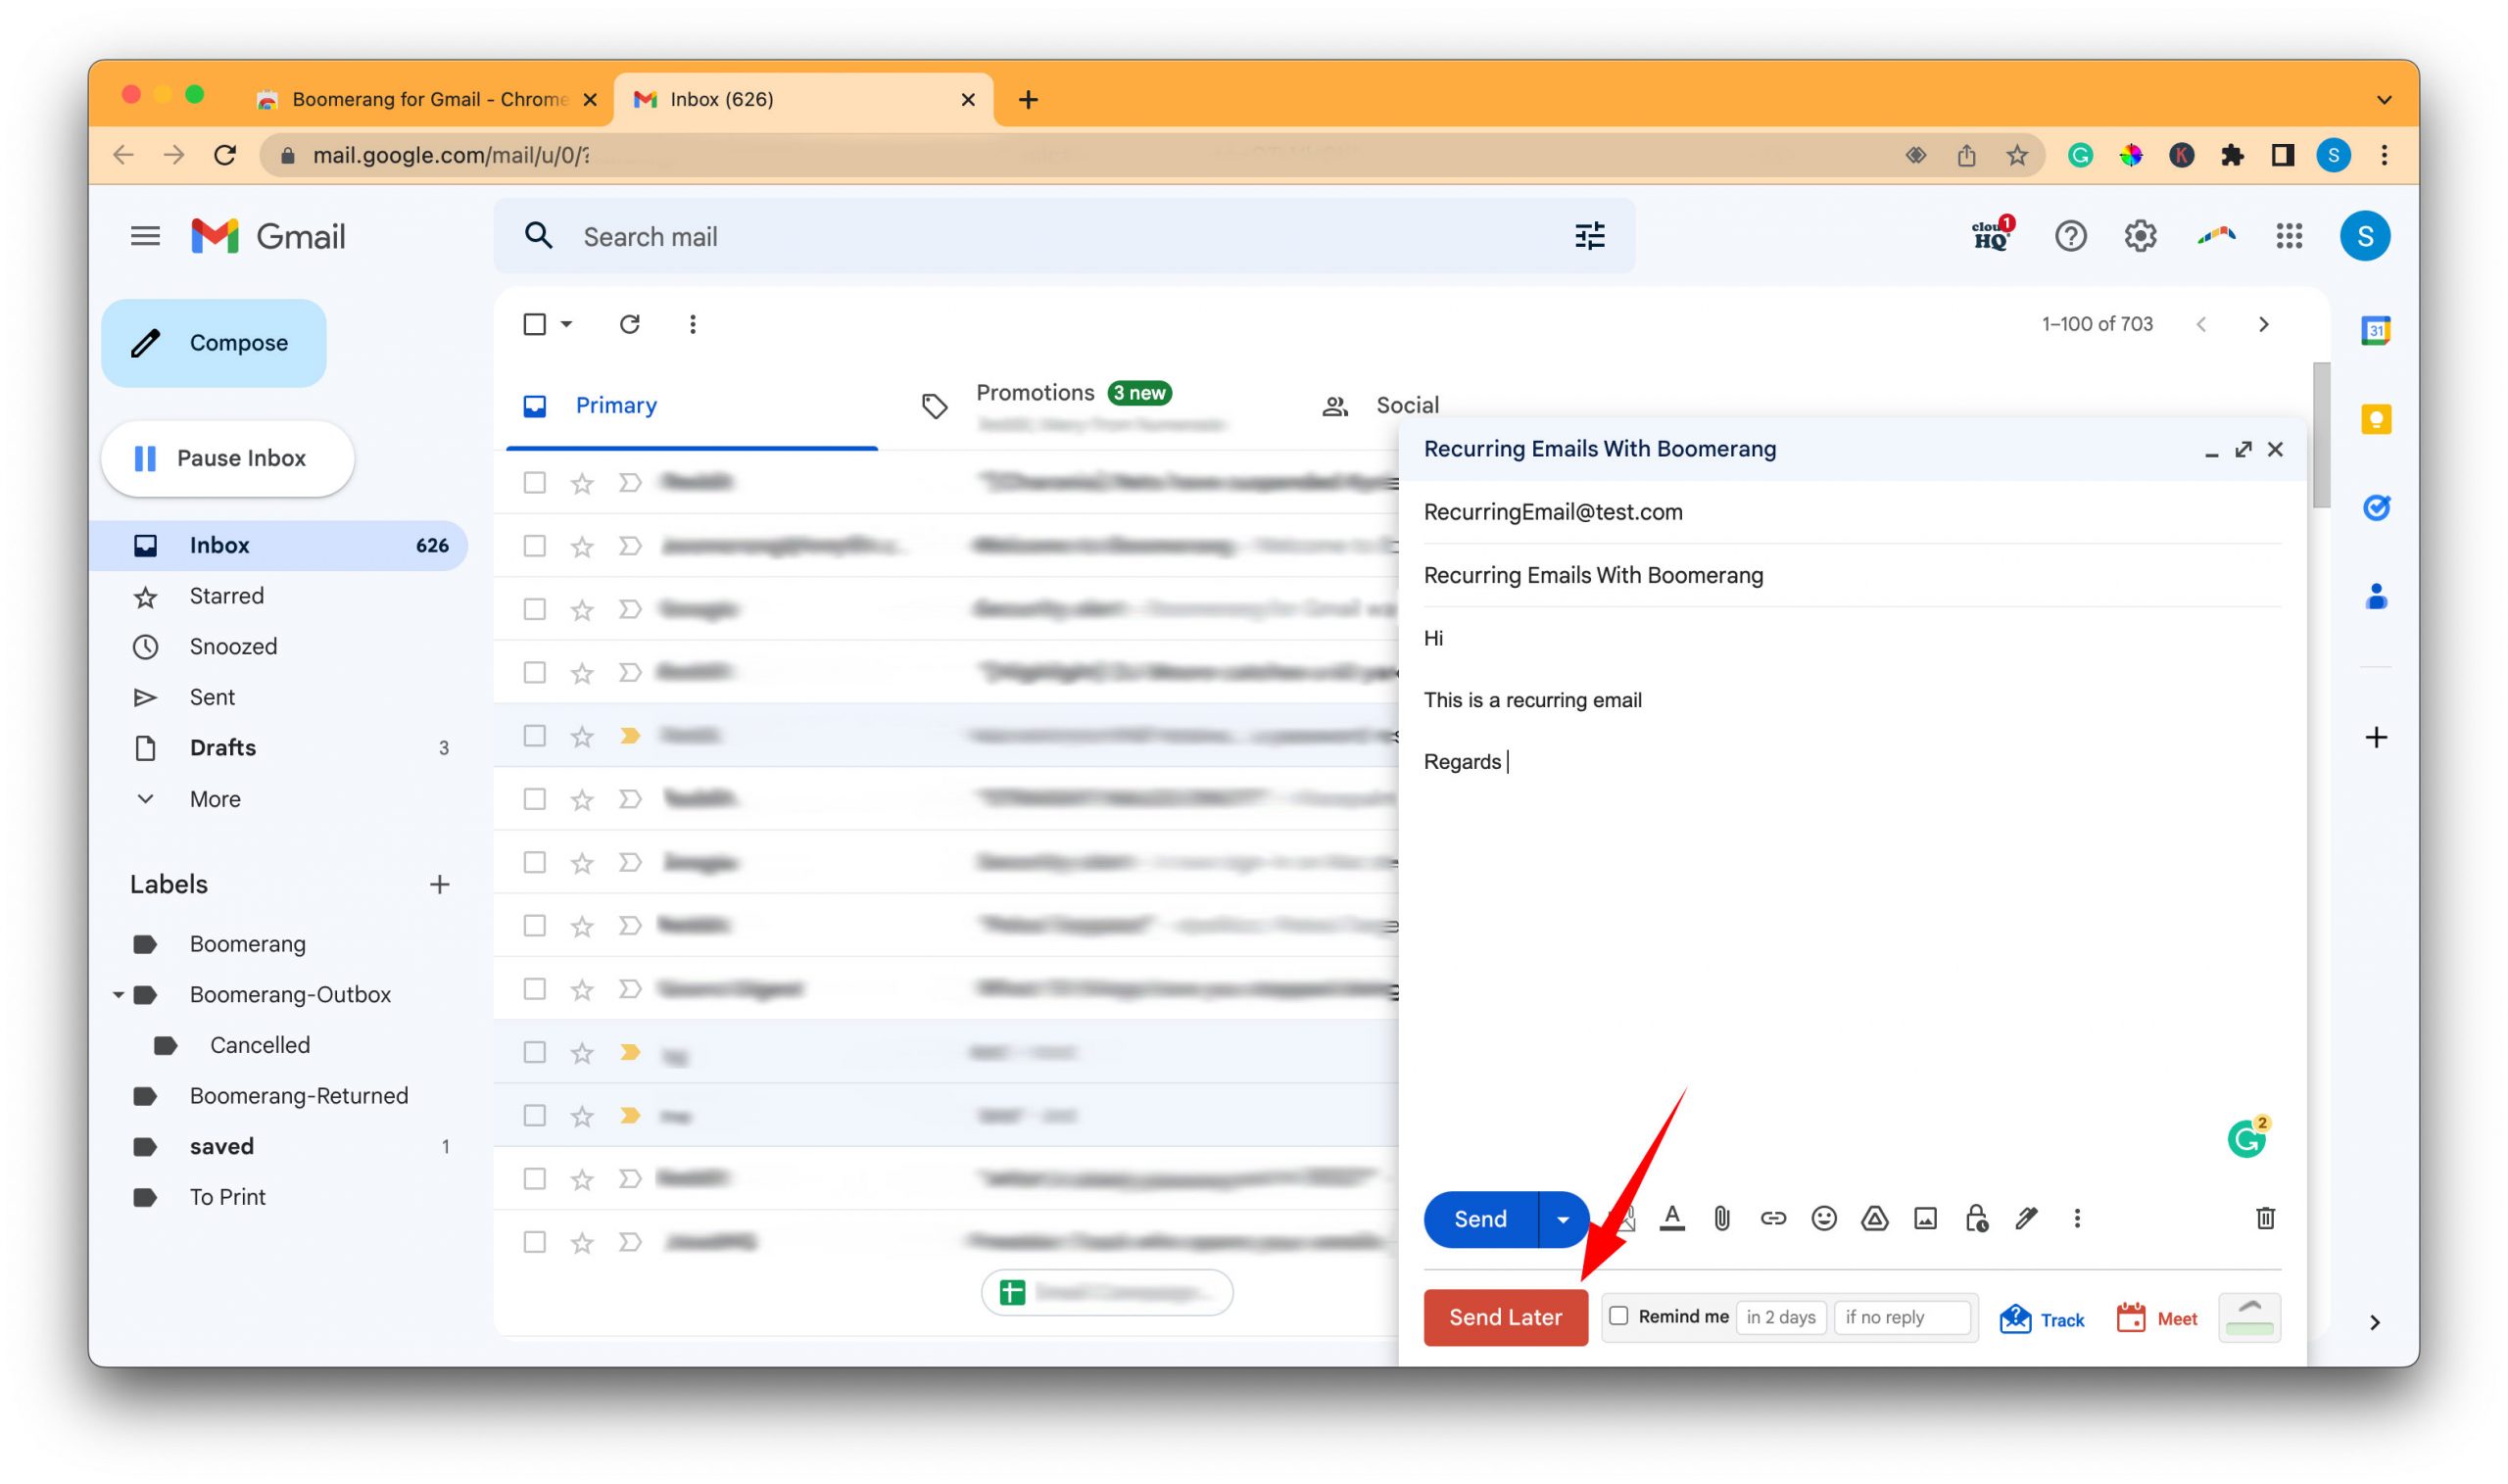
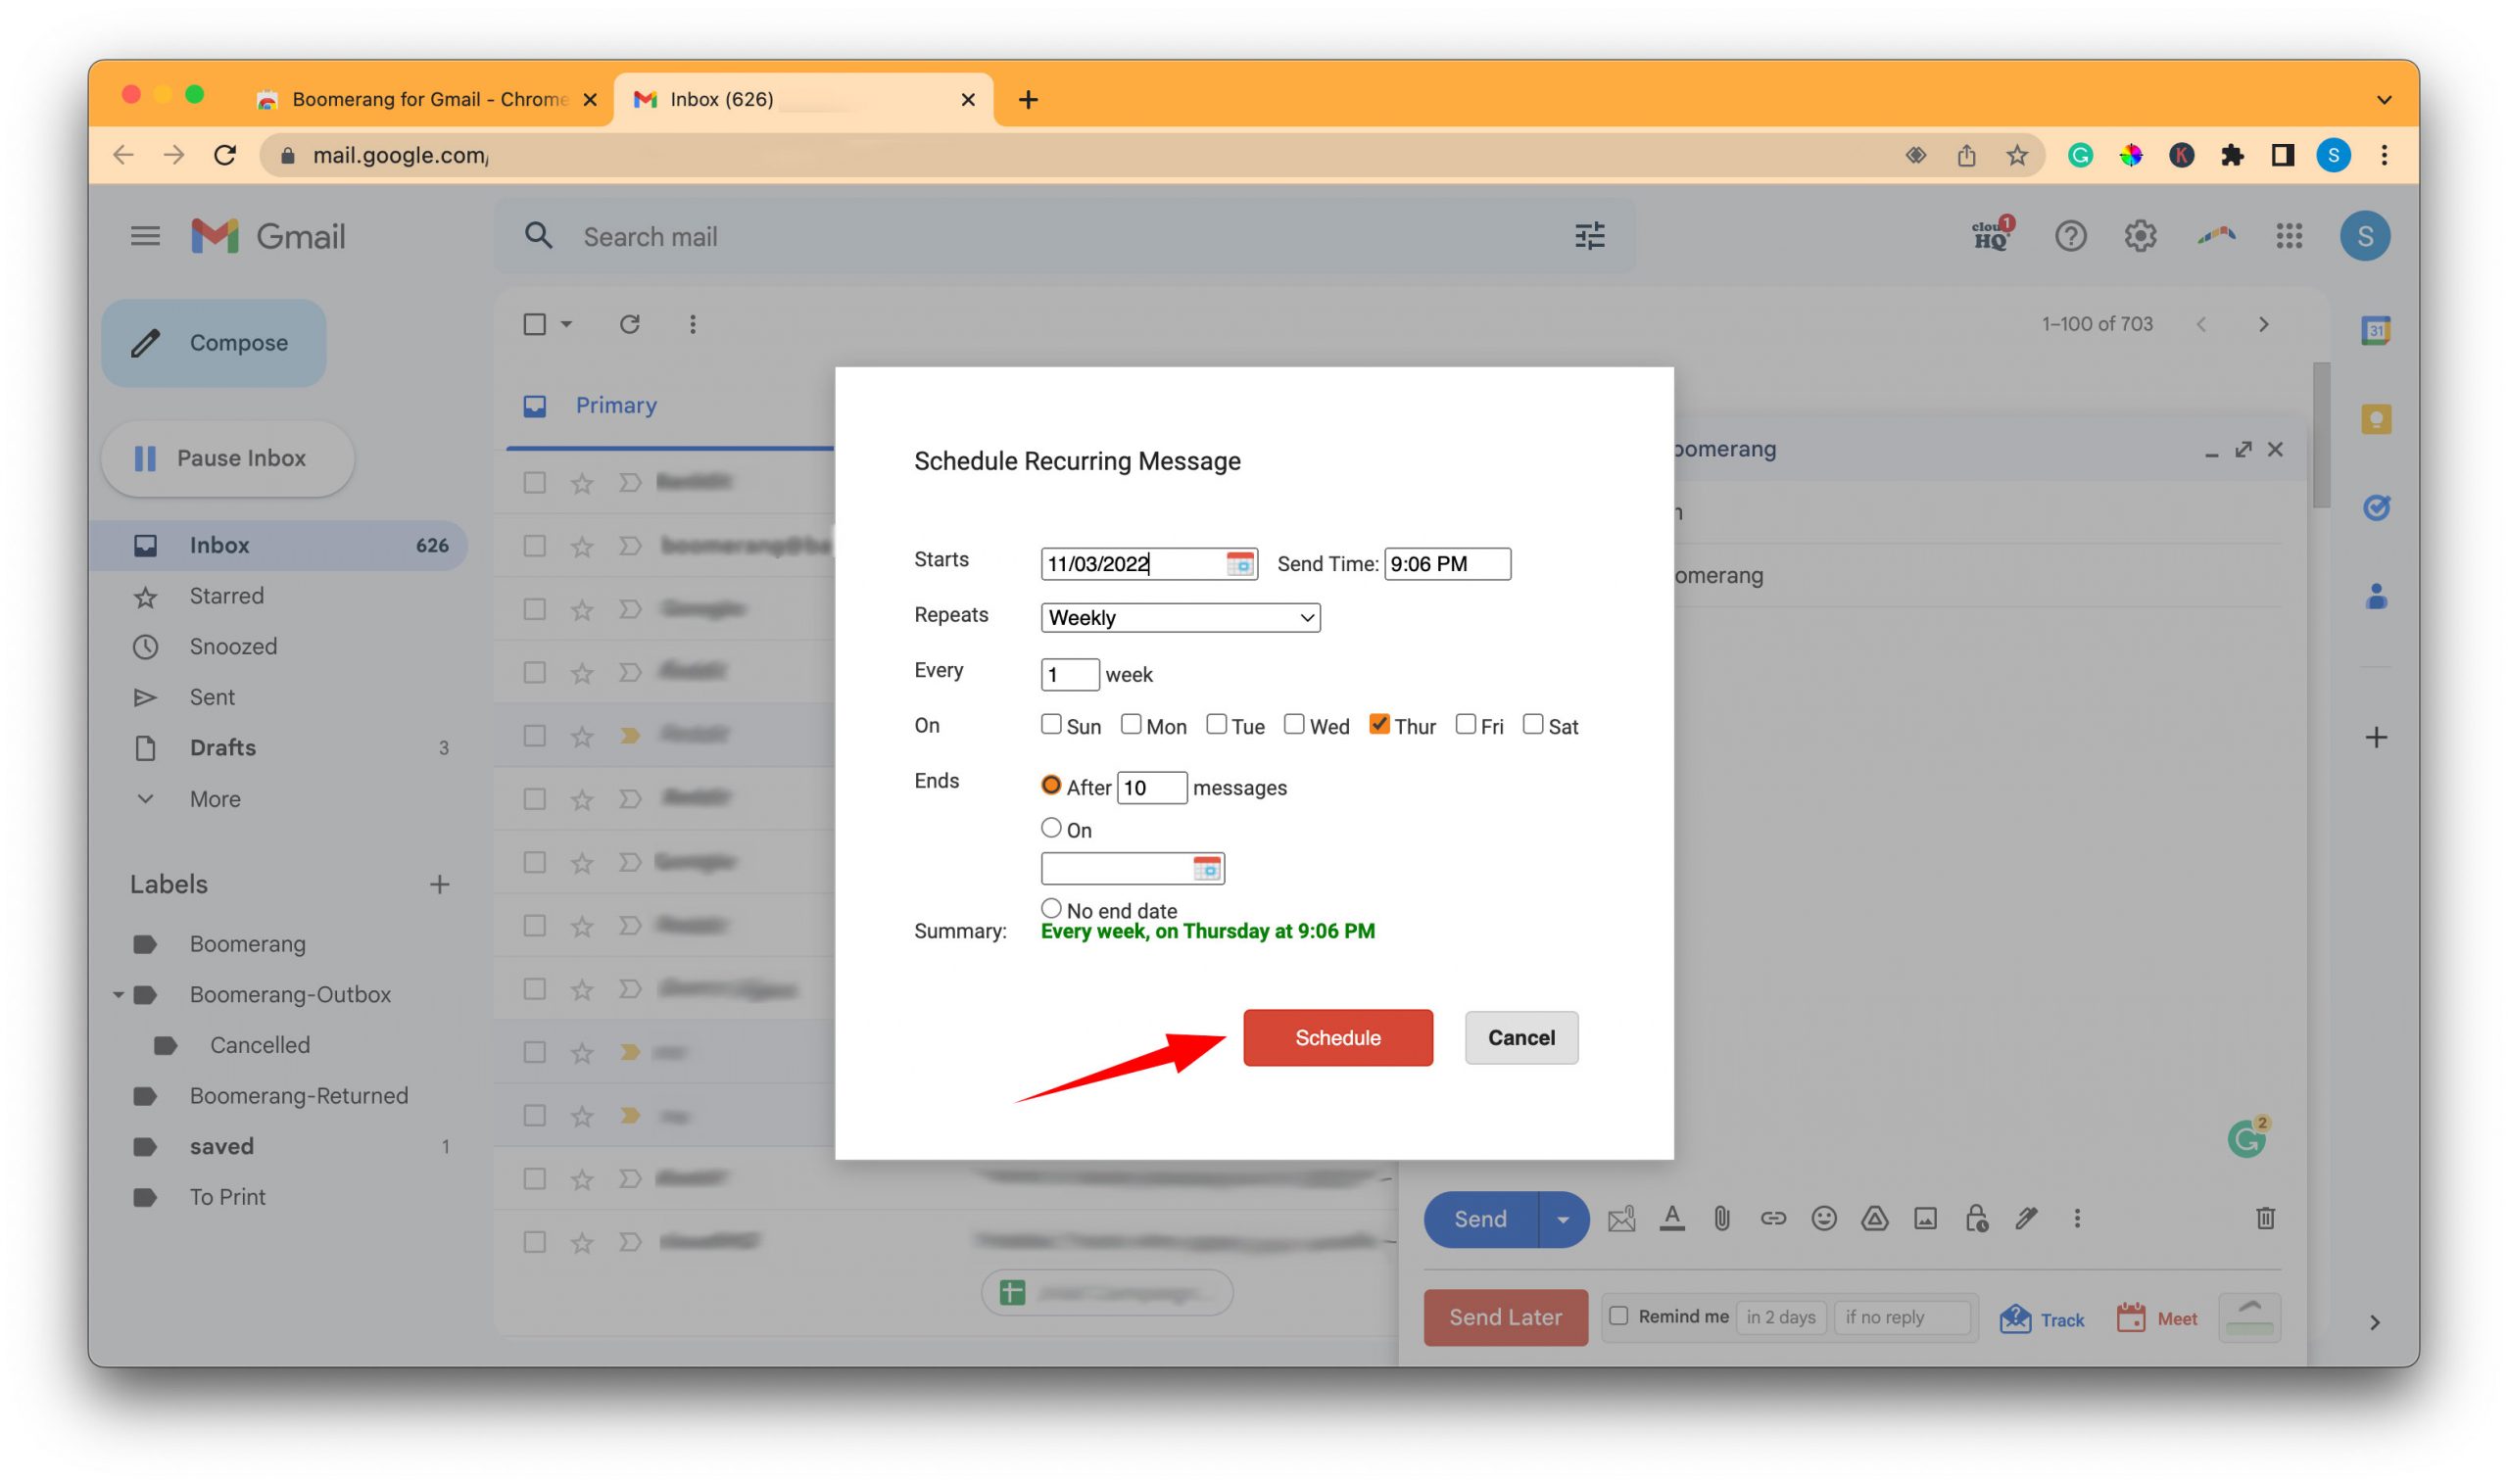
10 – Click the schedule recurring message option.

11 – Customise the settings for the recurring email, then click the schedule button when you are finished.
10 – How Many Emails Can You Schedule In Gmail?
In Gmail, you can schedule up to 100 emails at a given time.