The easiest way to insert emojis in Gmail is by using the built-in Gmail emoji keyboard.
Although the Gmail emoji keyboard can get the job done, it has limitations in terms of available emojis and where they can be inserted. Fortunately, there are several other options available that will allow you to add emojis to both the subject line and body of your emails in Gmail.

In this article, we’ll explore seven different methods to insert emojis in your Gmail messages, including using Unicode character generators, the Windows and macOS emoji keyboards, the Emoji Keyboard by JoyPixels® Google Chrome extension, as well as the iOS and Android emoji keyboards.
By the end of this article, you’ll be able to use a wider range of emojis and make your emails more expressive than ever before.
Method 1: Use the Built-In Gmail Emoji Keyboard
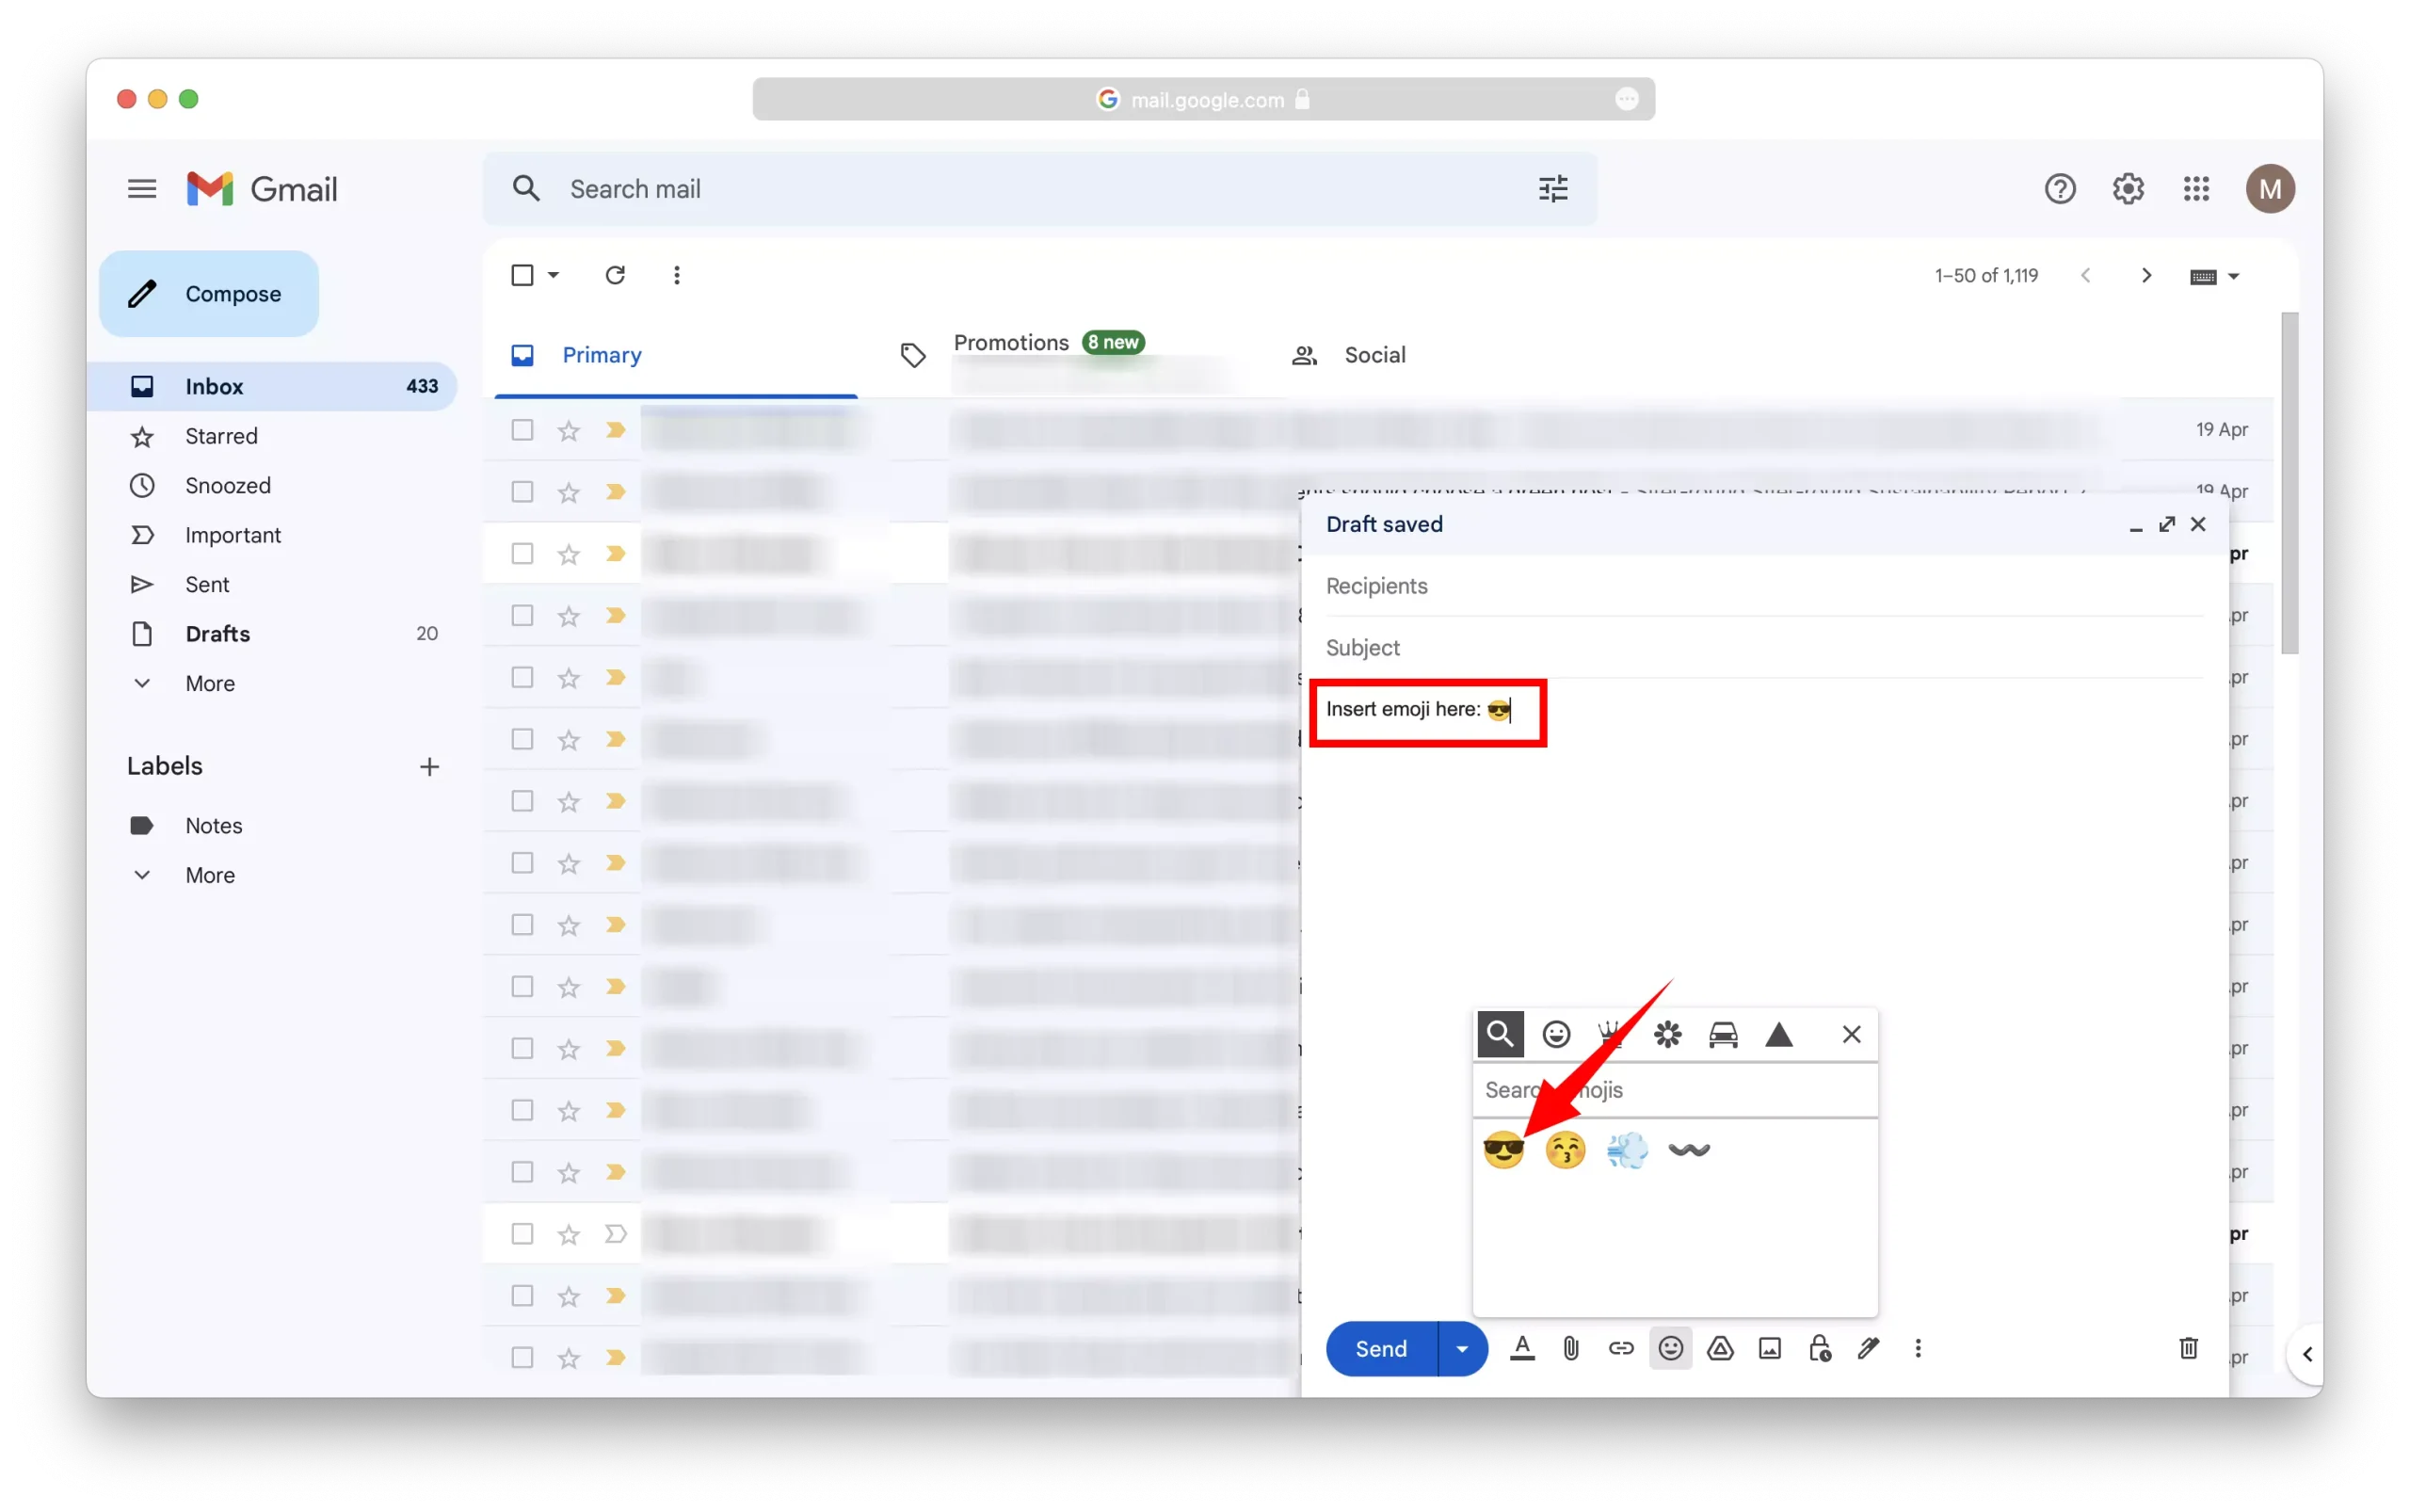
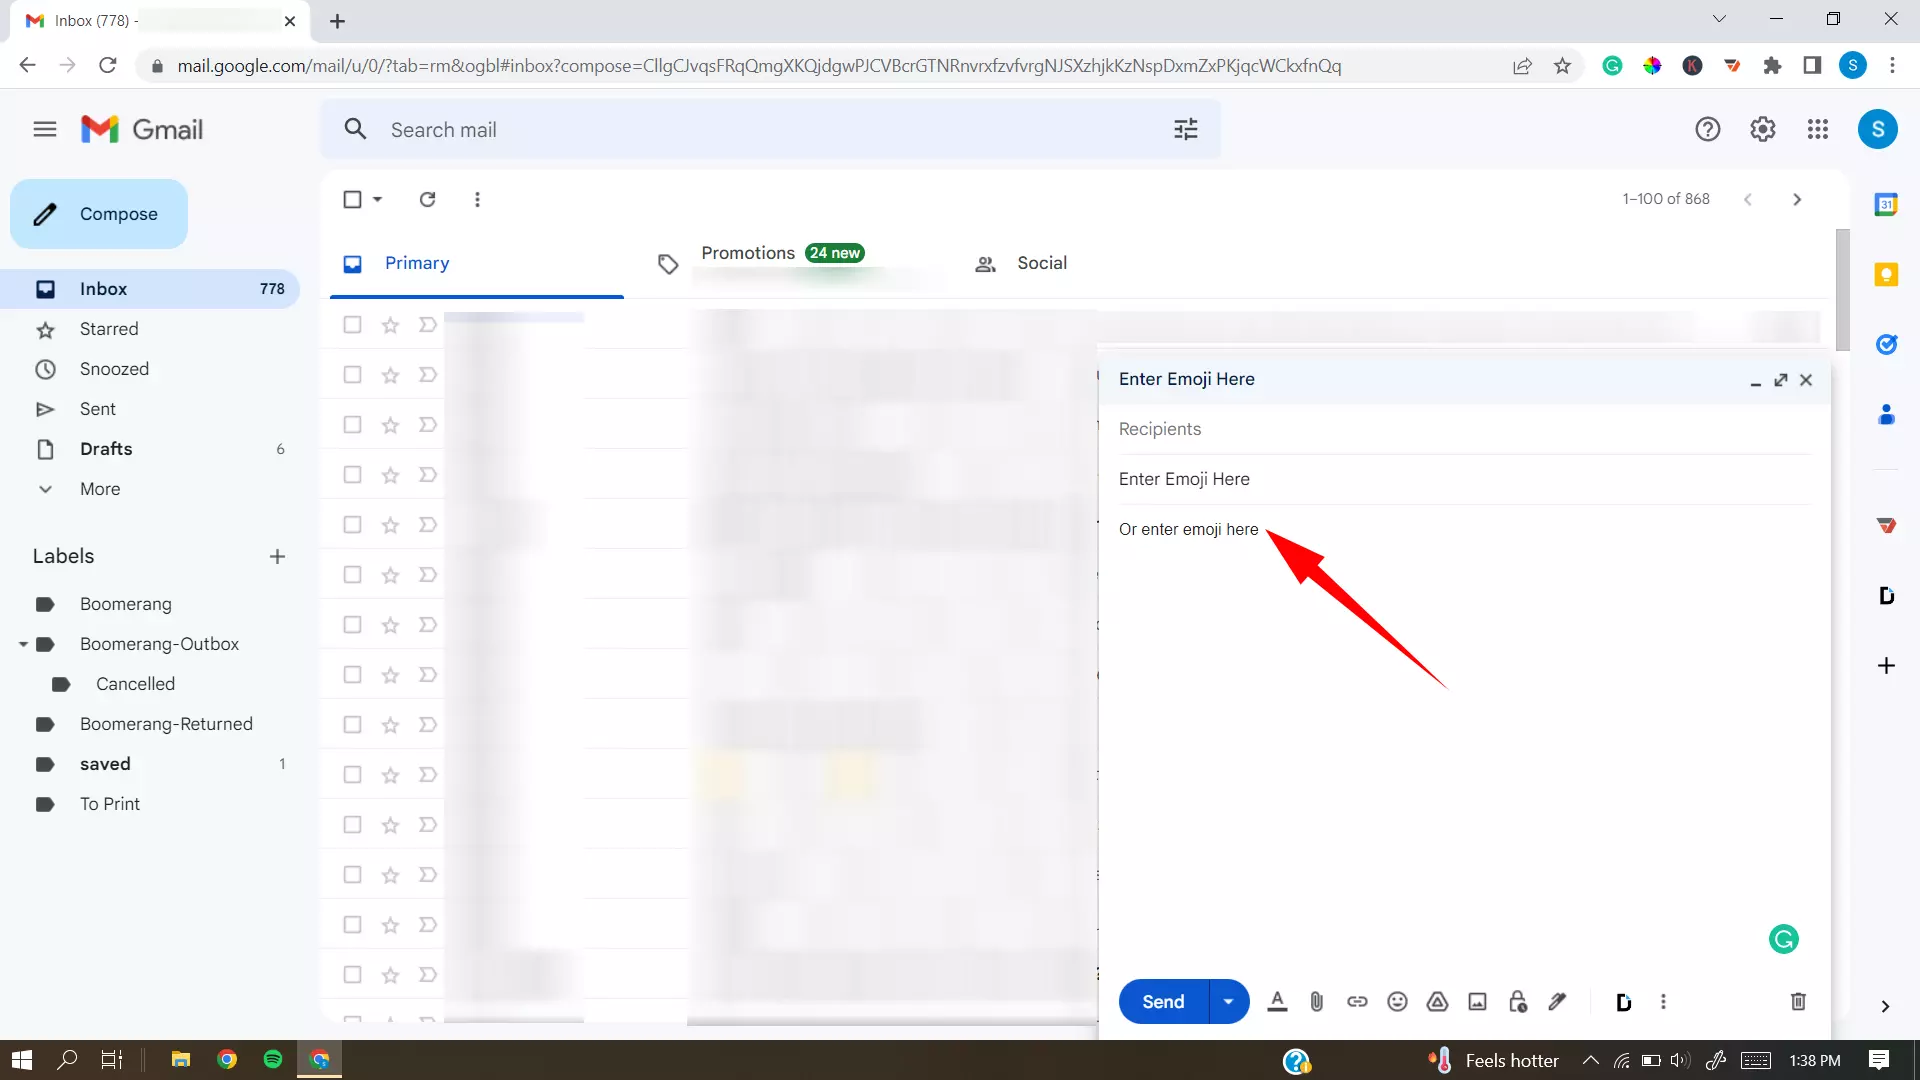
1 – Open Gmail and start composing a new email.

2 – Position your cursor where you want to insert the emoji.
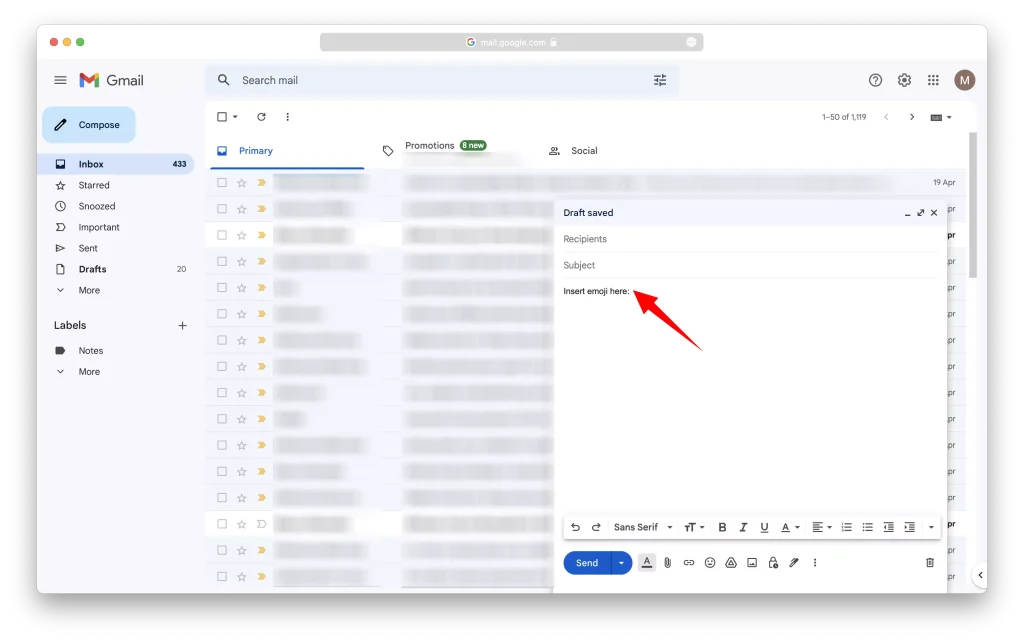
3 – Click on the emoji icon at the bottom of the compose window.
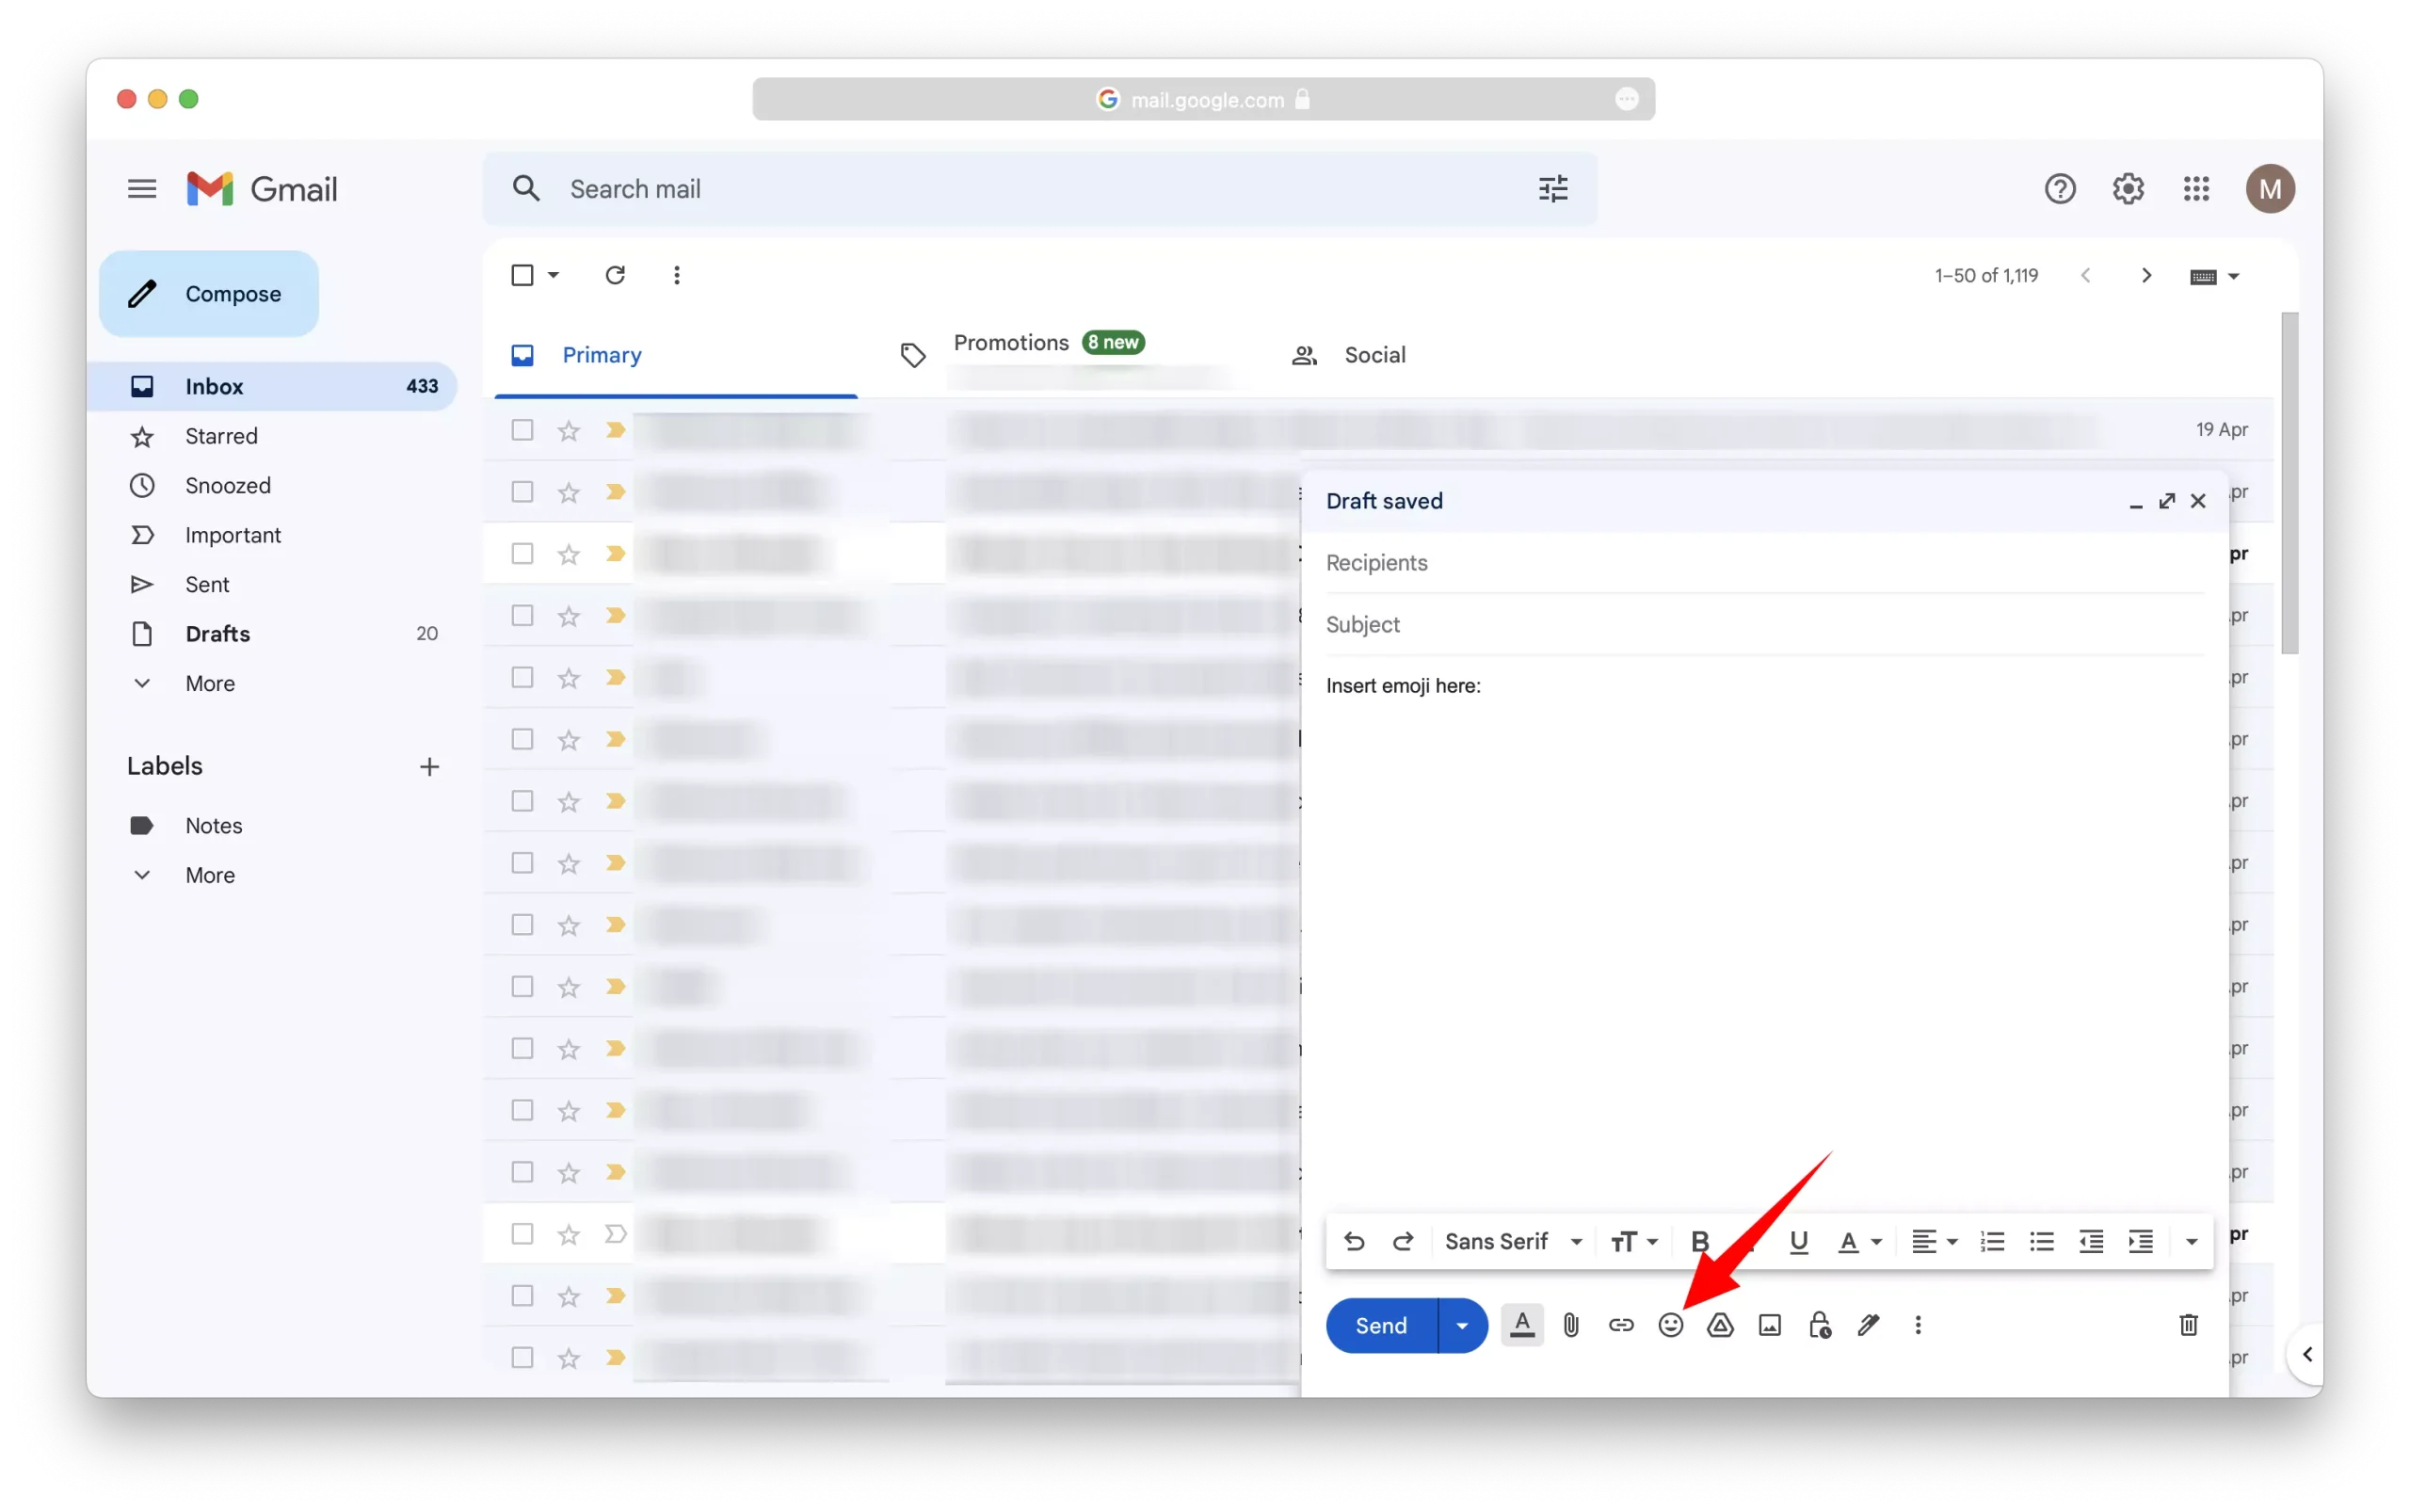
4 – Scroll through the list of available emojis or search for the specific one you want to use.
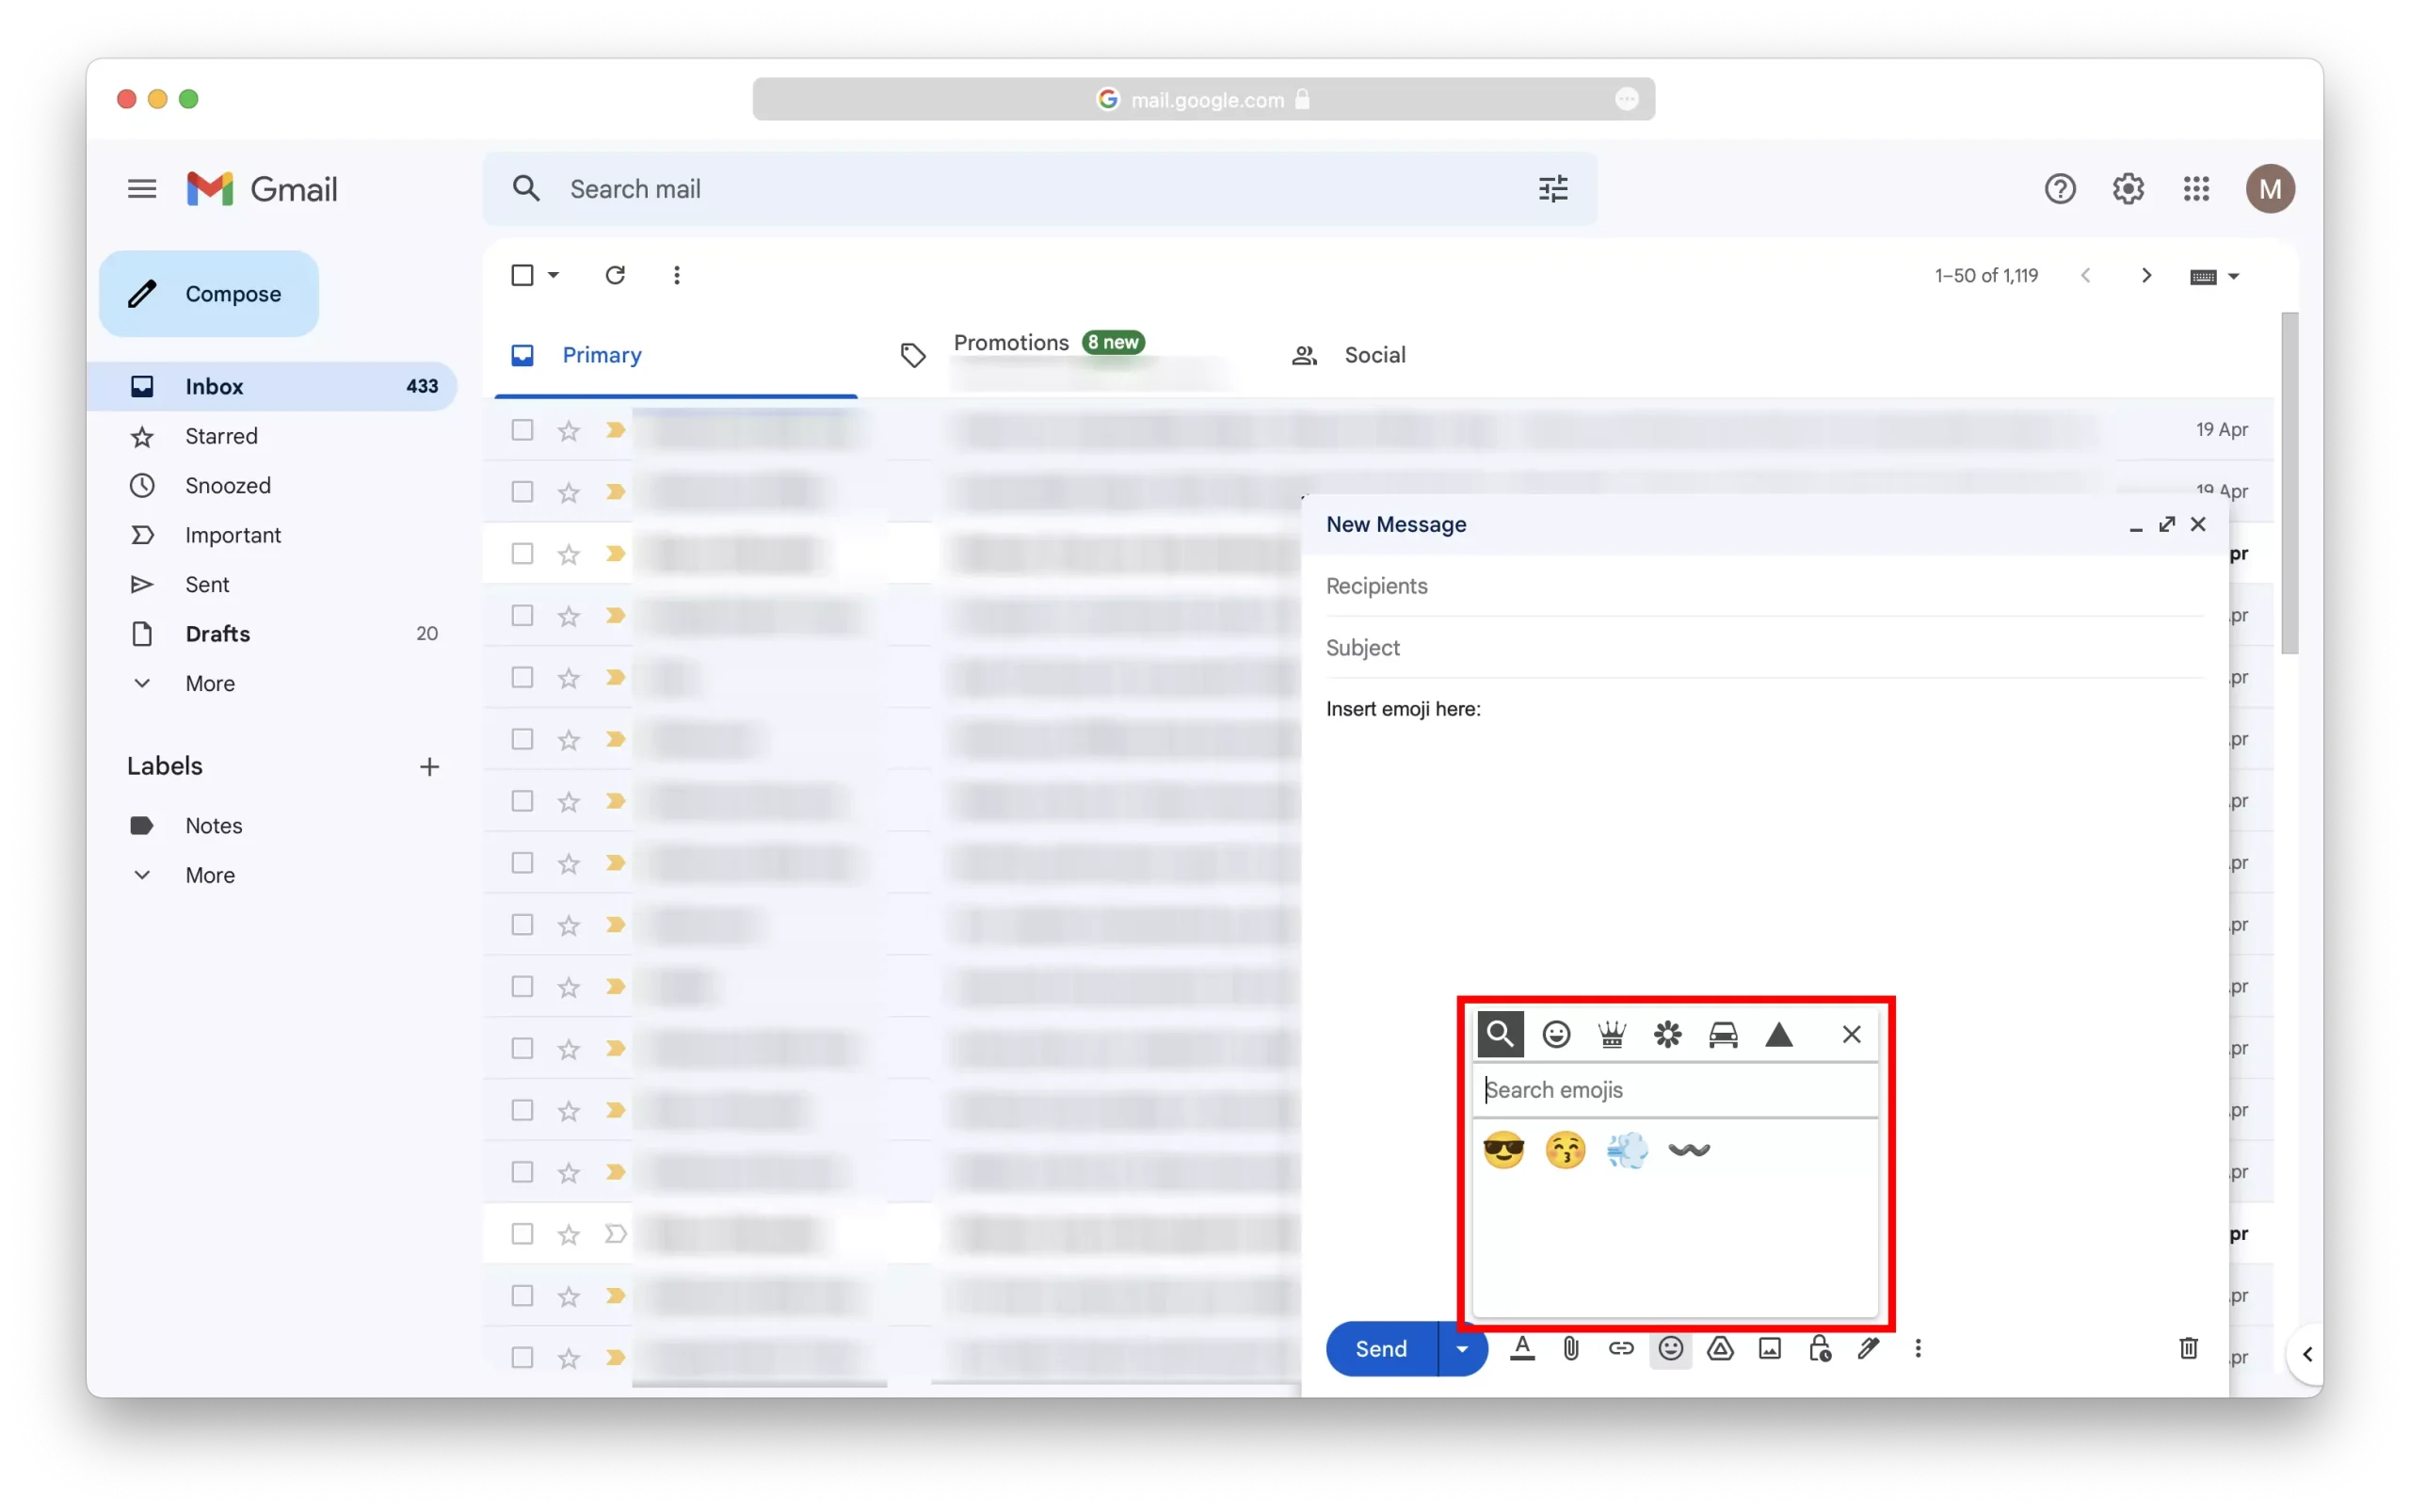
5 – Once you’ve found the emoji you want to use, click on it to insert it into your email.
Method 2: Use a Unicode Emoji Generator
1 – Follow this link to the Symbl.cc Unicode generator web app.

2 – Enter the name of the emoji that you want to use in the search bar then click the search button.
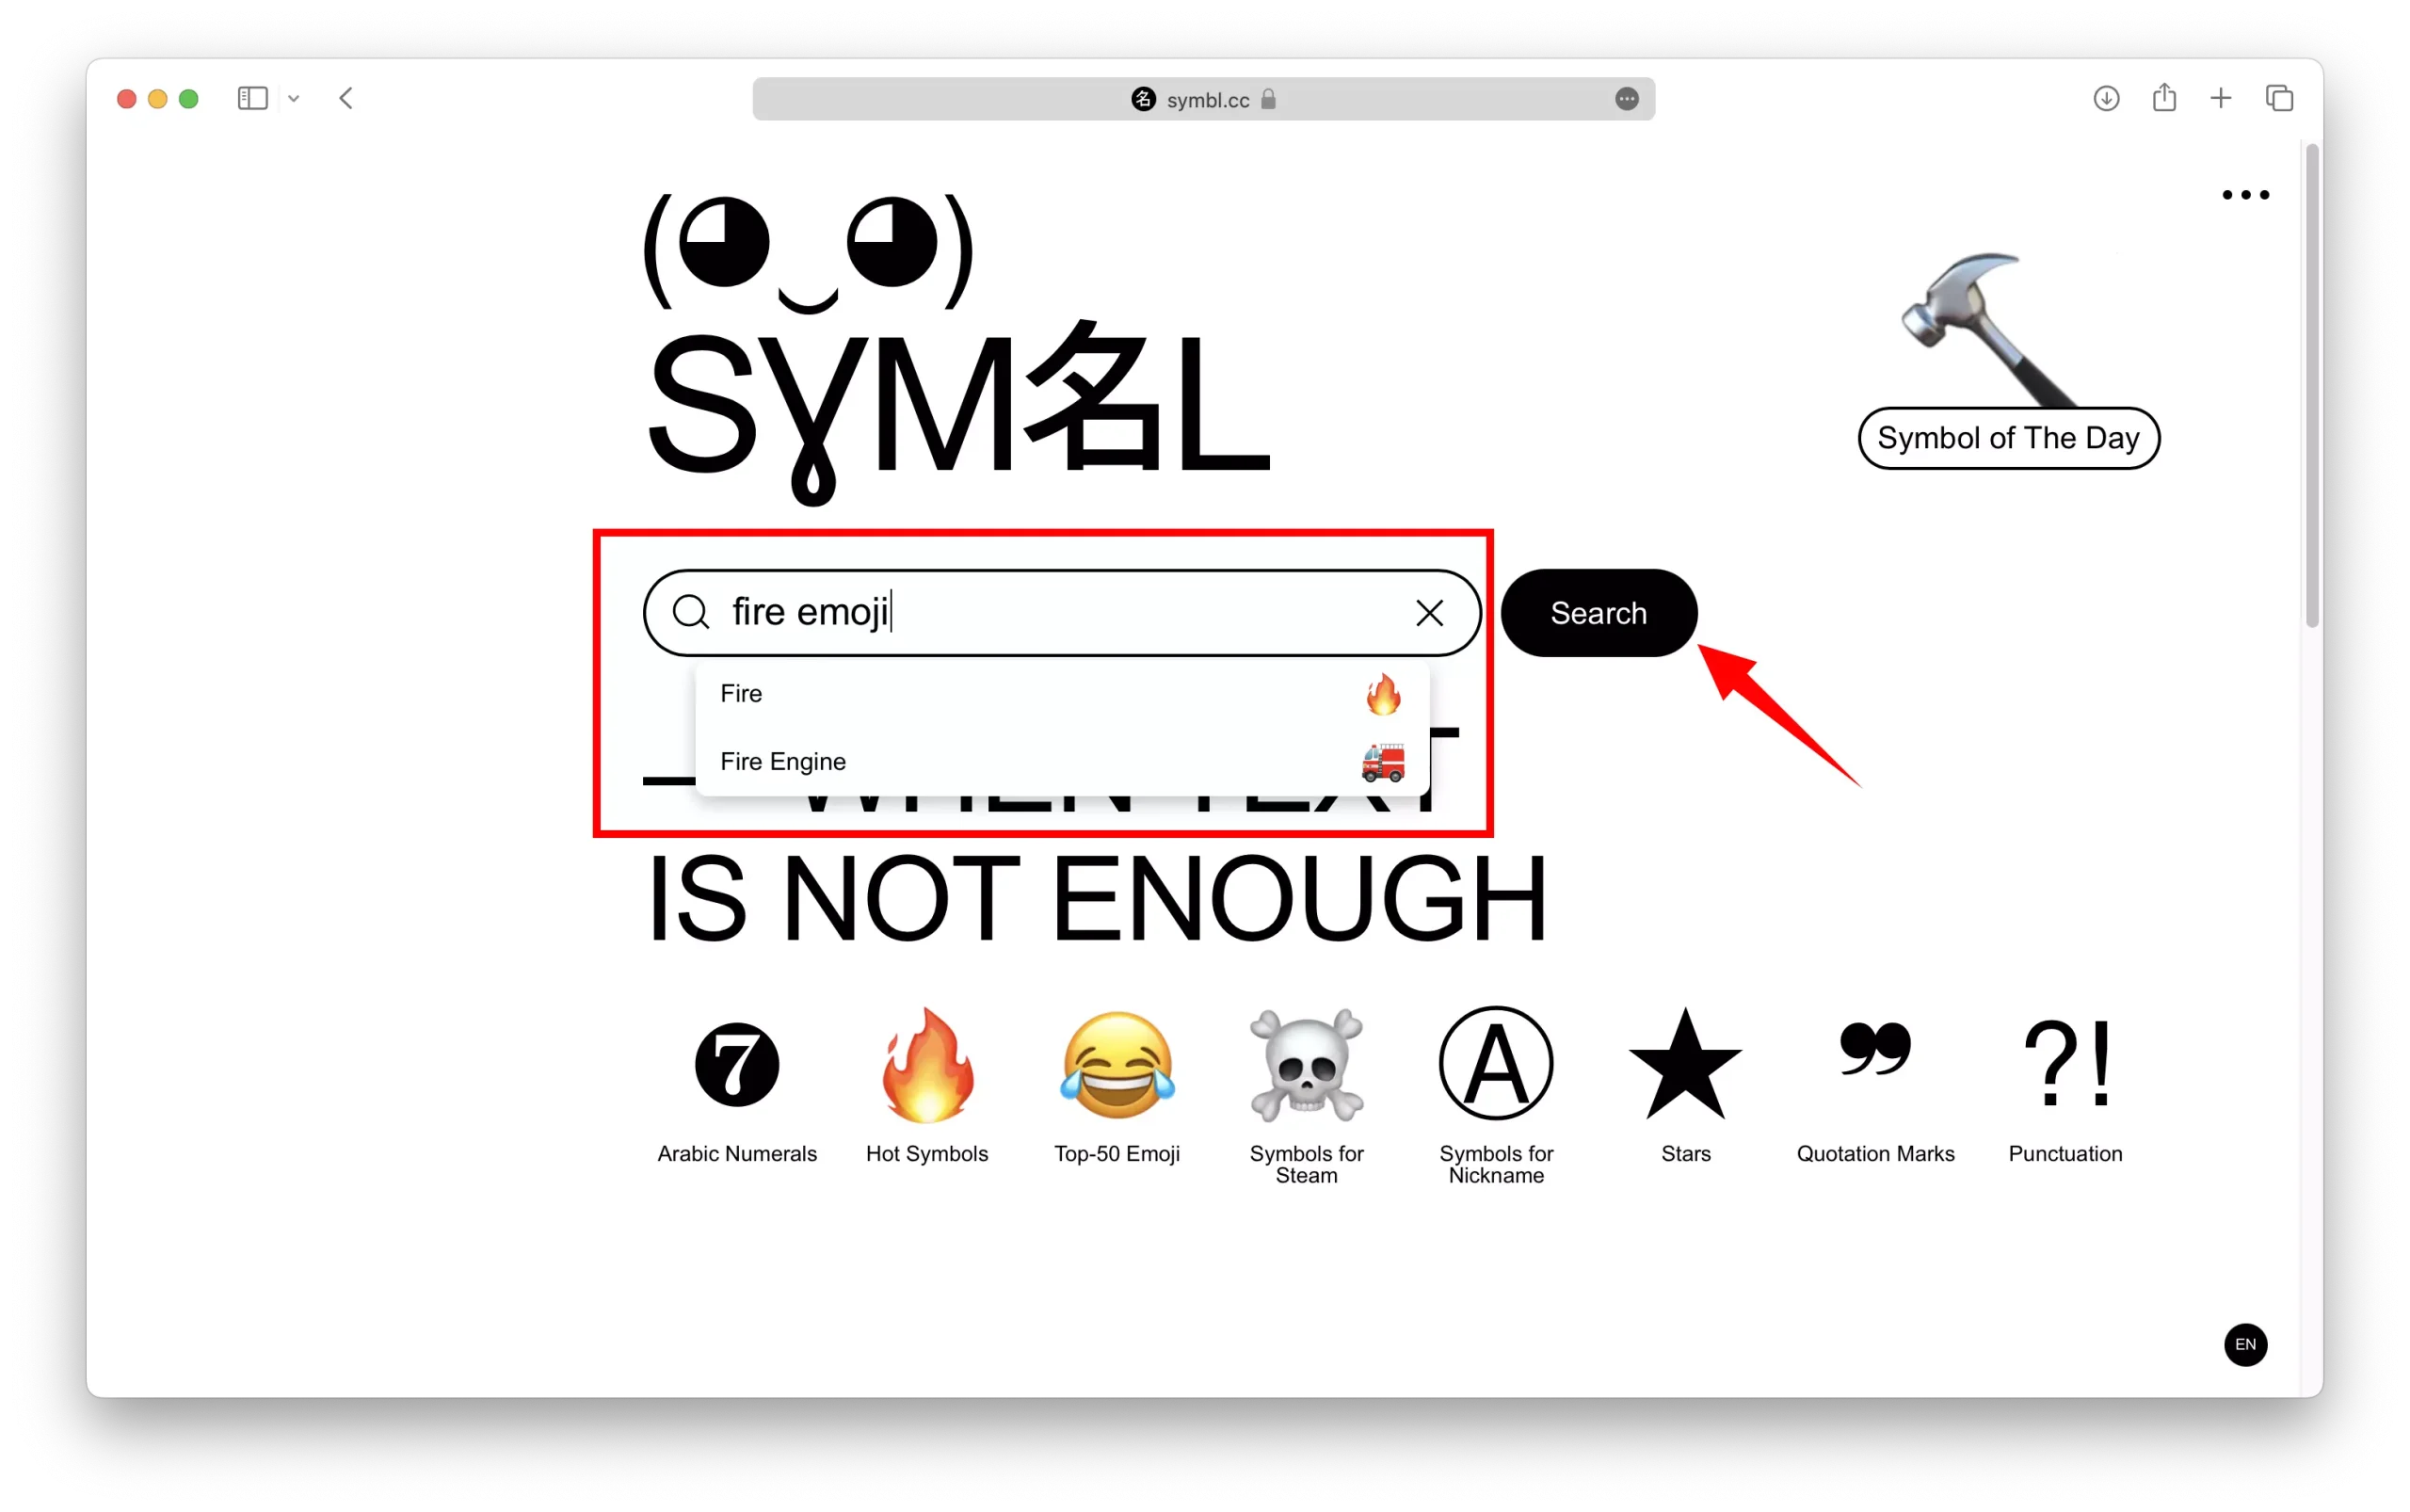
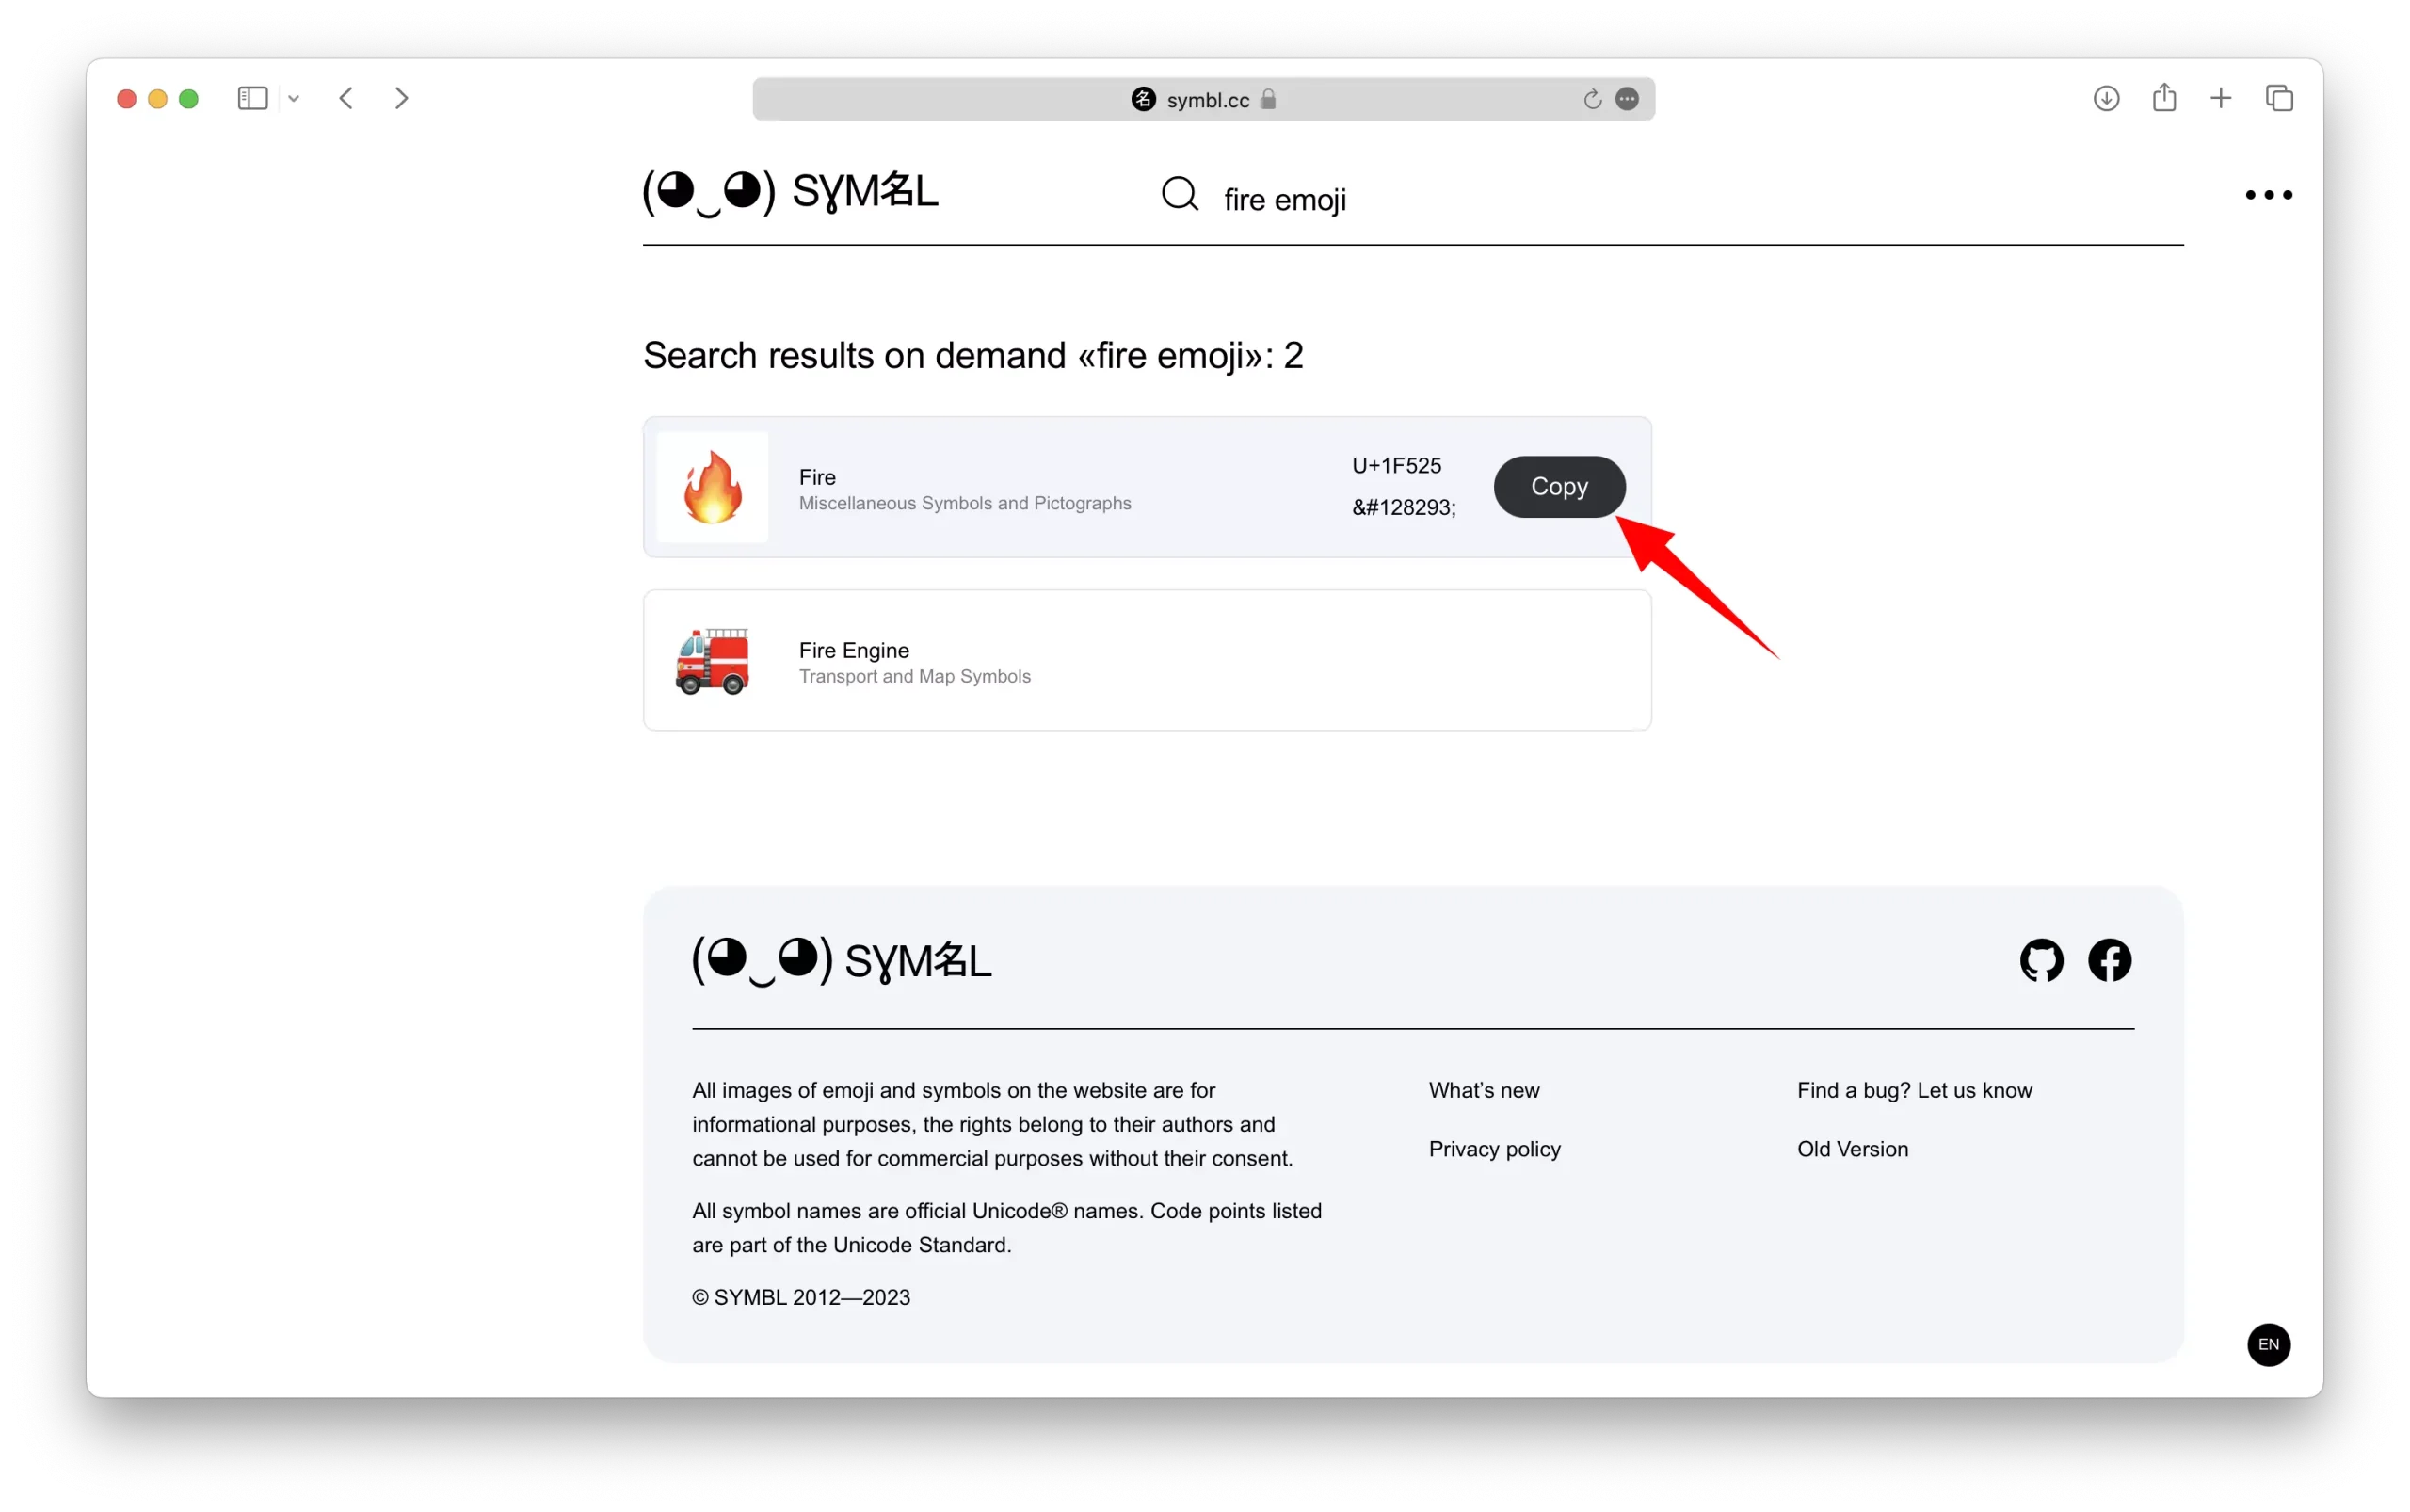
3 – In the list of search results, hover your mouse pointer over the emoji that you want to use and click on the “copy” button.
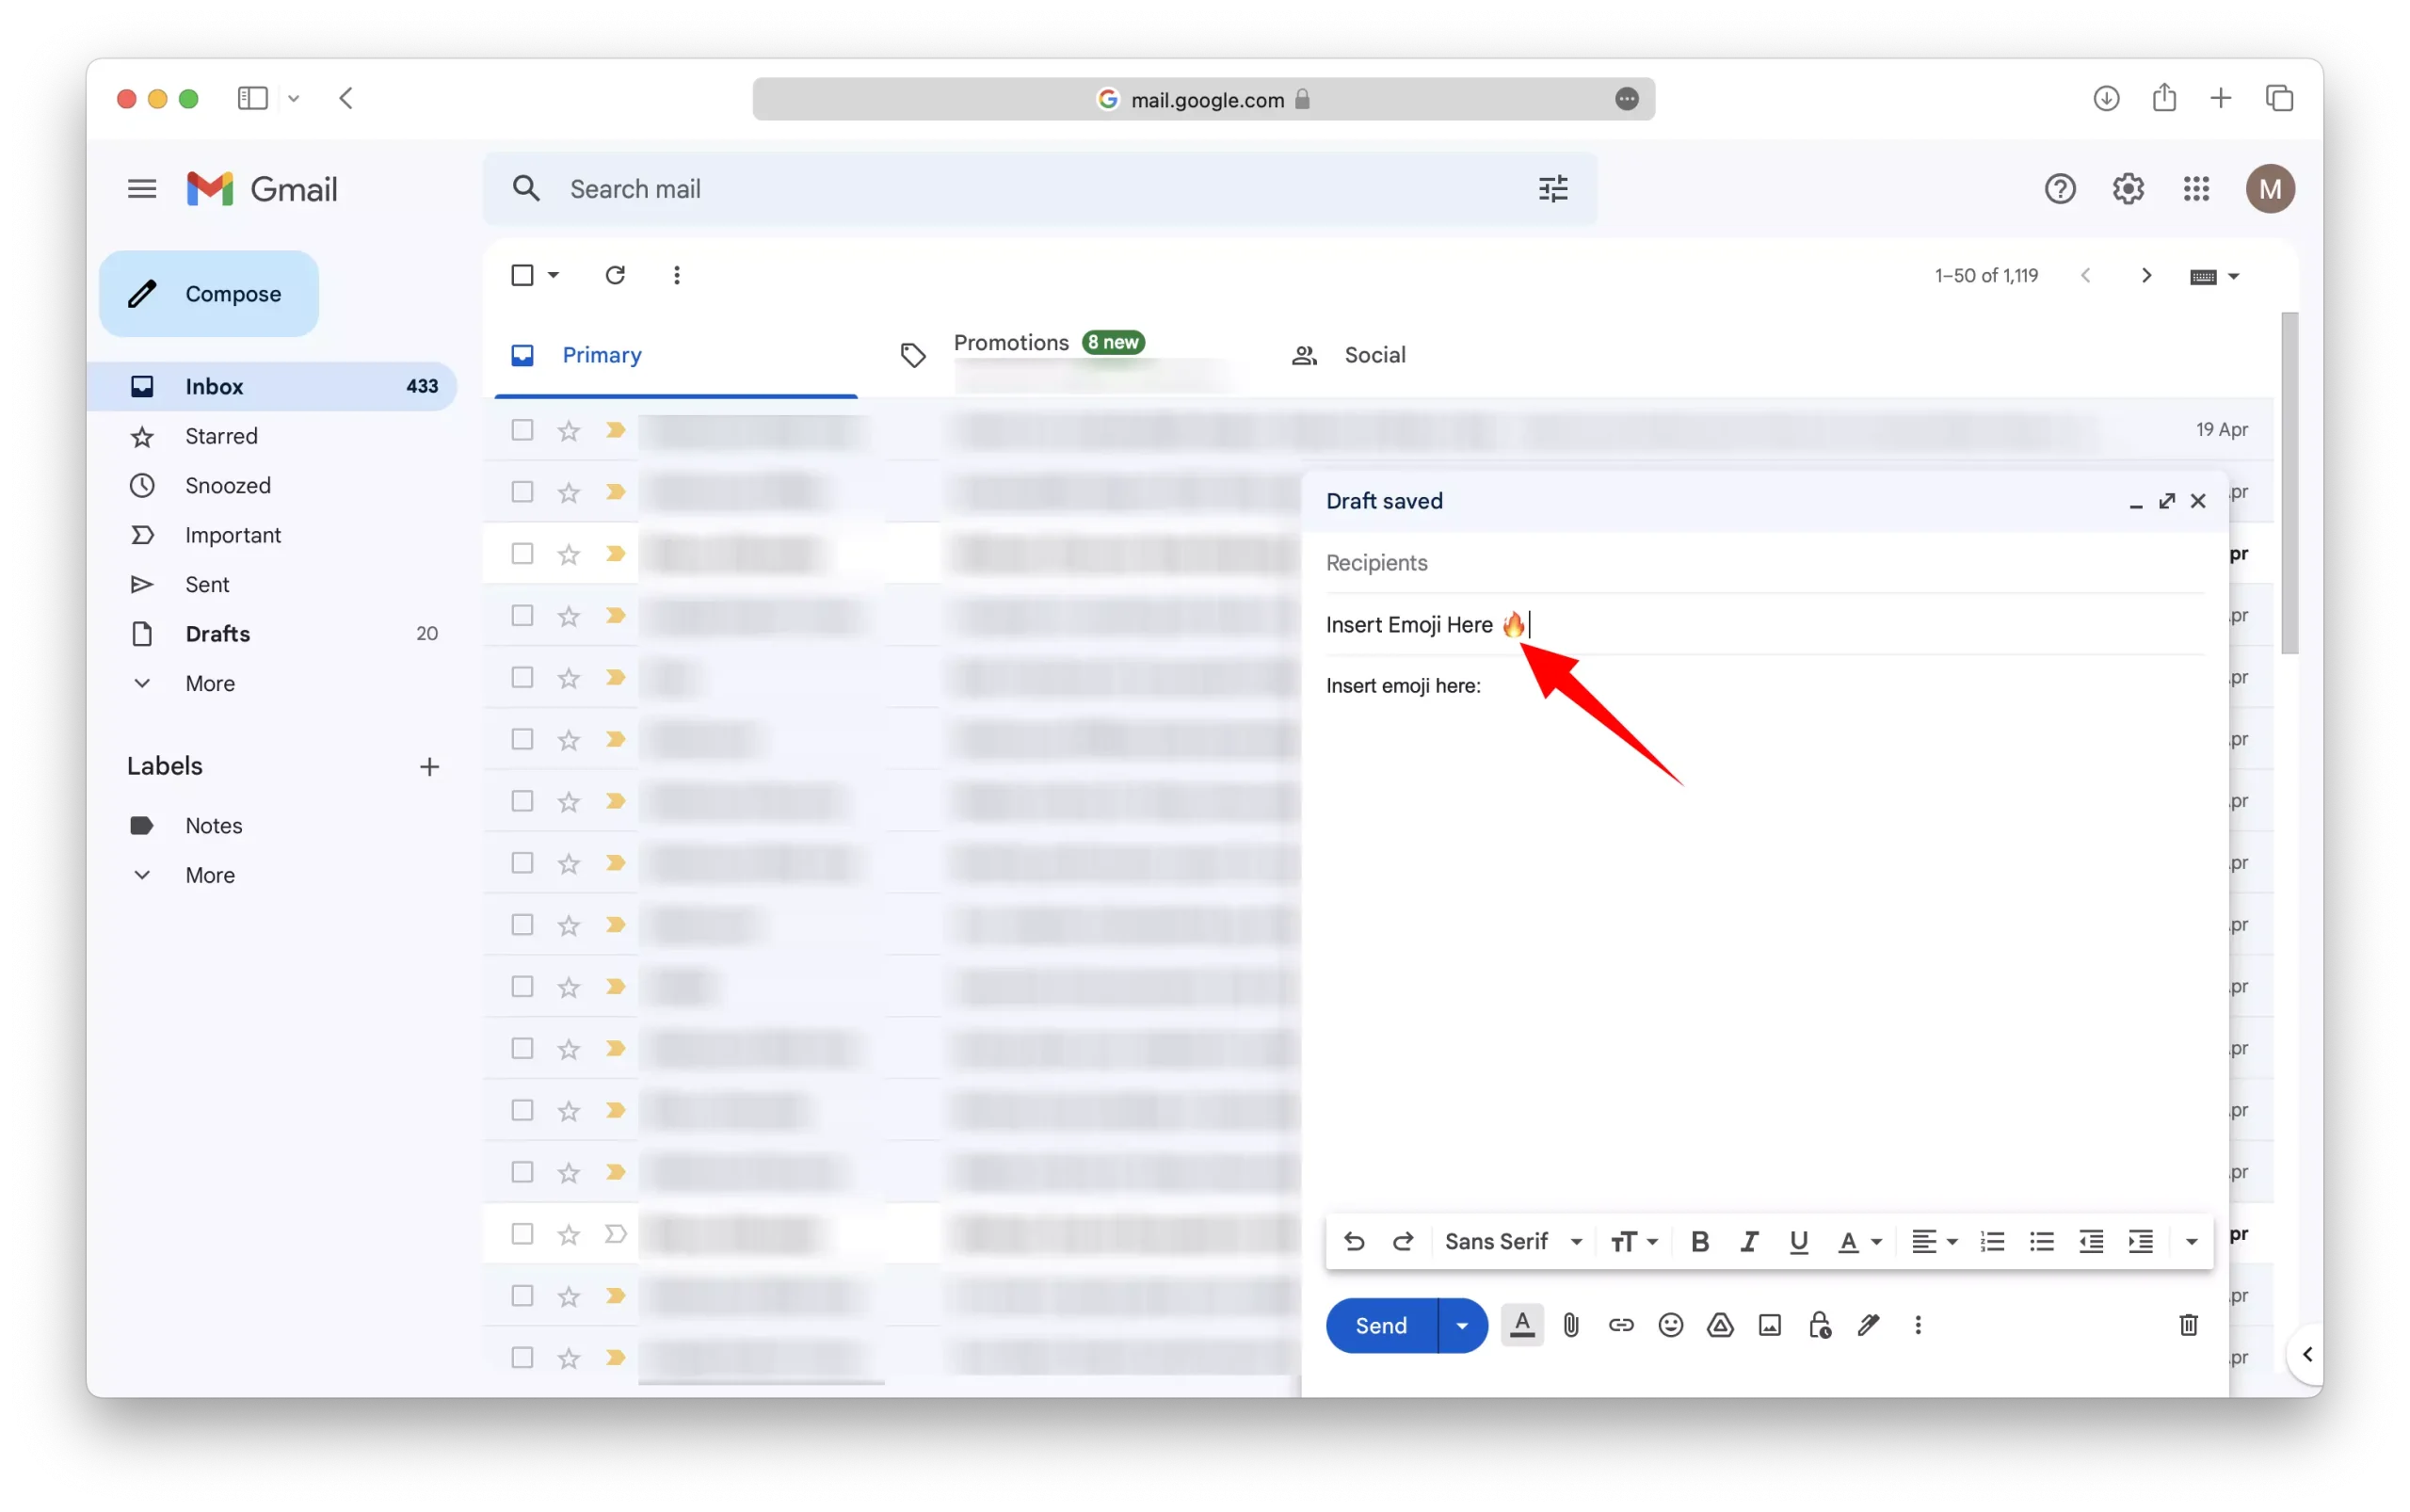
4 – Return to Gmail and open the email you were composing.
5 – Position your cursor where you want to add the emoji.

6 – Paste the emoji into your desired location in the email.
Method 3: Use the Emoji Keyboard by JoyPixels® Google Chrome Extension
1 – Follow this link to the Emoji Keyboard by JoyPixels® download page.
2 – Click on the “Add to Chrome” button to download the extension.
3 – Give the extension permission to install.
4 – Return to your Gmail inbox and open the email that you would like to insert the emojis in.
5 – Click on the extension icon in the Google Chrome toolbar.
6 – In the list of extensions, click on Emoji Keyboard by JoyPixels®.
7 – Use the search bar or scroll through the list of emojis to find the one you want to use.
8 – Once you’ve found the emoji, click on it to copy it.
9 – Position your cursor where you want to add the emoji in your email and paste it in.
Method 4: Use the Built-in Windows Emoji Keyboard
1 – Go to Gmail and Open the email you were composing.
2 – Place your cursor in the email where you want to add the emoji.
3 – Simultaneously press the “Windows key” and the “period key” on your keyboard to open the Windows Emoji Keyboard.

4 – You can either use the search bar or scroll through the list of emojis to find the one you want to use.

5 – Once you’ve found the emoji, click on it to insert it into your email where you placed your cursor.

Method 5: Use the built-in macOS Emoji Keyboard
1 – Log in to your Gmail account.
2 – Open the email that you were writing.
3 – Position your cursor where you want to insert the emoji.

4 – Press the key combination “fn-e” or “control-command-space” on your keyboard to open the built-in macOS emoji keyboard.

5 – Use the search bar or scroll through the list of emojis to find the one you want to use.

6 – Once you’ve found the emoji, click on it to insert it into your email where you placed your cursor.

Method 6: Use the built-in iOS Or Android Emoji Keyboard
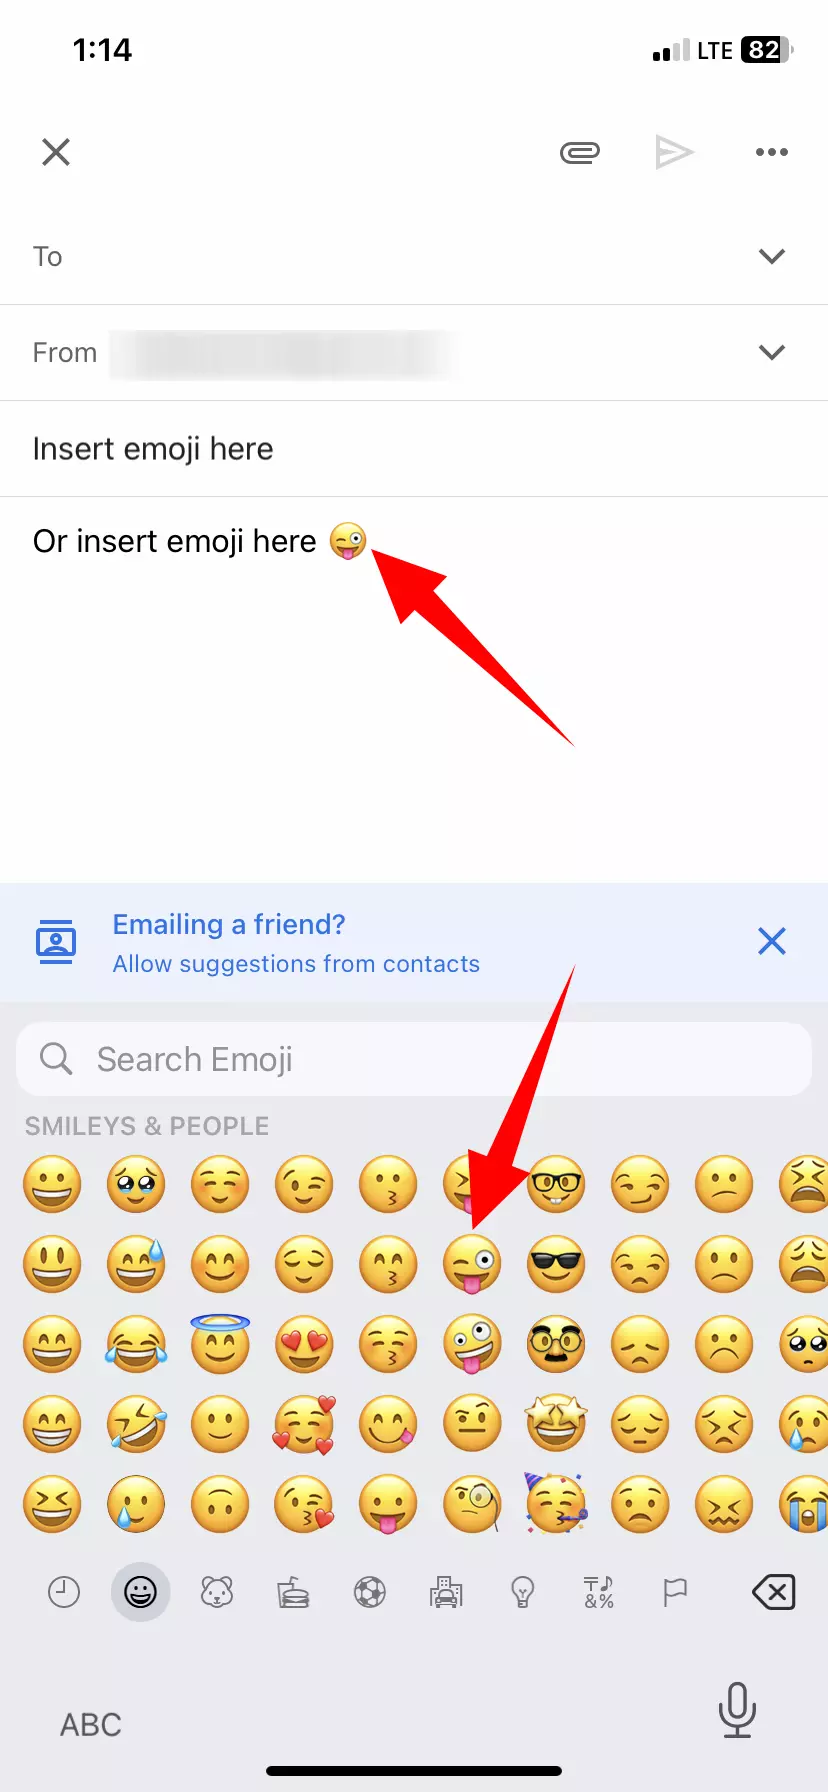
1 – Open the Gmail app on your iOS or Android device.
2 – Tap on the “Compose” button to start a new email.

3 – Place the cursor where you want to add the emoji to your email.

4 – Tap on the emoji icon on the keyboard to switch to the emoji keyboard.

5 – Use the search bar or scroll through the list of emojis to find the one you want to use.

6 – Once you’ve found the emoji, tap on it to insert it into your email.
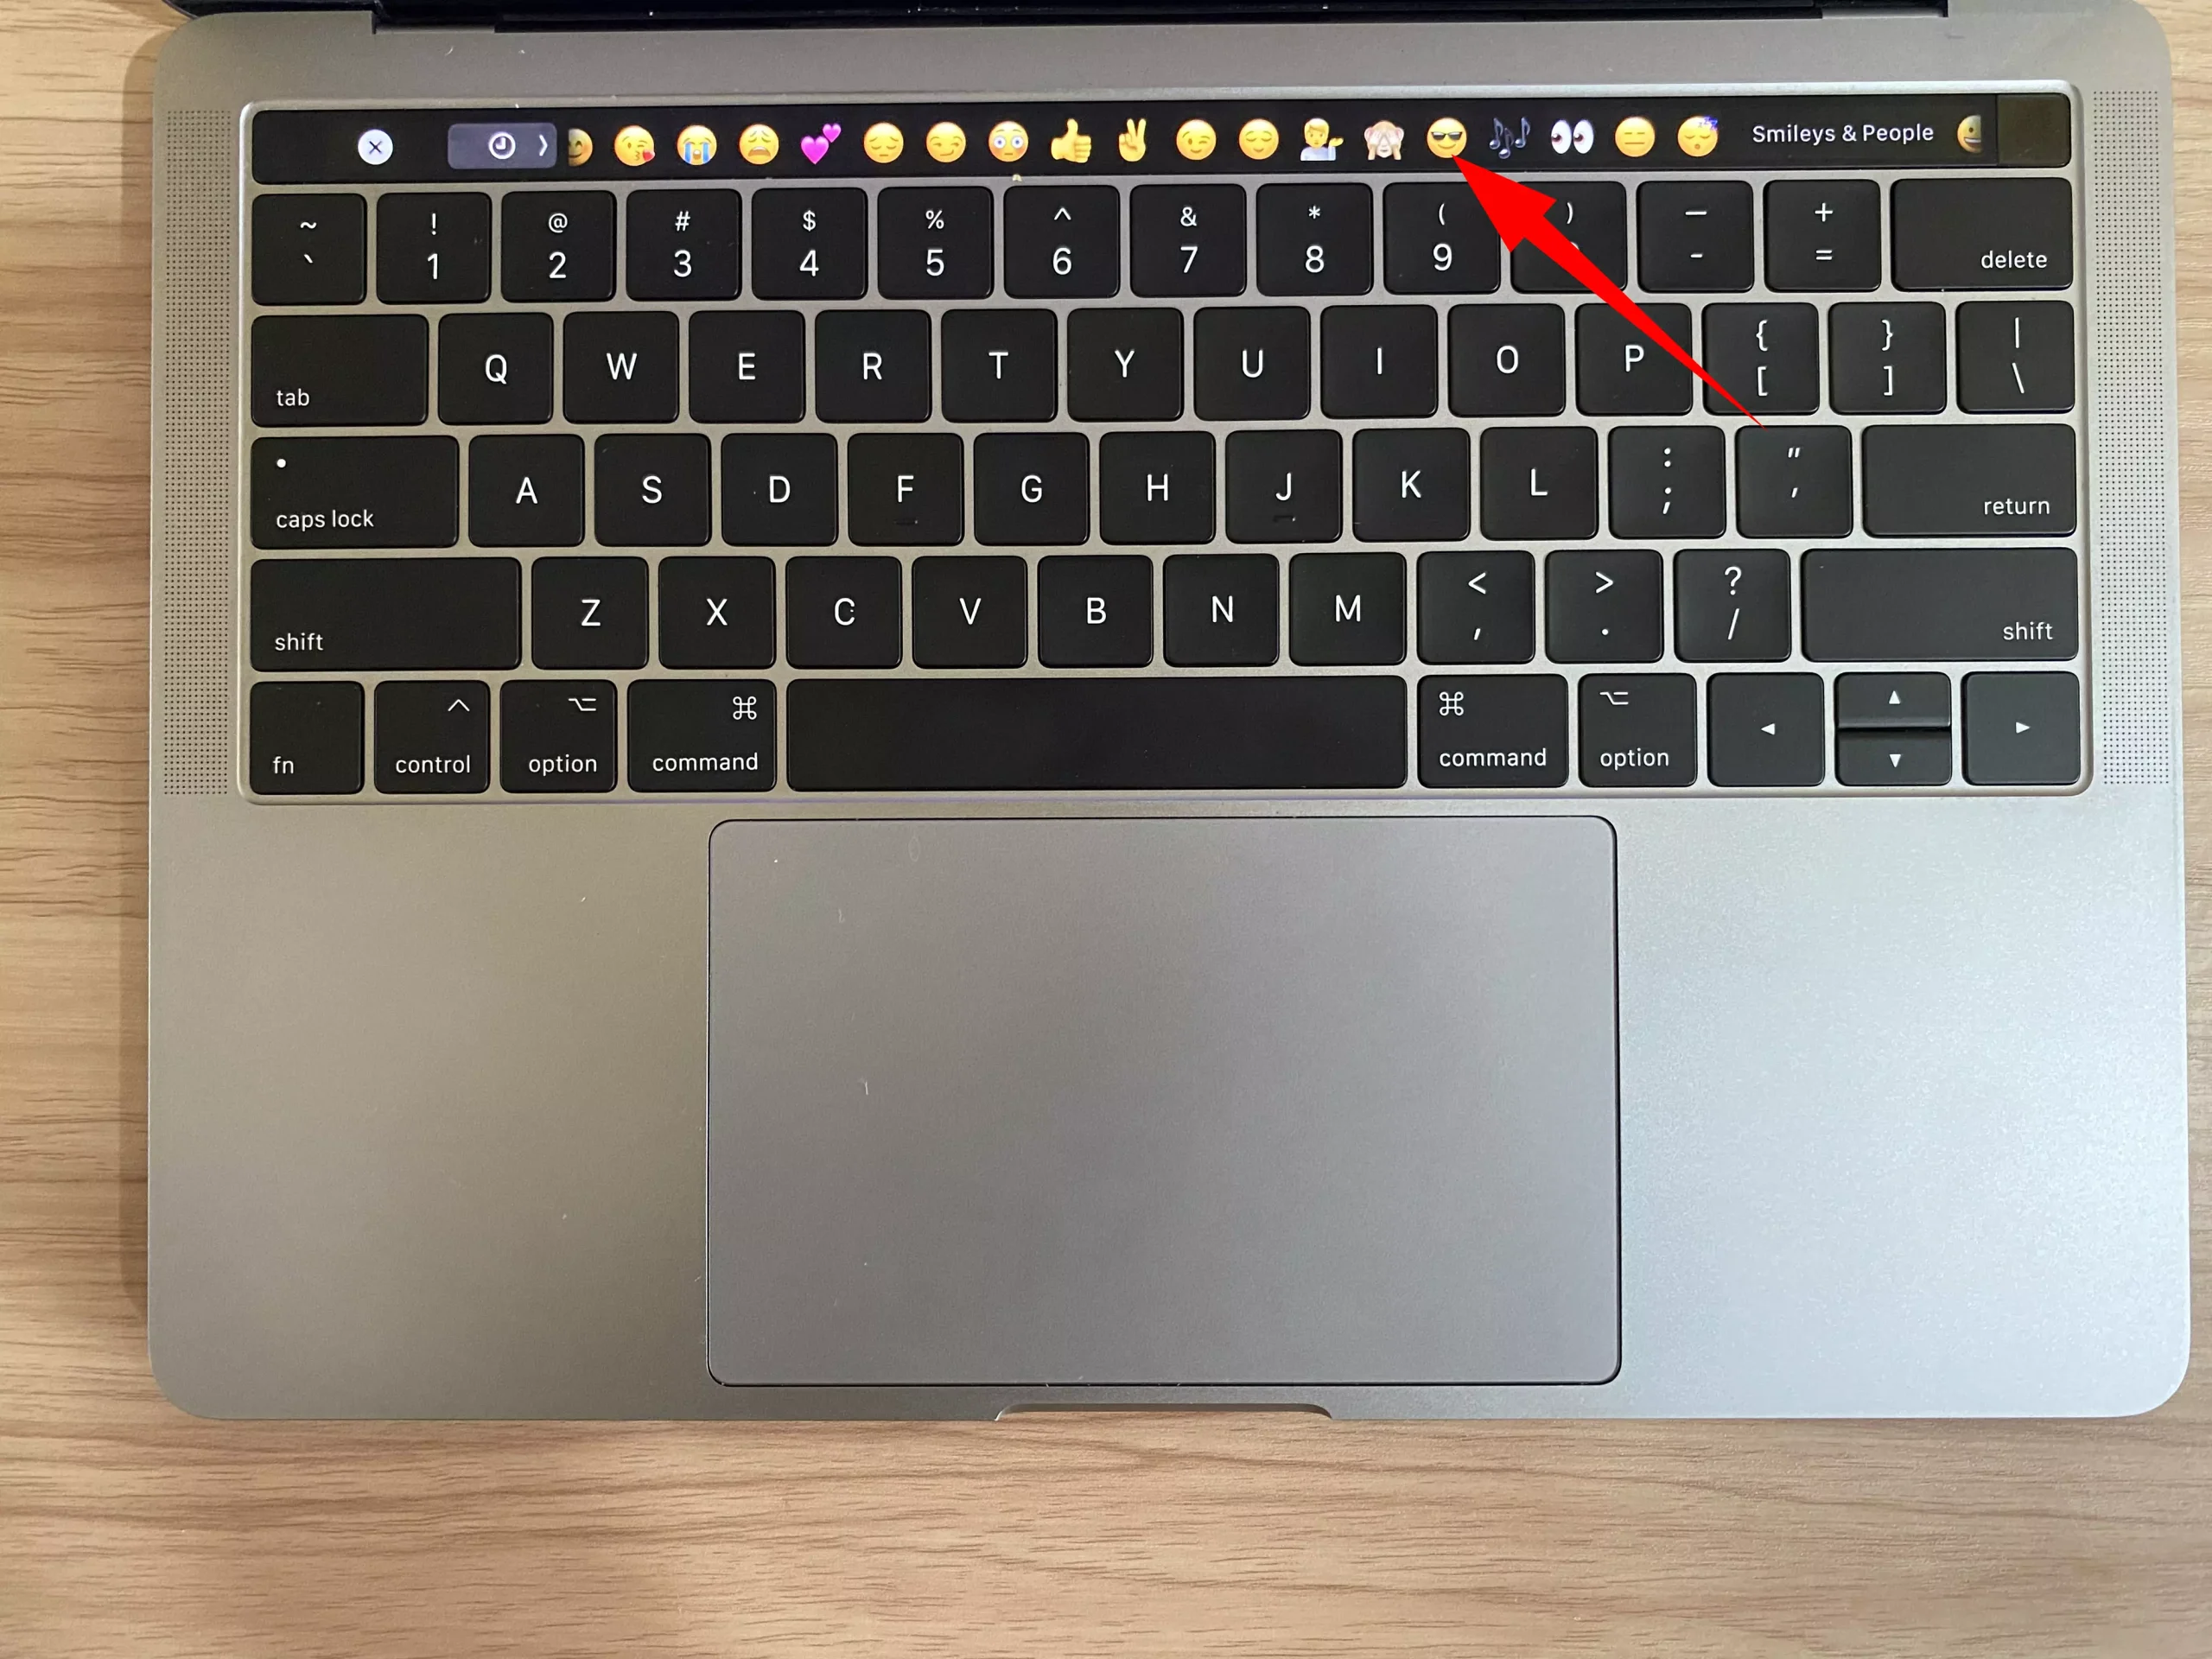
Method 7: Use the MacBook Pro Touch Bar (2016 and newer)
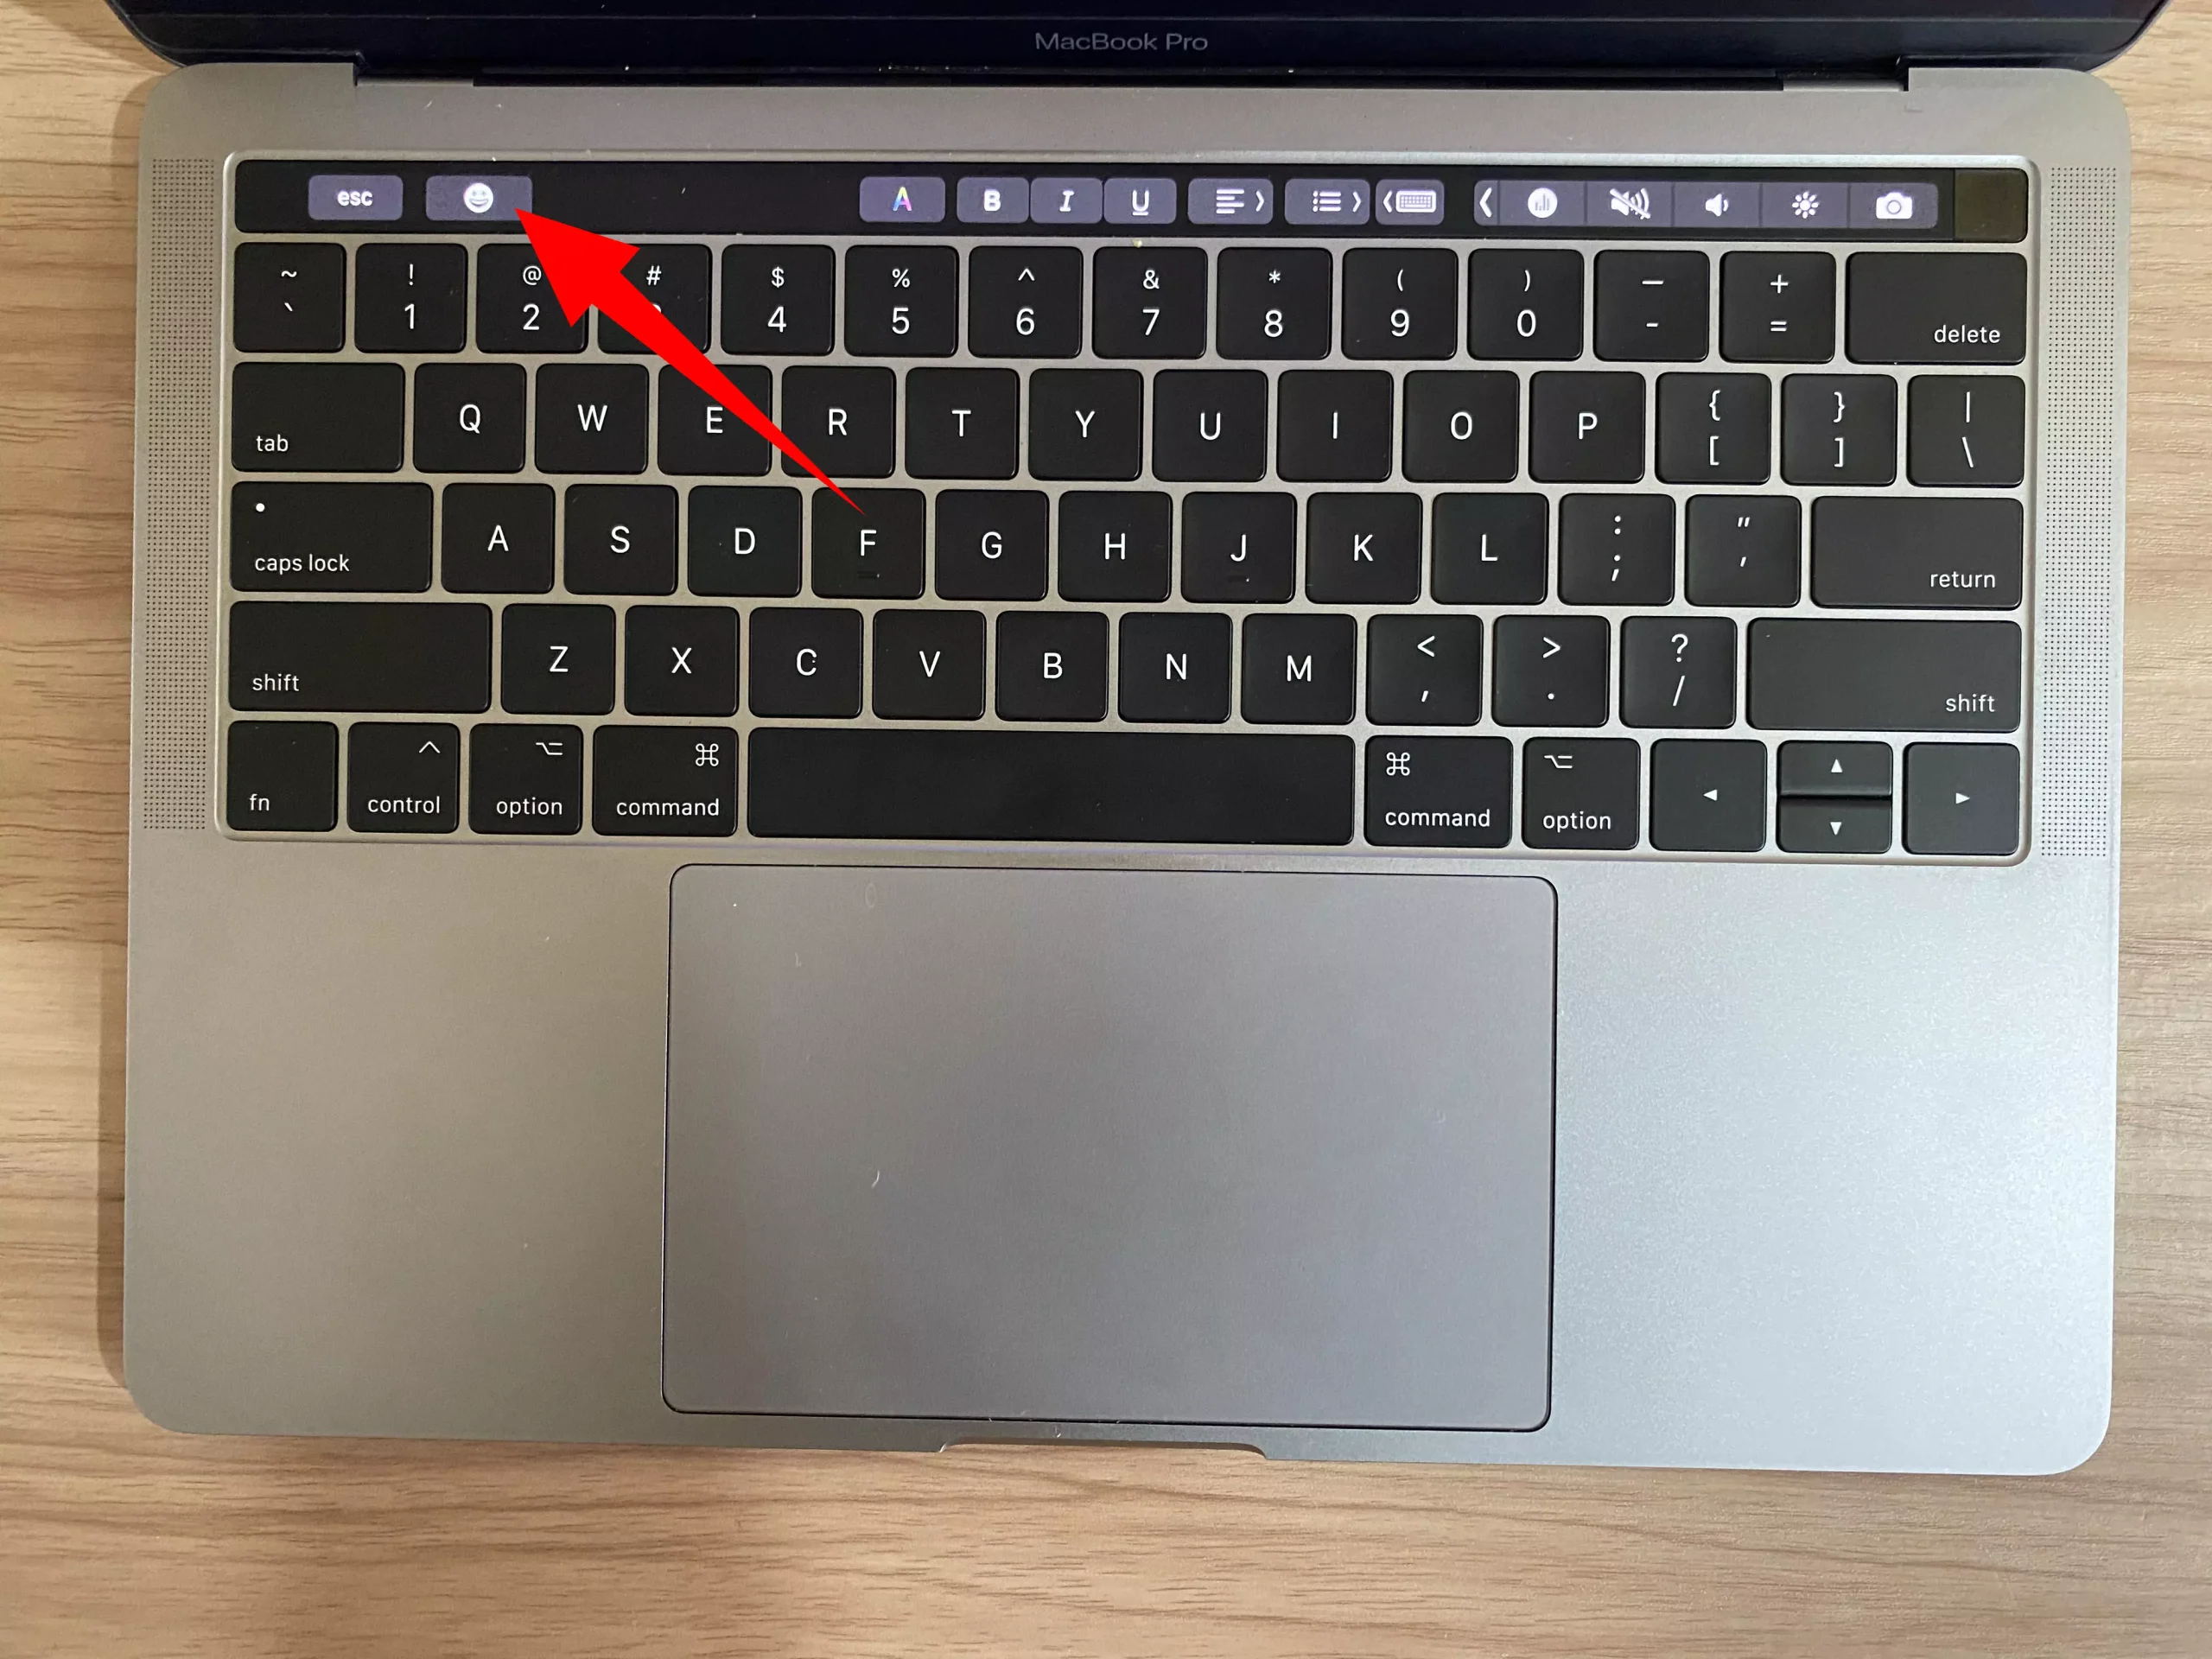
1 – Open your preferred browser on your Macbook and go to your Gmail inbox
2 – Click on the compose button to start writing a new email
3 – Place the cursor where you want to insert the emoji.

4 – Look for the emoji icon on the MacBook Touch Bar and tap on it.
5 – Scroll through the list of available emojis and find the one you want to use.
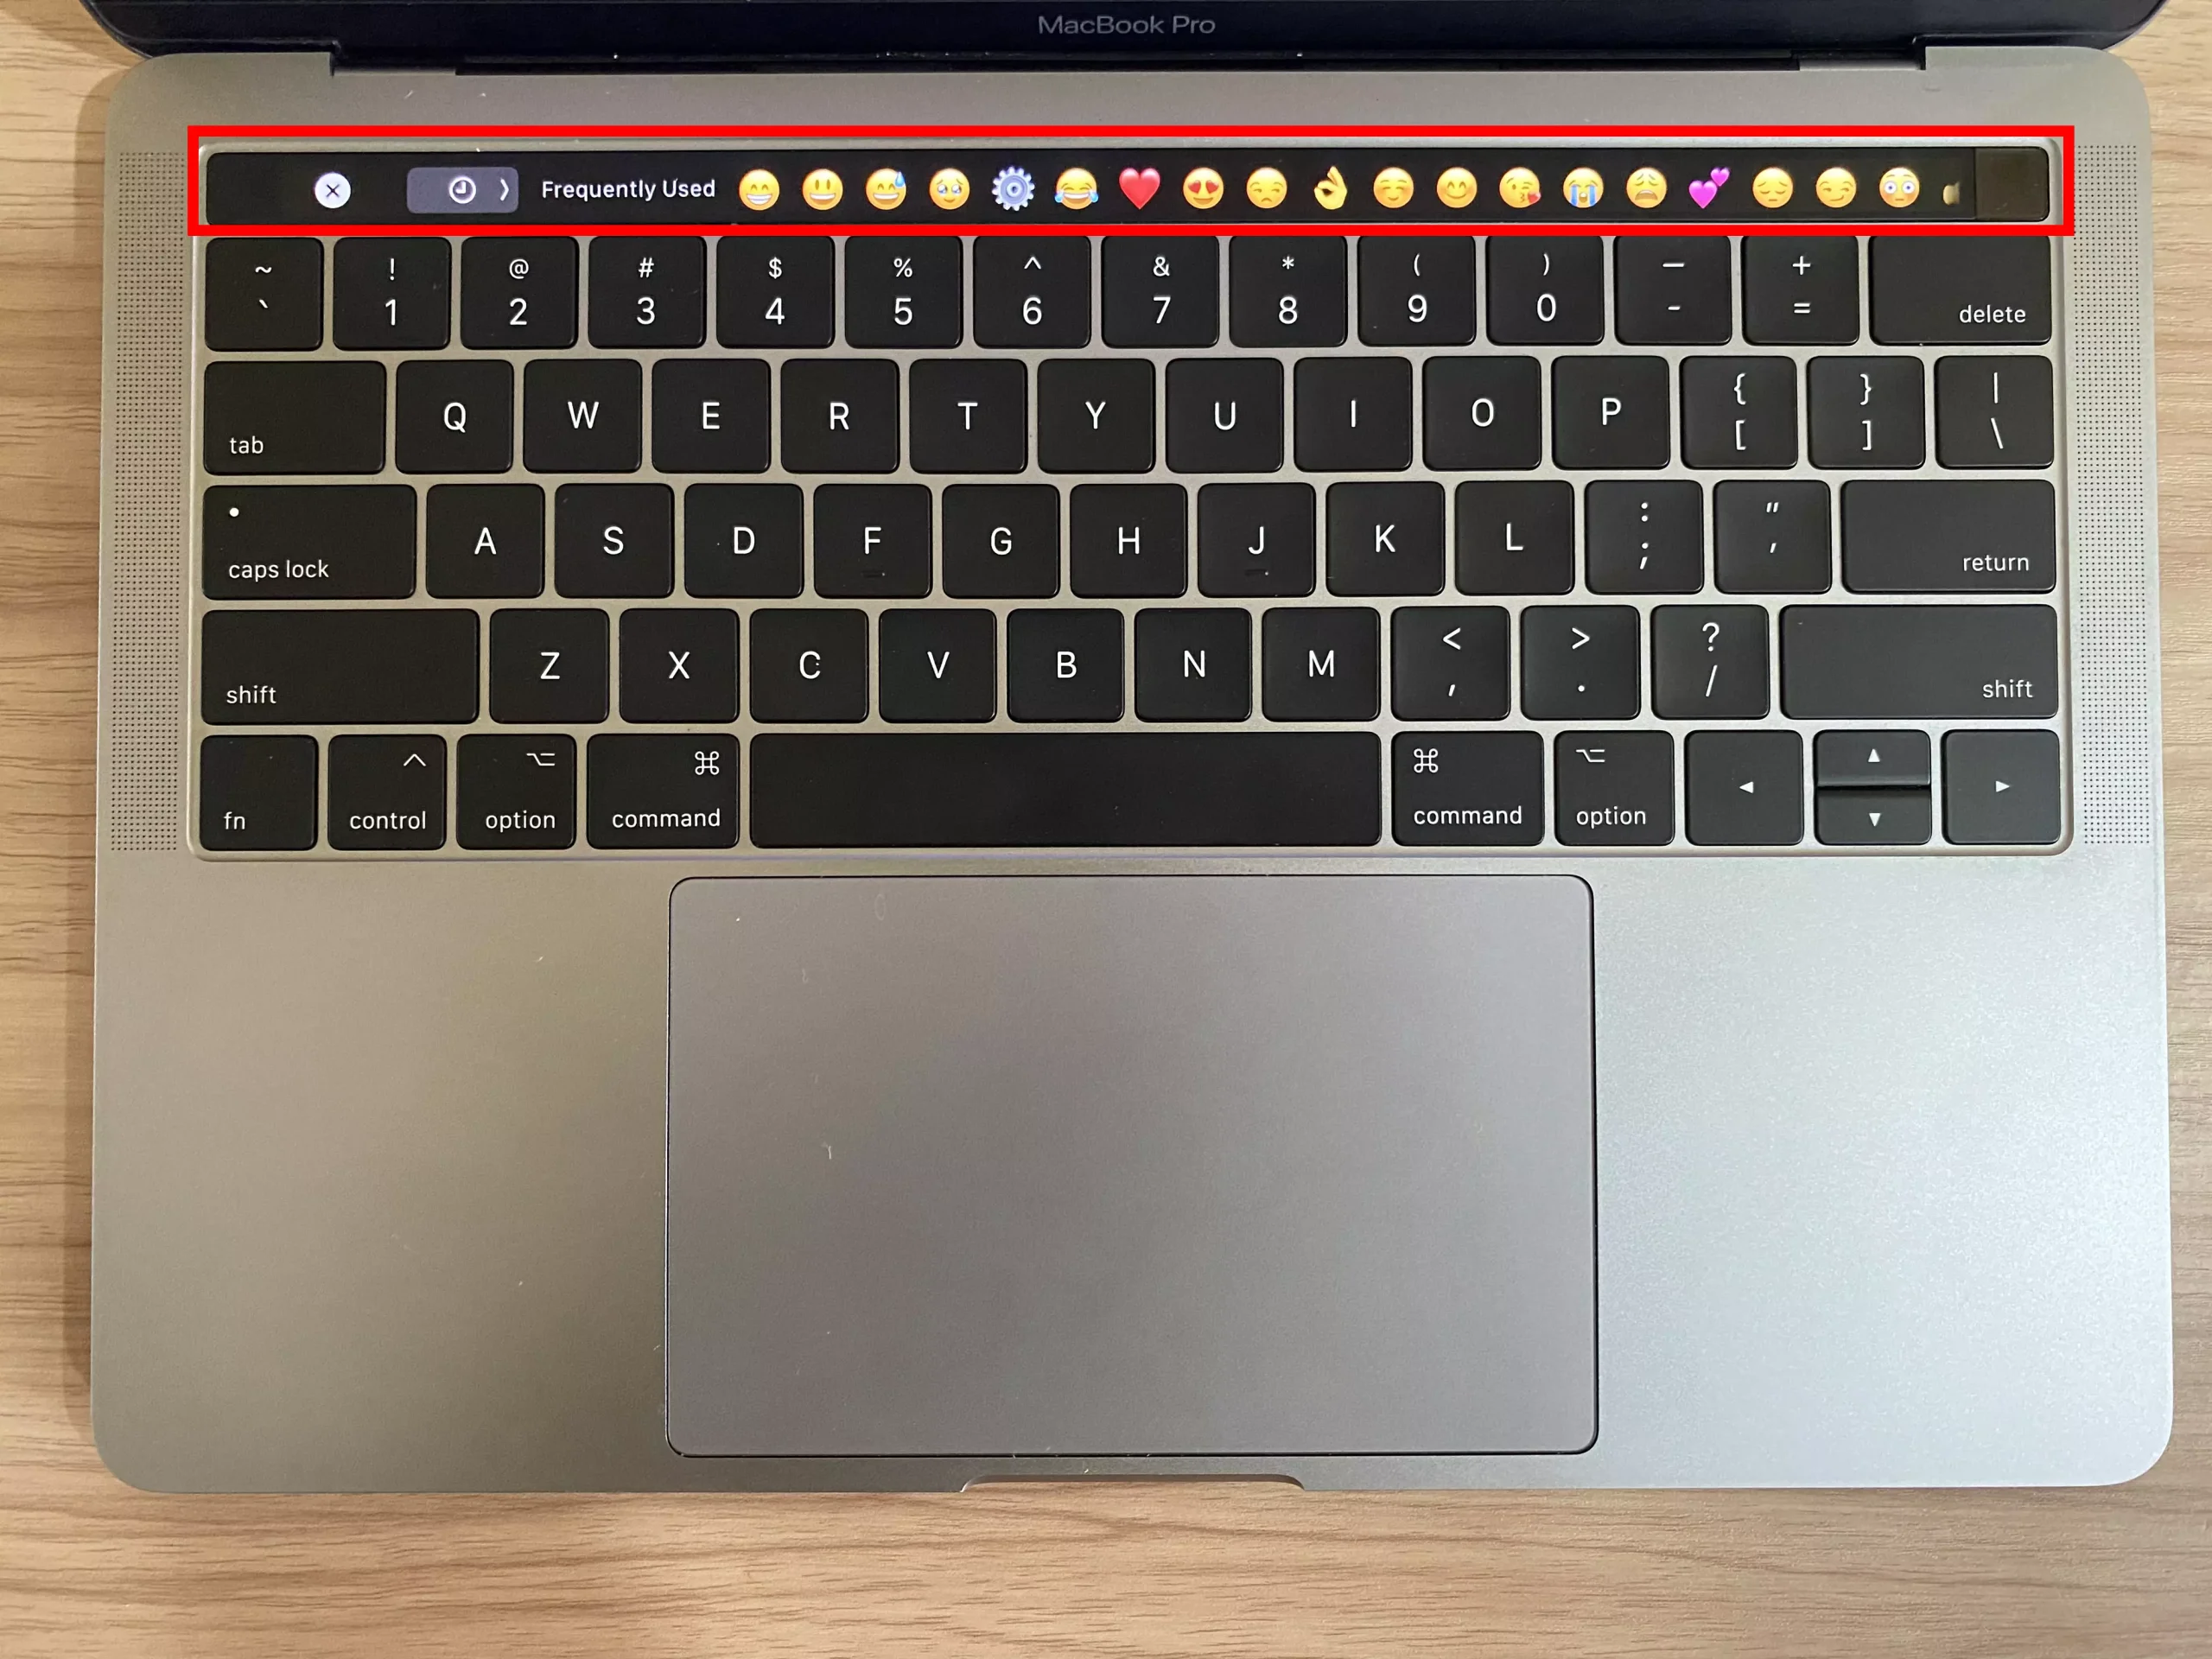
6 – Tap on the emoji that you want to use to insert it in the email.