To move your local WordPress website from XAMPP to a web server you’ll first need to create a backup of your local website’s files and database. Then you will need to purchase a web hosting plan and restore your backed-up website’s files and database on this web server.
There are two methods that you can use to achieve this. The first method which is by far the easiest is to use the All-in-One WP Migration plugin to backup your local website and restore it on the live web server.
The second method which is more difficult is to manually backup your website’s files and database. This method requires a bit of technical knowledge and does not utilize any plugins.

Step 1 – Backup Your local WordPress Website
How To Backup A Local WordPress Site Using A Plugin
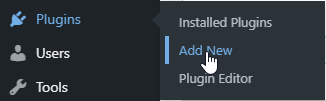
1. From the WordPress dashboard of your local website, hover your mouse pointer over the plugins menu option and click on “add new” in the slide-out menu.
2. Search for the All-in-One WP Migration plugin then install and activate it.

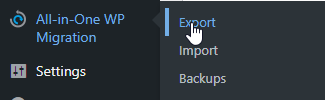
3. After installing the plugin a new menu option titled “All-in-One WP Migration” will become available in the menu to the left on the WordPress dashboard. Hover your mouse pointer over this option and click on “export”.
4. On the export page click on the green “export to” button and select the “file” option.
5. When the file is finished downloading, you would have successfully backed up your local WordPress website.
How To Backup A Local WordPress Site Manually (Without Plugins)
How To Manually Backup WordPress Website Files
1. Navigate to the location where your local website files are saved on your computer. This location should look like “E:\xampp\htdocs\”.
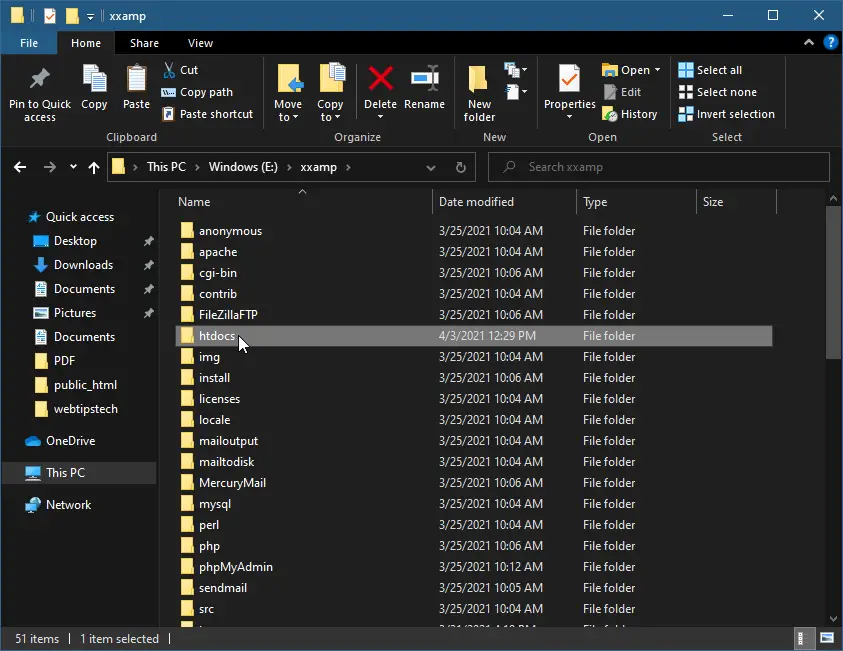
2. Within the htdocs folder find your local website’s folder and open it.
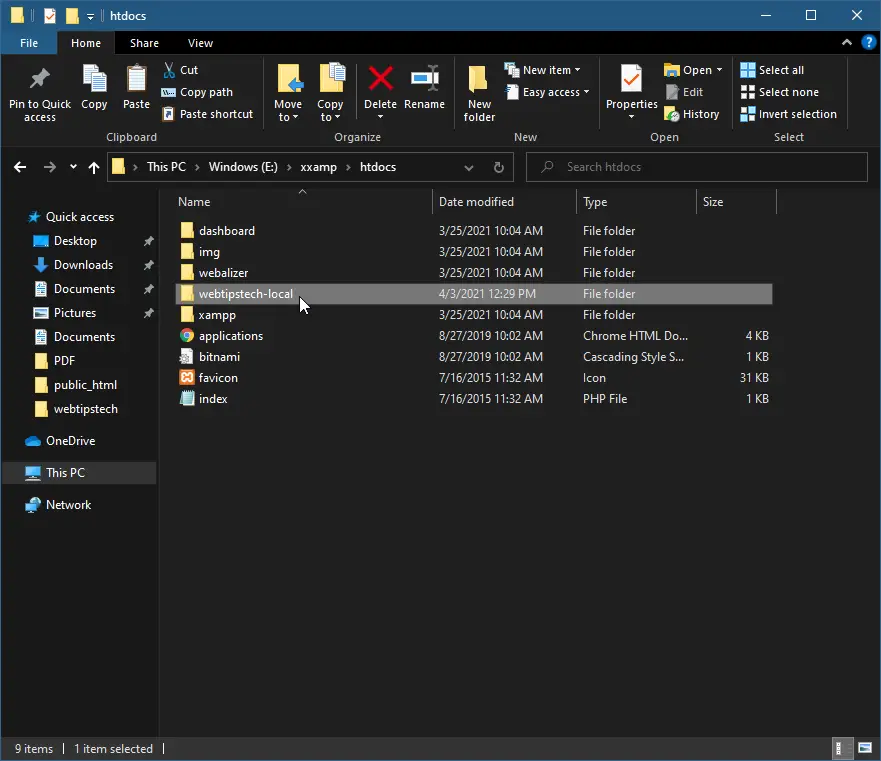
3. Highlight all the files and folders within this folder and create a single .zip file.

How To Manually Backup A WordPress Database
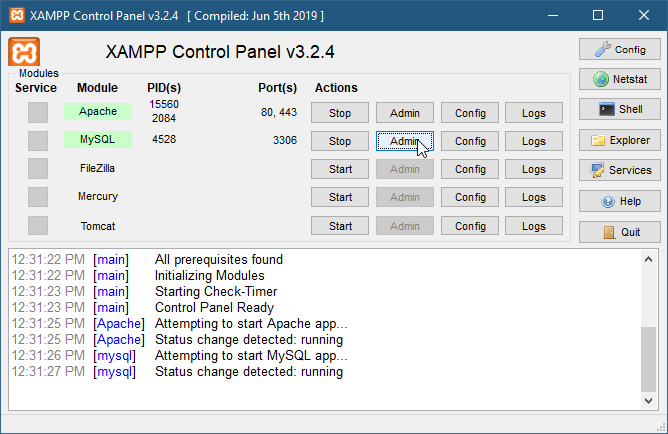
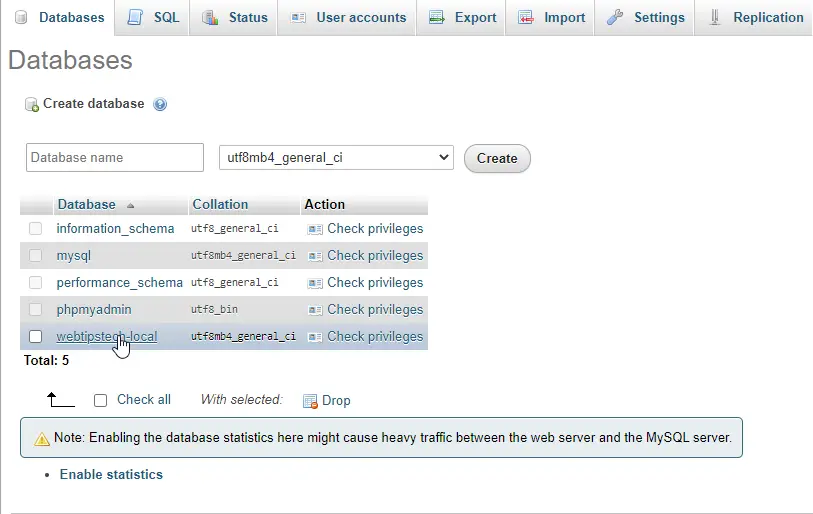
1. Open the XAMPP control panel and click on the admin button under the MySQL option.
2. From the PHPMyAdmin dashboard click on the database tab.
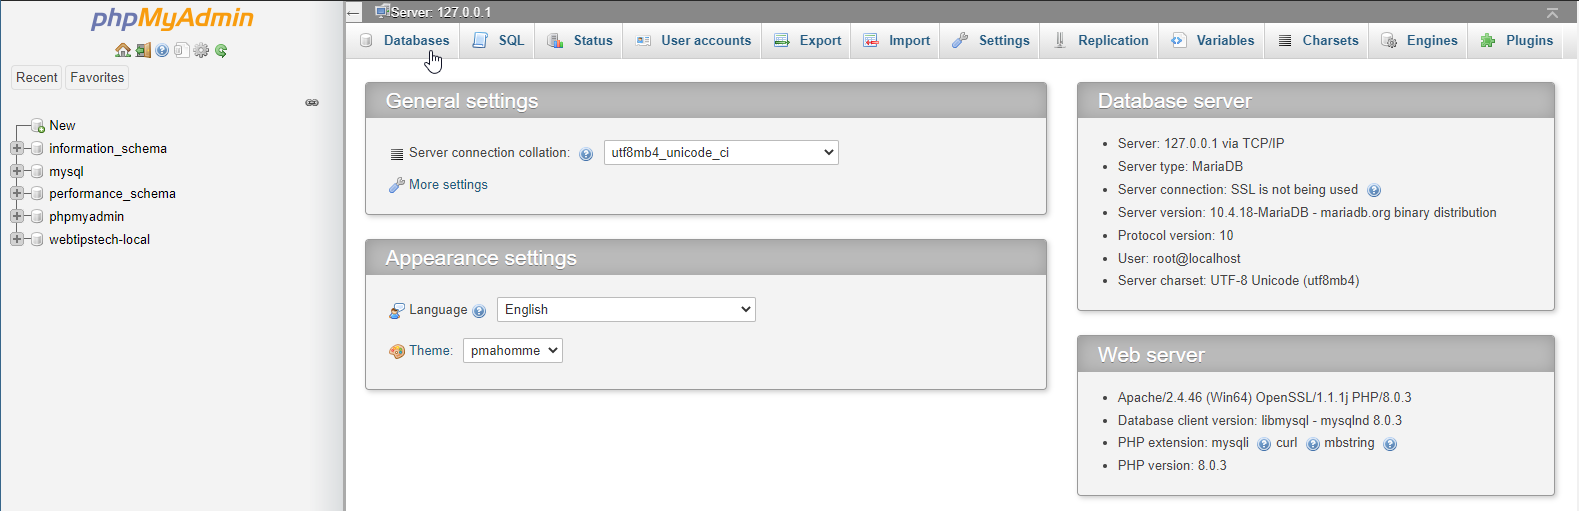
3. Locate the database for your local website and click on it.
4. Within the database options click on the “export” tab.

5. Set the export method as quick and the format as SQL then click on “go”.
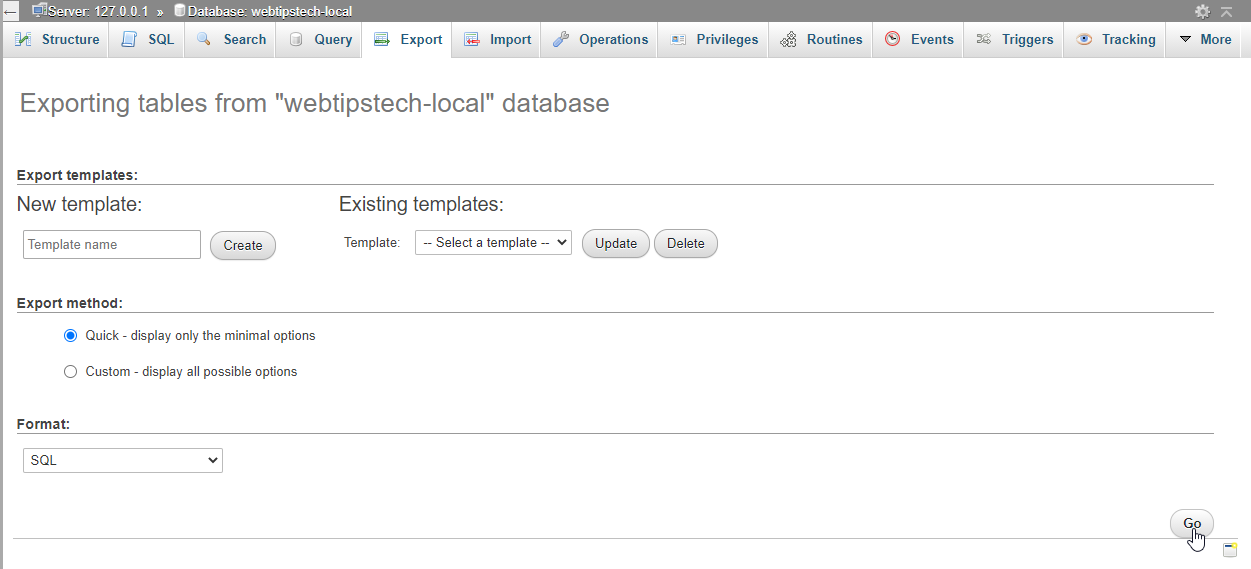
6. This will download your WordPress database in a single SQL file.
Step 2 – Purchase A Domain And Hosting Plan
After creating a backup of your local WordPress website you will need to purchase a domain name and a hosting plan. If you have not yet decided on a web hosting provider, I highly recommend that you use SiteGround Managed WordPress Hosting. I’ve been using their services for about two years and I must say their service has been excellent.

1. Head on over to the SiteGround Managed WordPress Hosting landing page and select the start-up plan. This plan is ideal for a new website.

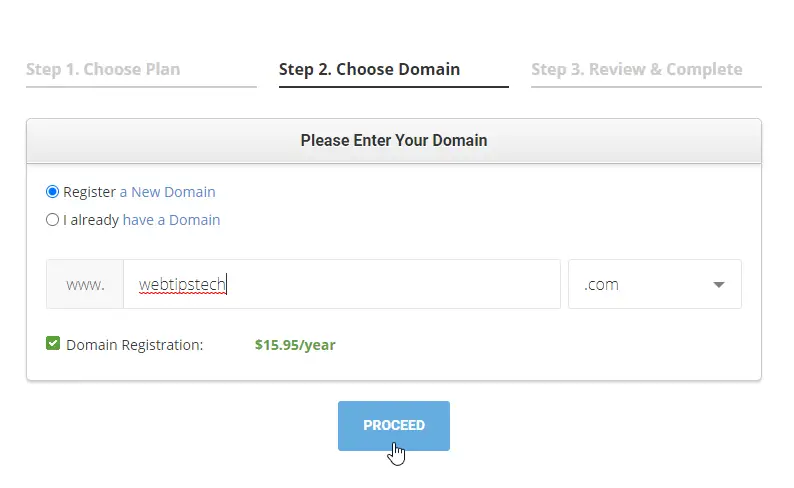
2. Next if you already have a domain name select “I already have a Domain”. If you don’t have one then you can register one with SiteGround by selecting the “Register a New Domain” option.
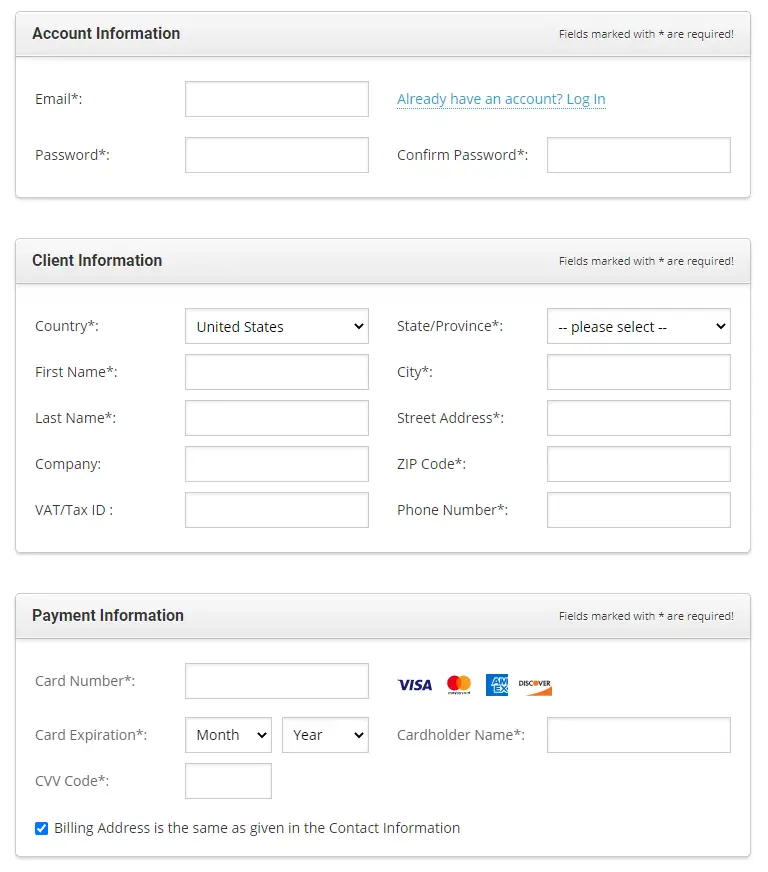
3. Create your SiteGround account by filling in your account, client, and payment information.
4. Under the purchase information section select a hosting period of 12 months and select domain privacy if you would like to hide your personal domain information from Whois services.
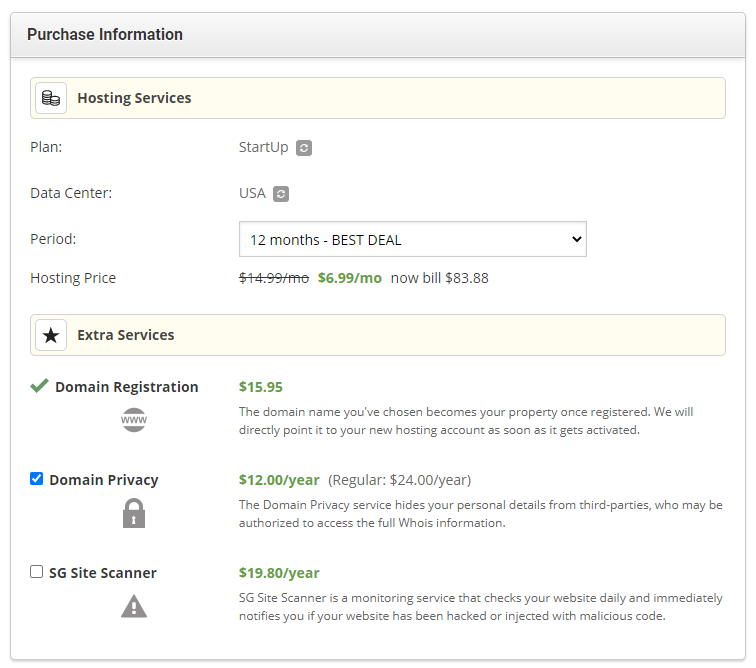
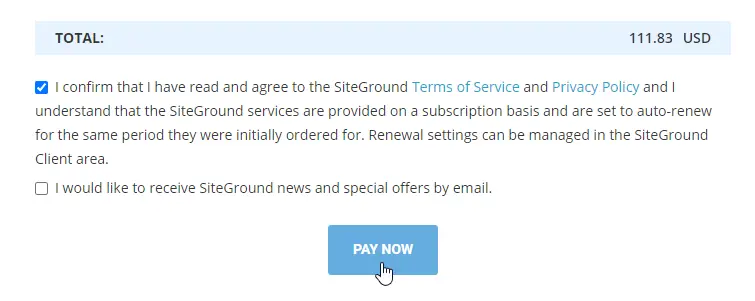
5. Agree to the terms and conditions and click on pay now.
Step 3 – Install WordPress On The Live Web Server
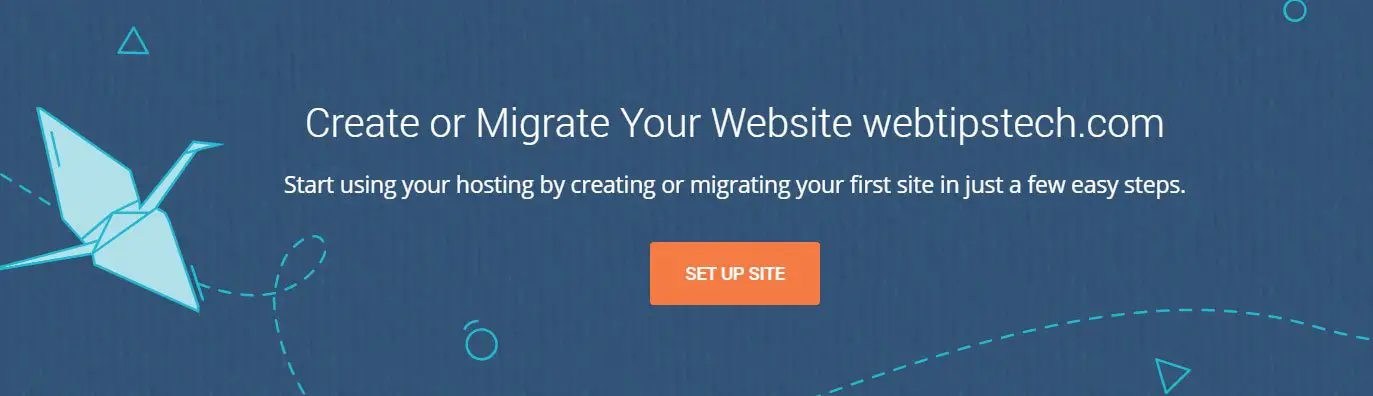
1. From the SiteGround welcome screen click on the “set up site” button.
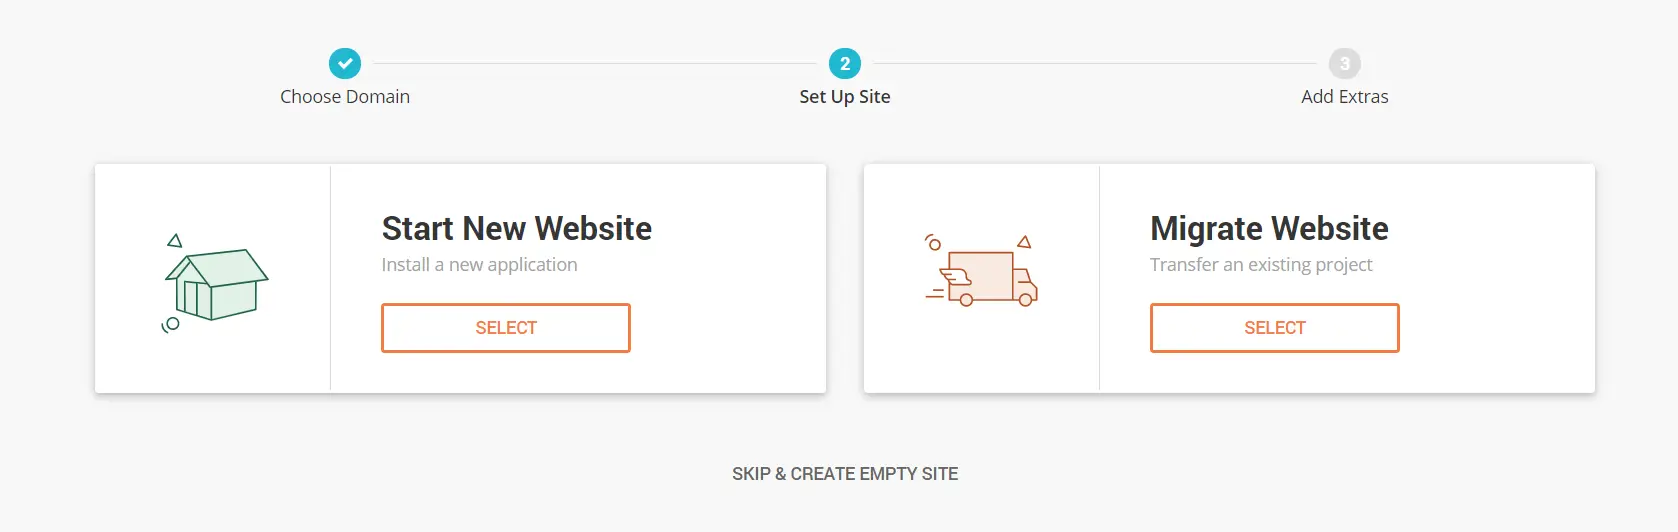
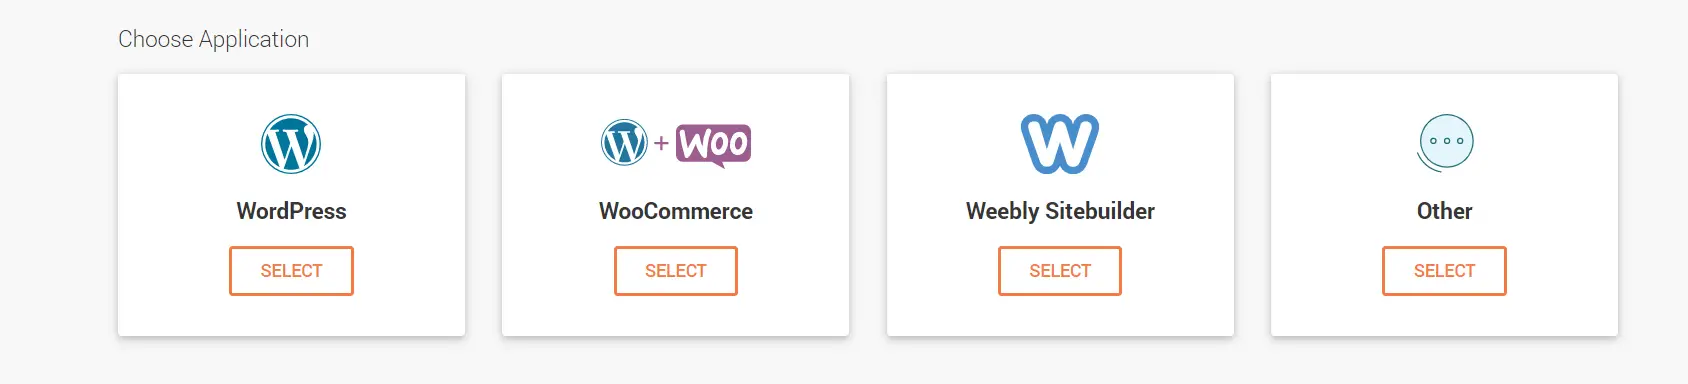
2. Next select start new website and select WordPress as the application of choice.
3. Create your WordPress admin credential that you would later use to log in to your WordPress dashboard.

4 Skip the extra addons by clicking finish, then on the next page click on the login admin button.
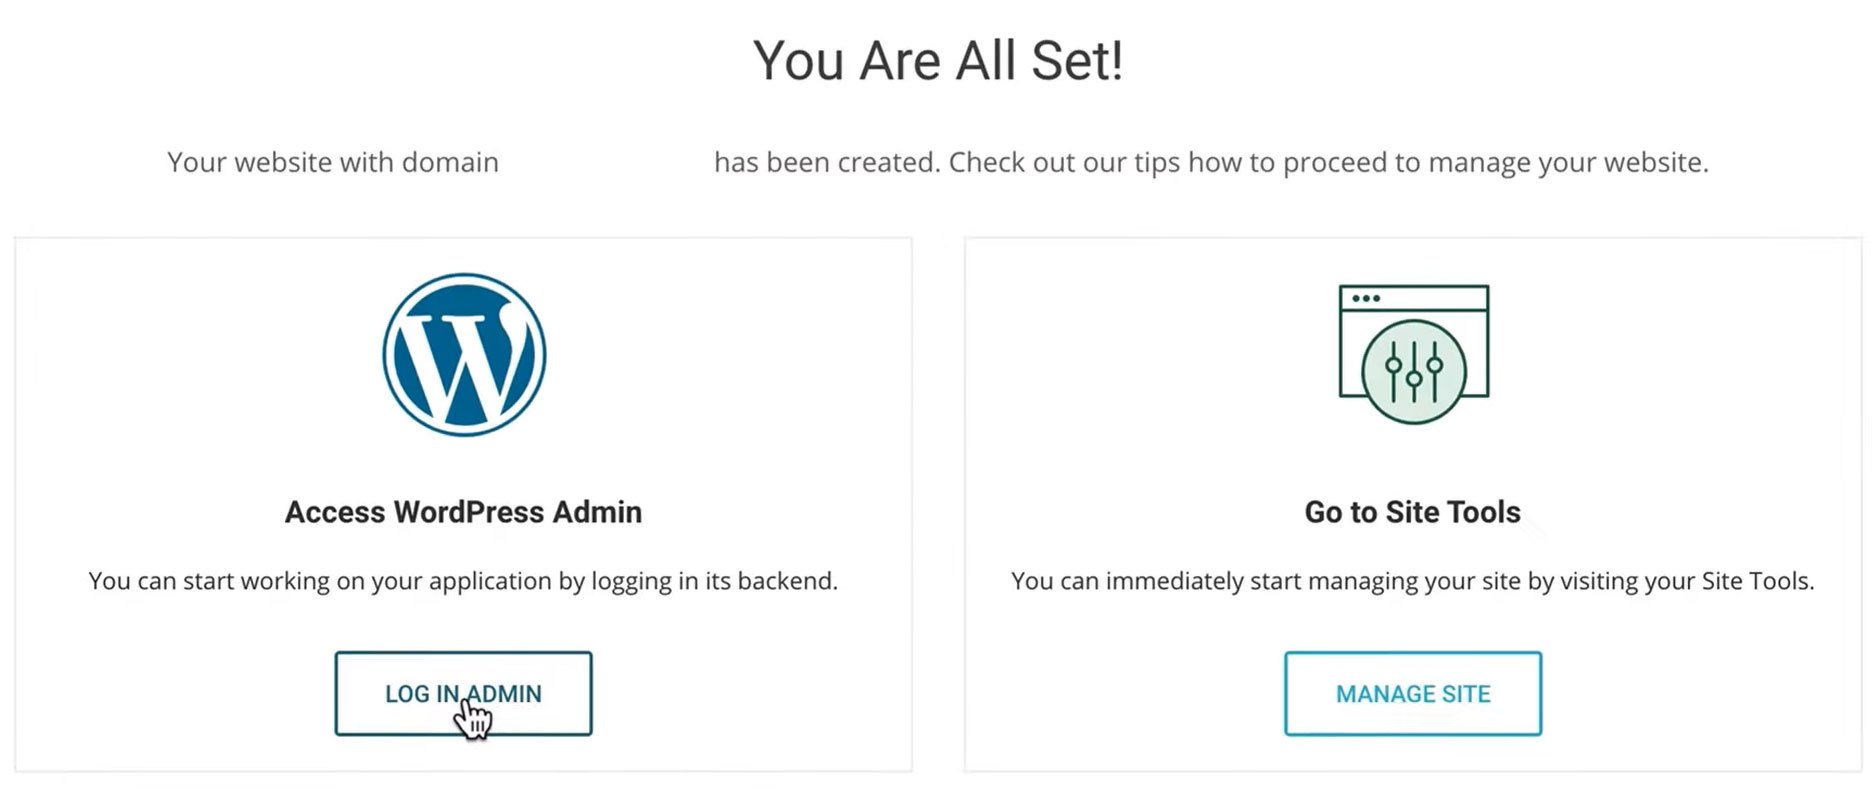
5. Before you can access your WordPress dashboard SiteGround will launch its built-in started setup. Follow through with it until you get to the part where it gives you the option to go to your dashboard.
Step 4 – Restore Your Local WordPress Website On The Live Web Server
How To Restore A WordPress Website On A Web Server Using A Plugin
1. Now that you’re at the dashboard of your live WordPress website, head on over to the plugins page and install and activate the All-in-One WP Migration plugin.
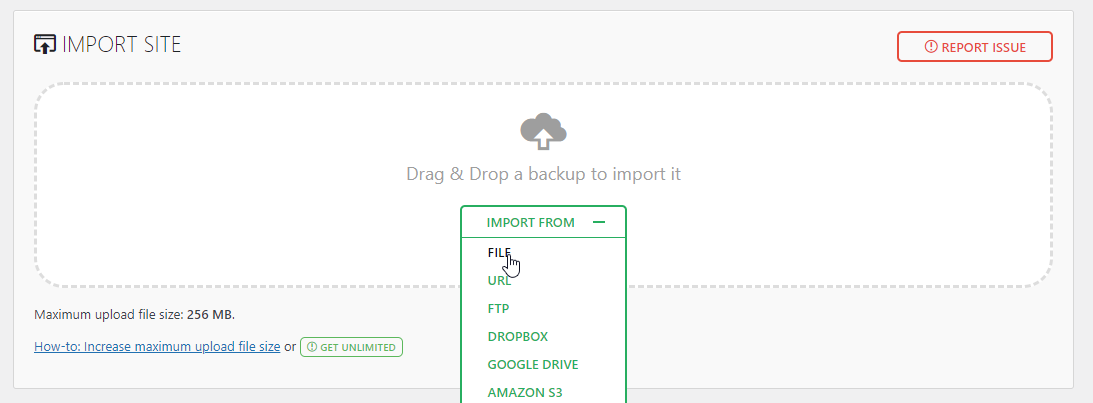
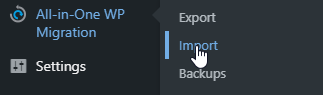
2. With the plugin activated select the import option from the All-in-One WP Migration menu item.
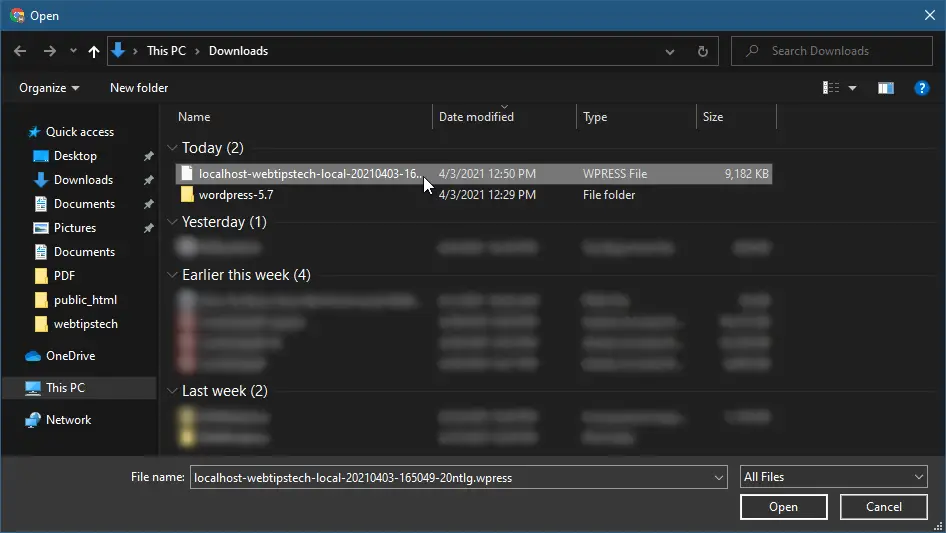
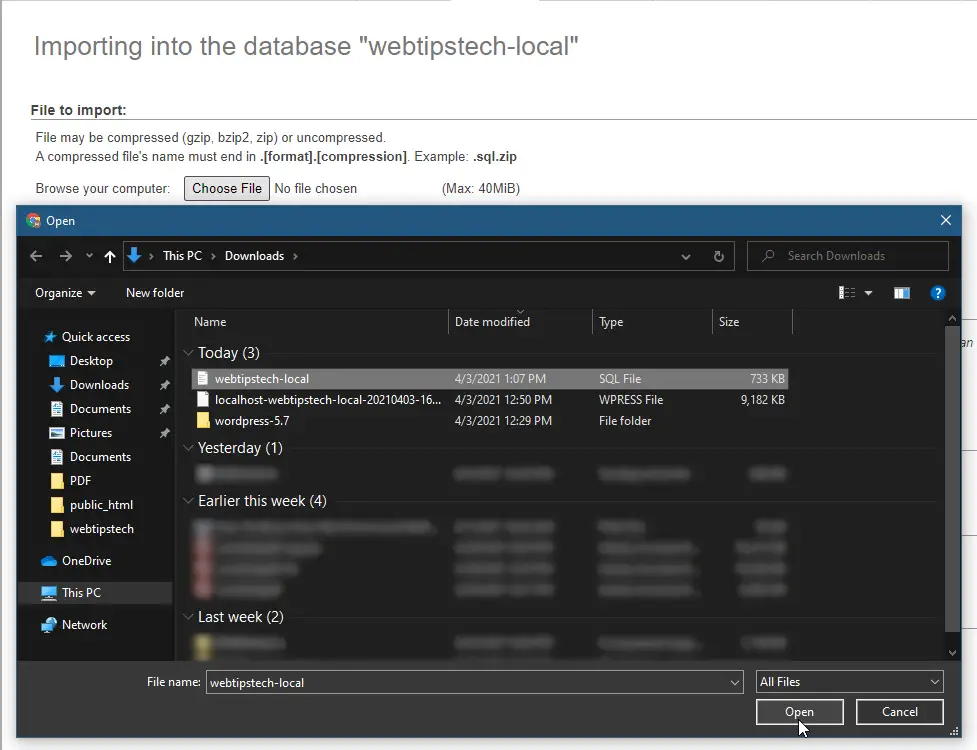
3. On the import page click on the green import button and then select file.
4. This will open a file explorer window. Locate the backup file of your local website and click on open.
5. Wait for the process to be completed and you would have successfully moved your local site to a web server.
How To Restore A WordPress Website On A Web Server Manually (Without Plugins)
How To Manually Restore A WordPress Database
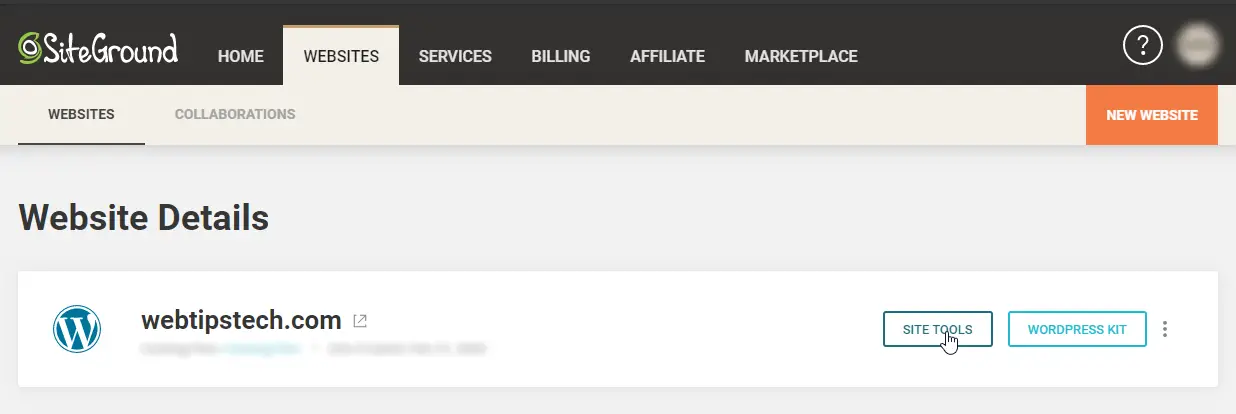
1. After installing your WordPress website return to your SiteGround dashboard.
2. From here click on the websites tab and then click on site tools.
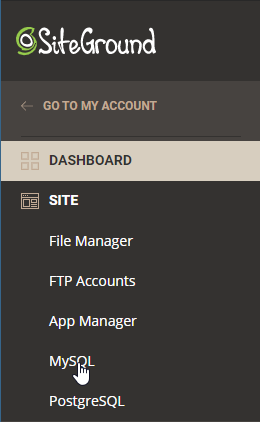
3. Next from the site tools dashboard click on the site tab to expand it then click on MySQL.
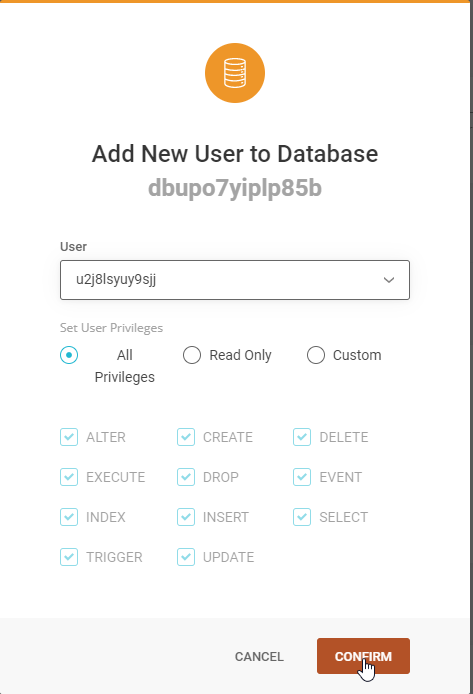
4. On the MySQL manager page click on the user tab and create a new user. Keep a note of the username and password.

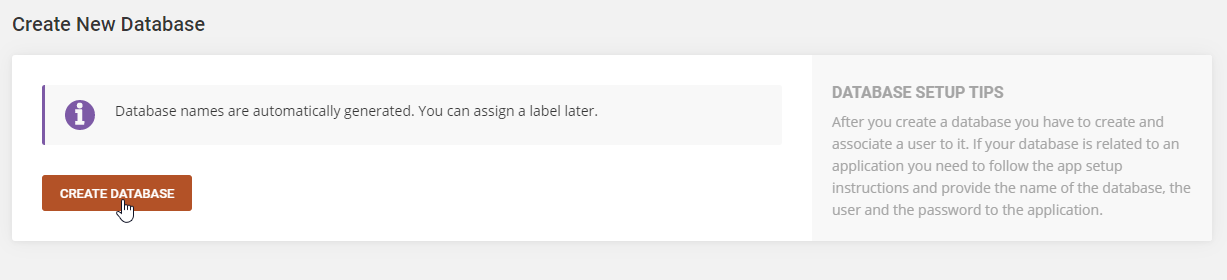
5. Next click on the “database” tab and click on the create database button.
6. Now that your new database is created, click on manage access and assign the user you’ve just created to it.
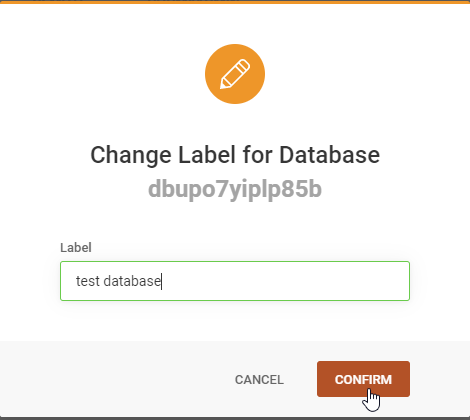
7. Under the manage database section click on the ellipsis (the three vertical dots) to the right and then select change label. Give your database a label that you would easily remember.

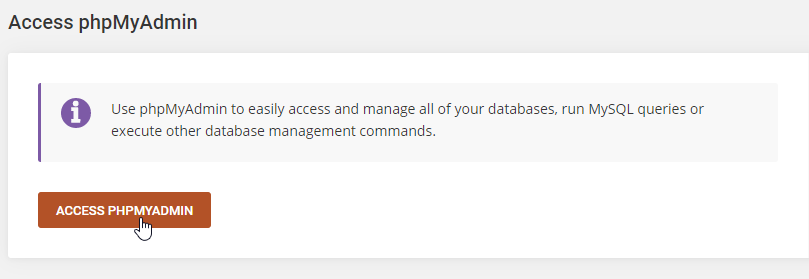
8. Next select the PHPMyAdmin tab and then click on access PHPMyAdmin.
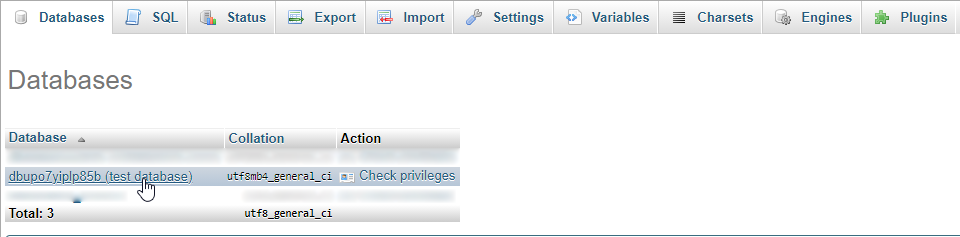
9. From the PHPMyAdmin dashboard click on the databases tab. Select the new database we’ve just created. It is named with random alphanumeric characters and your custom label in brackets.
10. Before you import your backed-up local database, open the .sql file in your preferred text editor. Using the find and replace function, of your text editor type in your local URL in the find field, and in the replace field enter your new domain name. Click on find and replace all then save the file. For example, if I was doing this import I would find the local URL “http://localhost/webtipstech-local” and replace it with my live URL “https://www.webtipstech.com”

11. With your local URLs replaced with the live URLs head on back to PHPMyAdmin. From the dashboard click on the import tab then click on the choose file button and select the .sql file that we just edited.
12. Click on the go button and when the import has been completed the tables and data from your local website’s database will be populated in this database.

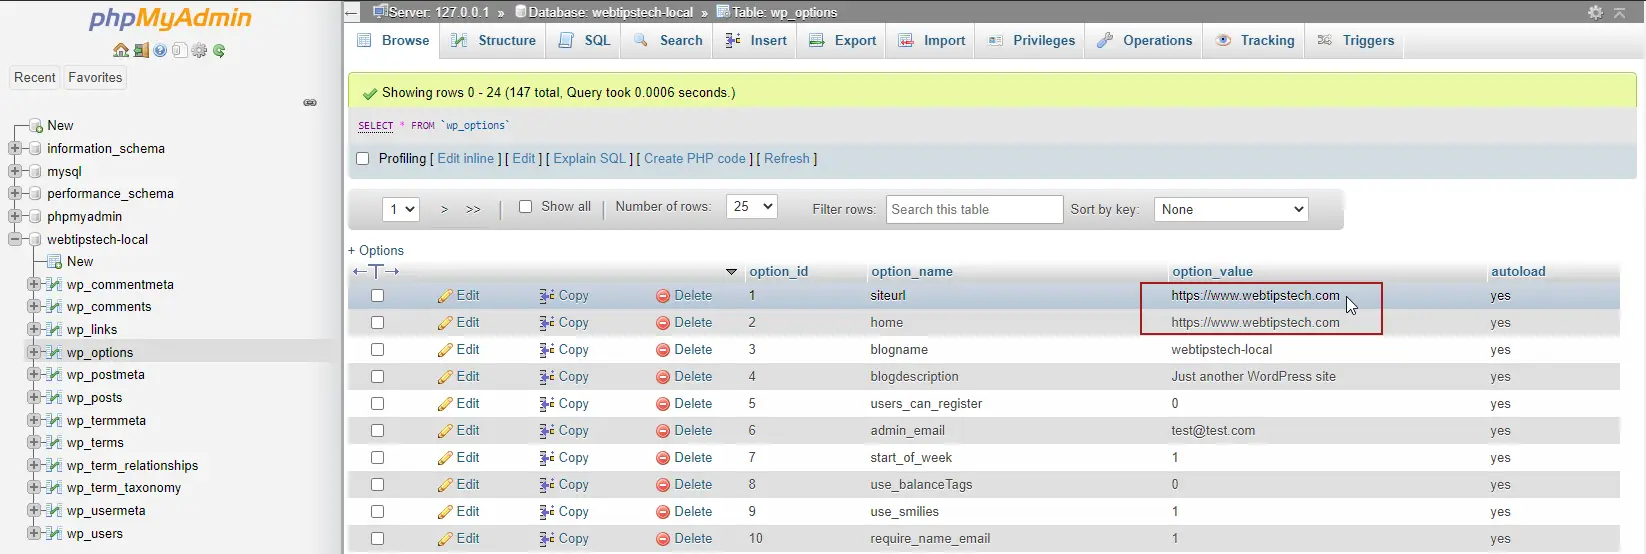
13. Select the database again from the list on the left, then open the wp_options table and double-check that the site URL and the home URL have been changed to your live URL.
How To Manually Restore WordPress Website Files
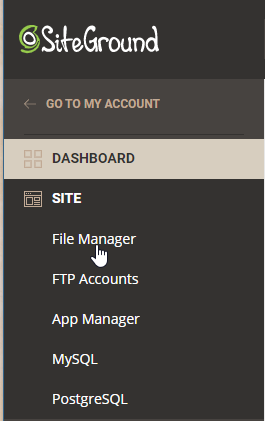
1. Return to the site tools dashboard and click on file manager.
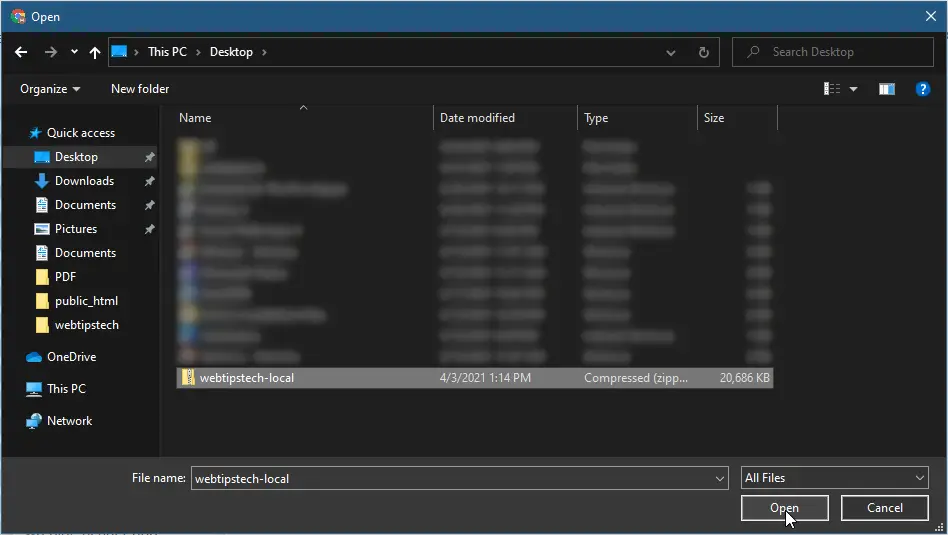
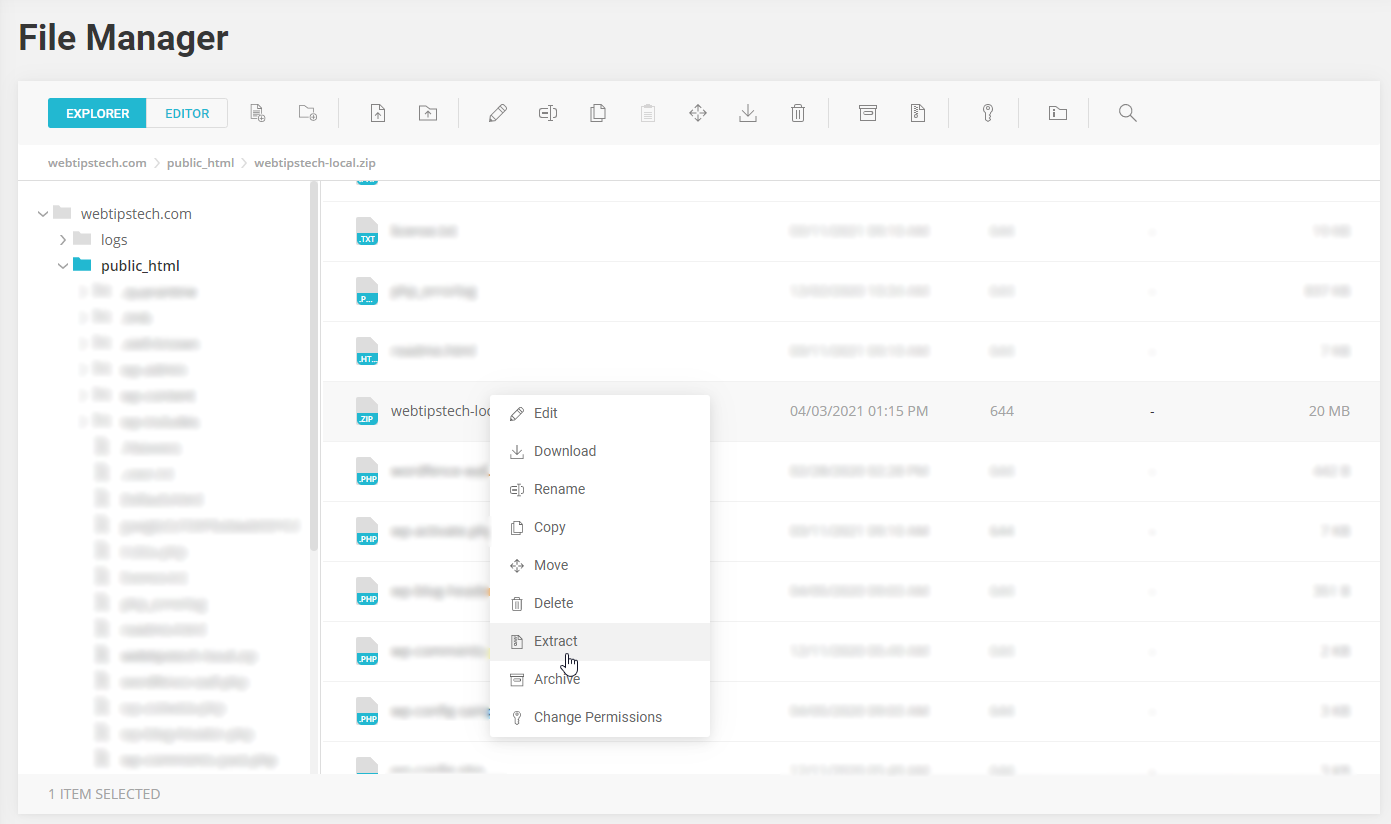
2. Within the file manager navigate to the public_html folder. Within this folder upload the .zip file of your local website that we created earlier.

3. Extract the contents of the .zip file and replace the folders and files within it the public.html folder.
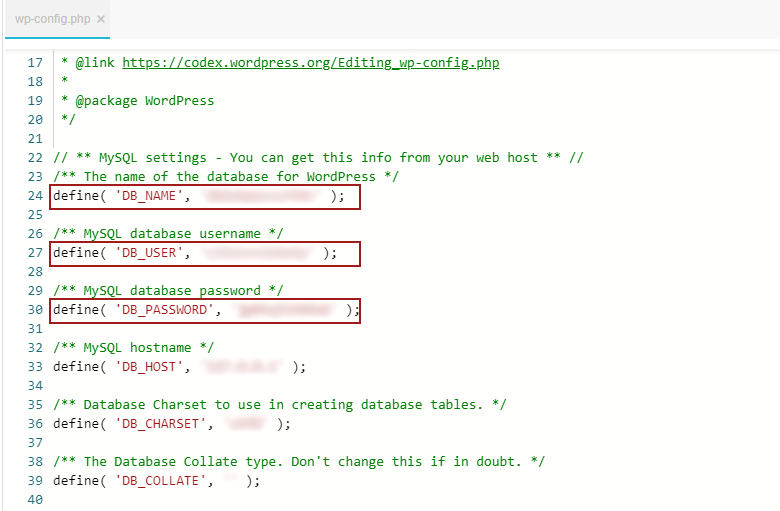
4. Next open the wp-config file and change the database name, username and password with the ones that we created.
Final Thoughts
Migrating a local WordPress website from XAMPP is quite simple if you use a plugin like All-in-One WP Migration. For anyone attempting a migration like this, I would always recommend that you use a plugin. You should only attempt the manual method if for some reason you are unable to install plugins on your local website or the plugin that you are using has some limitations.